

")
")
")


DIY Faux Wood Beams
December 14, 2015
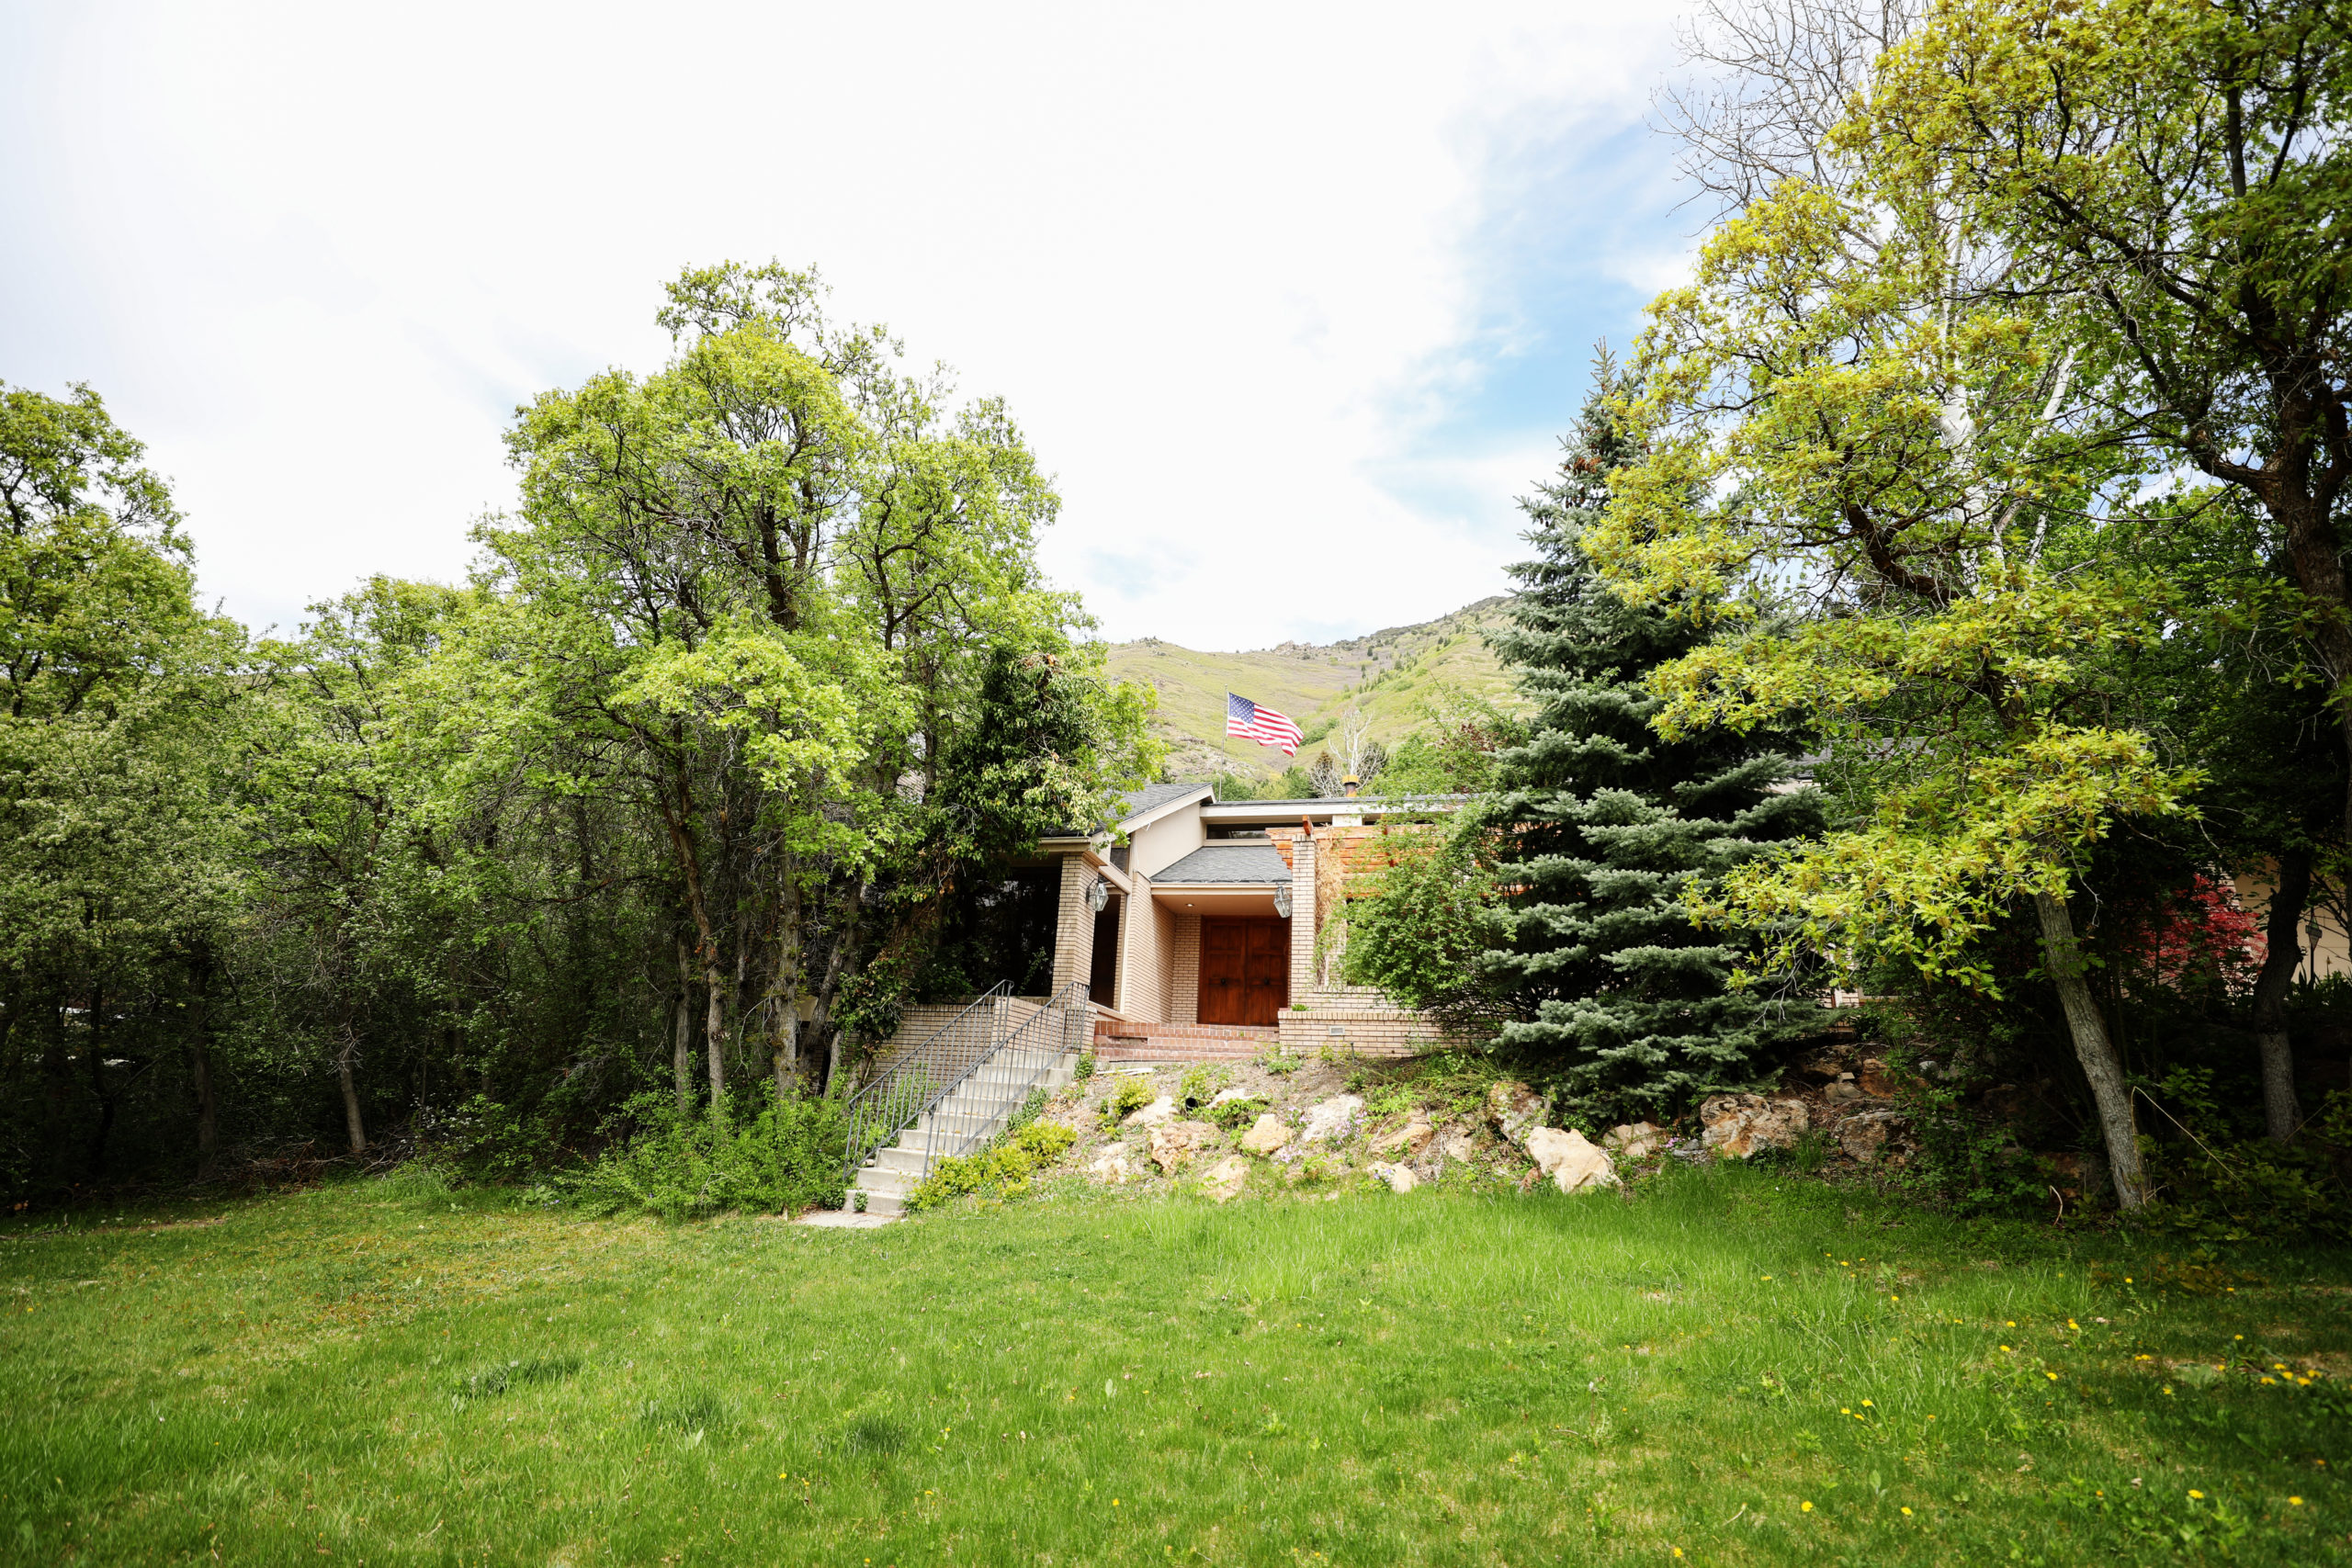
 Long before we started construction on the #staggreno, a company called Arizona Faux Beams reached out to me about a collaboration for faux wood beams. Because we were getting ready to move, it wasn’t really a good time. I mentioned that we were getting ready to launch into a big renovation and thought it could be a neat feature.
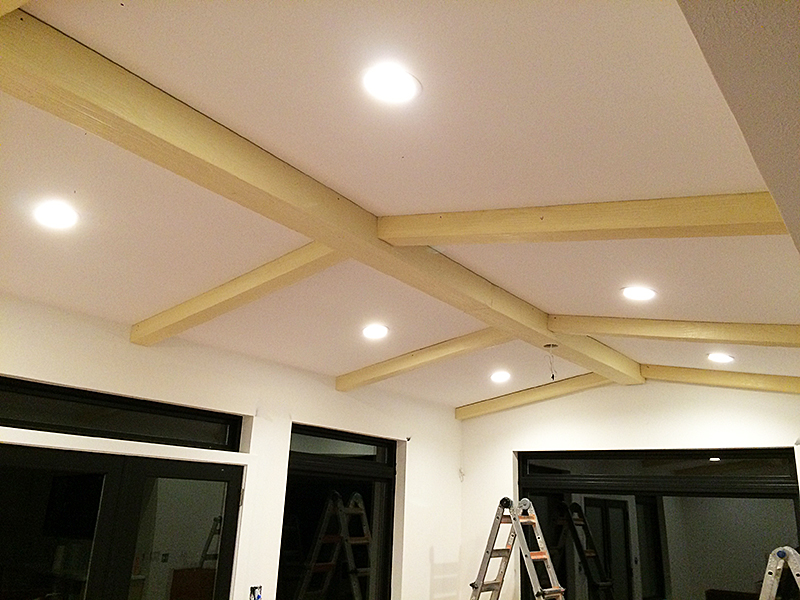
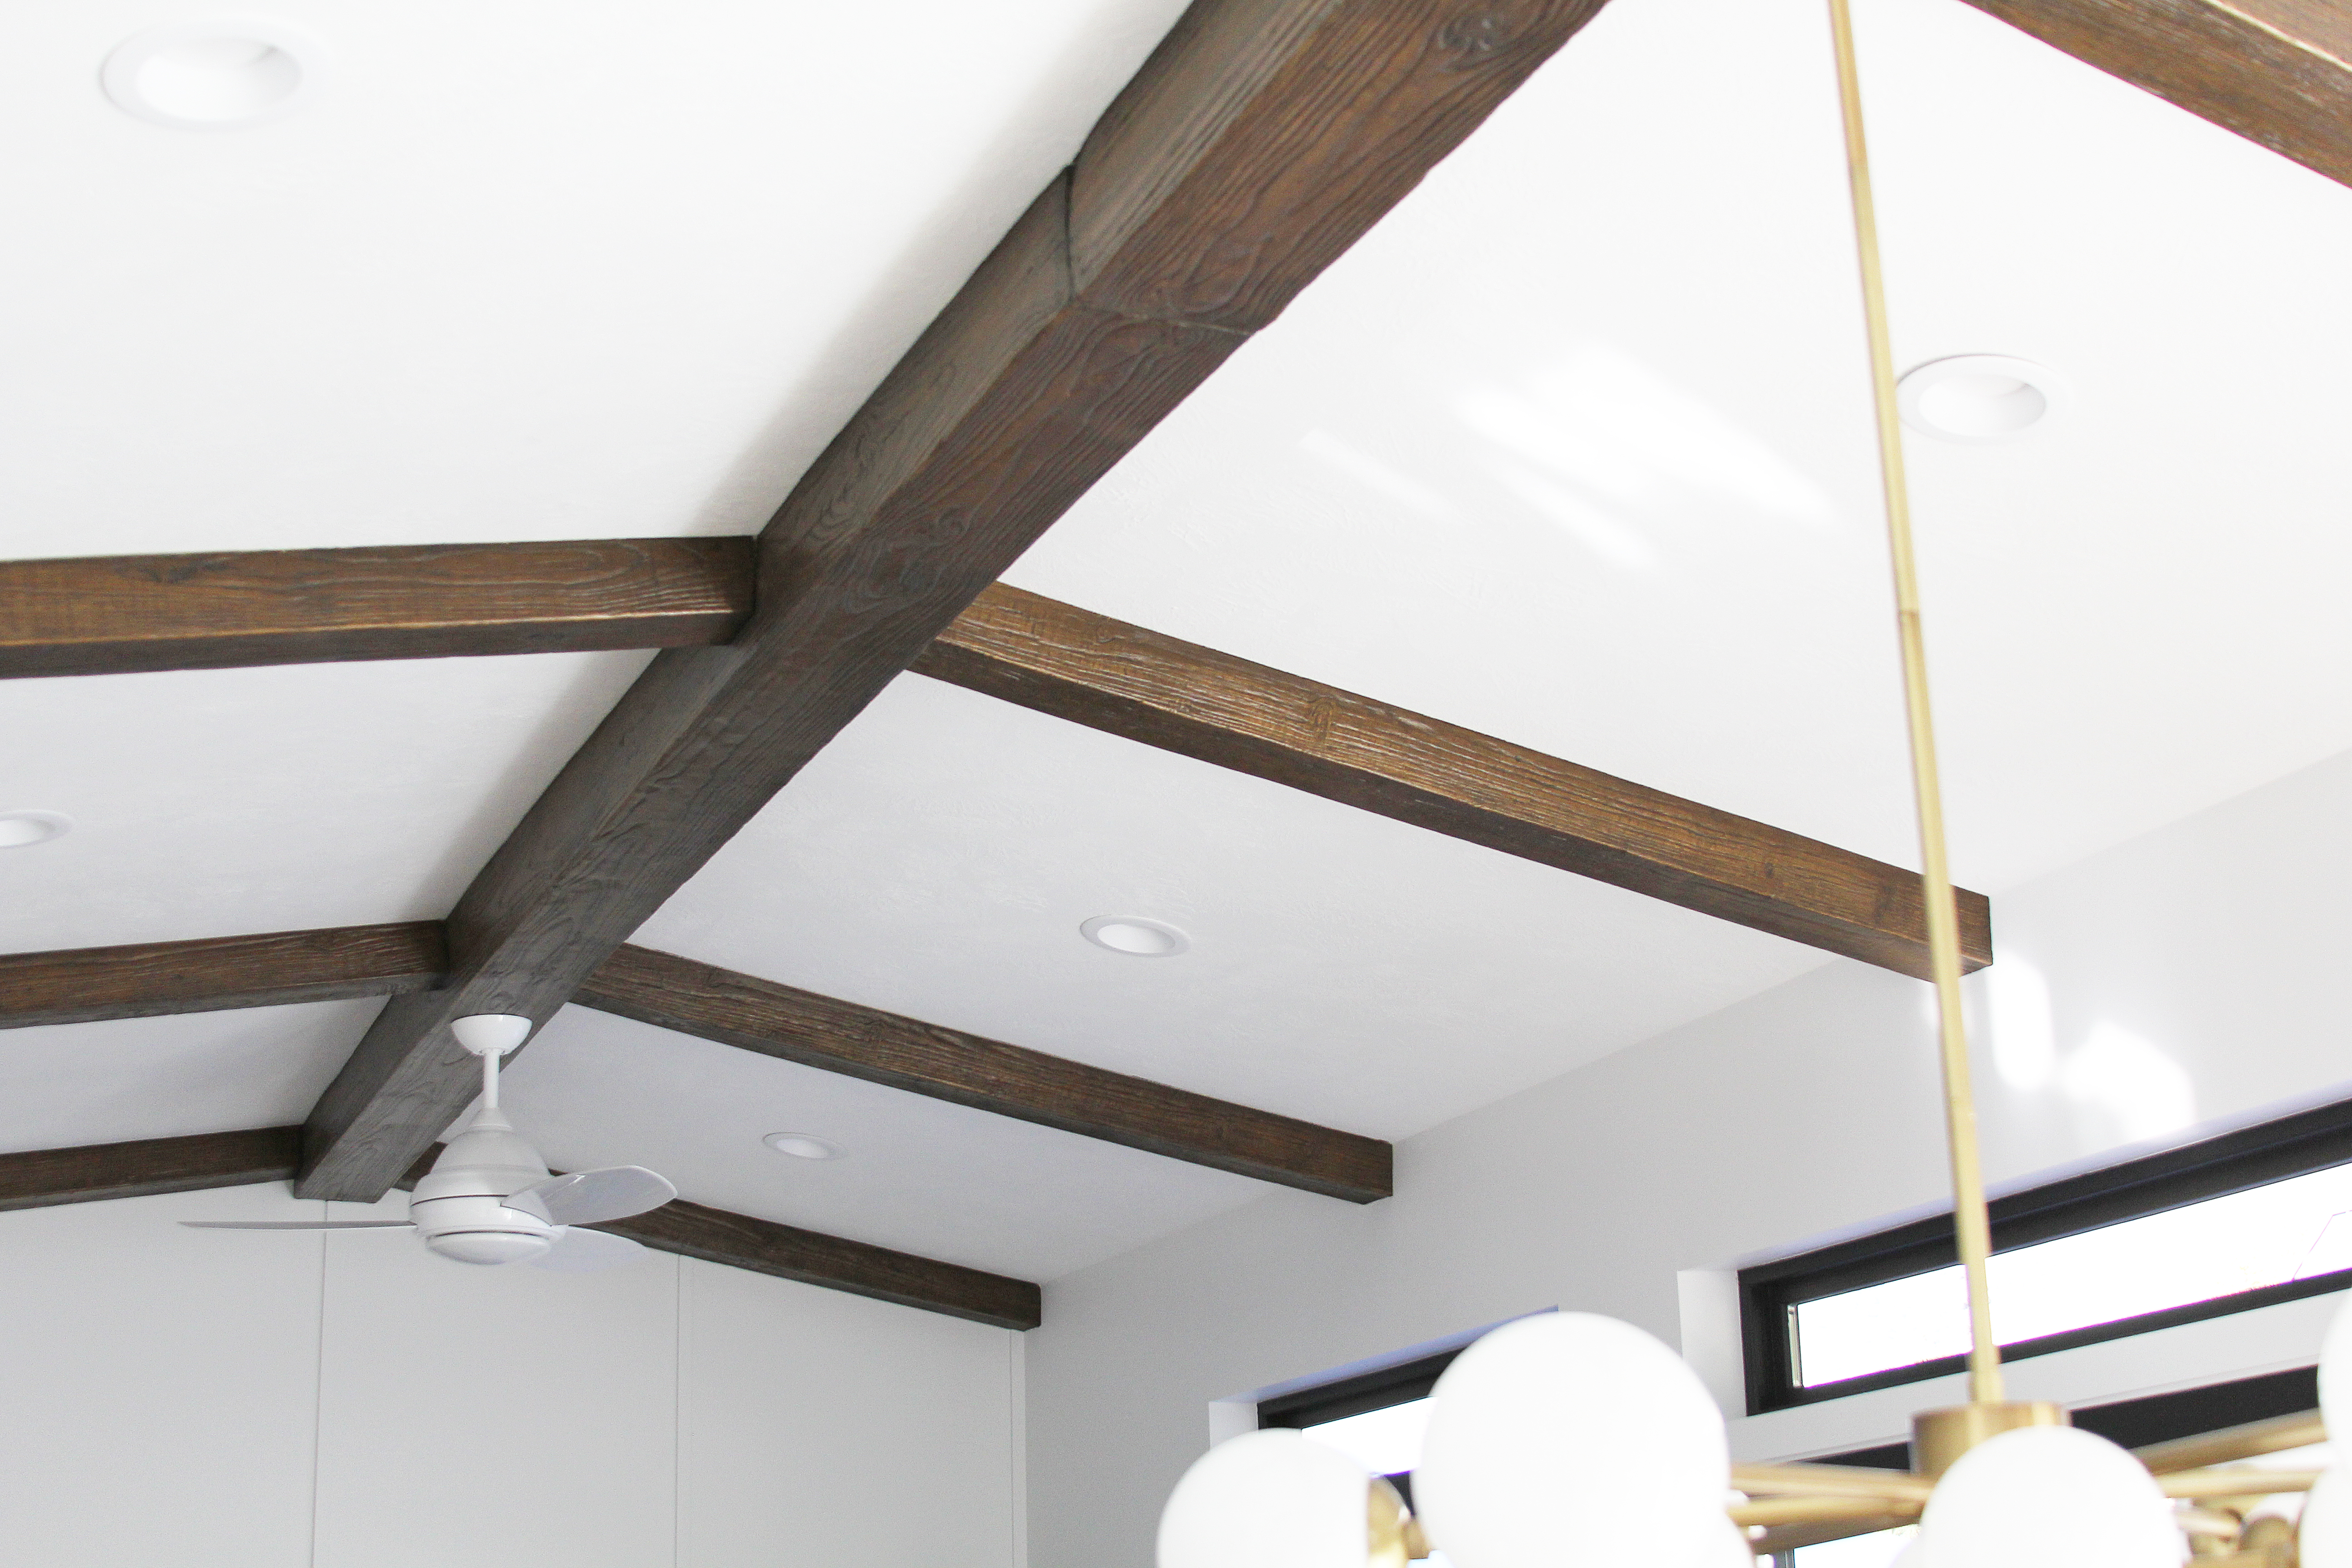
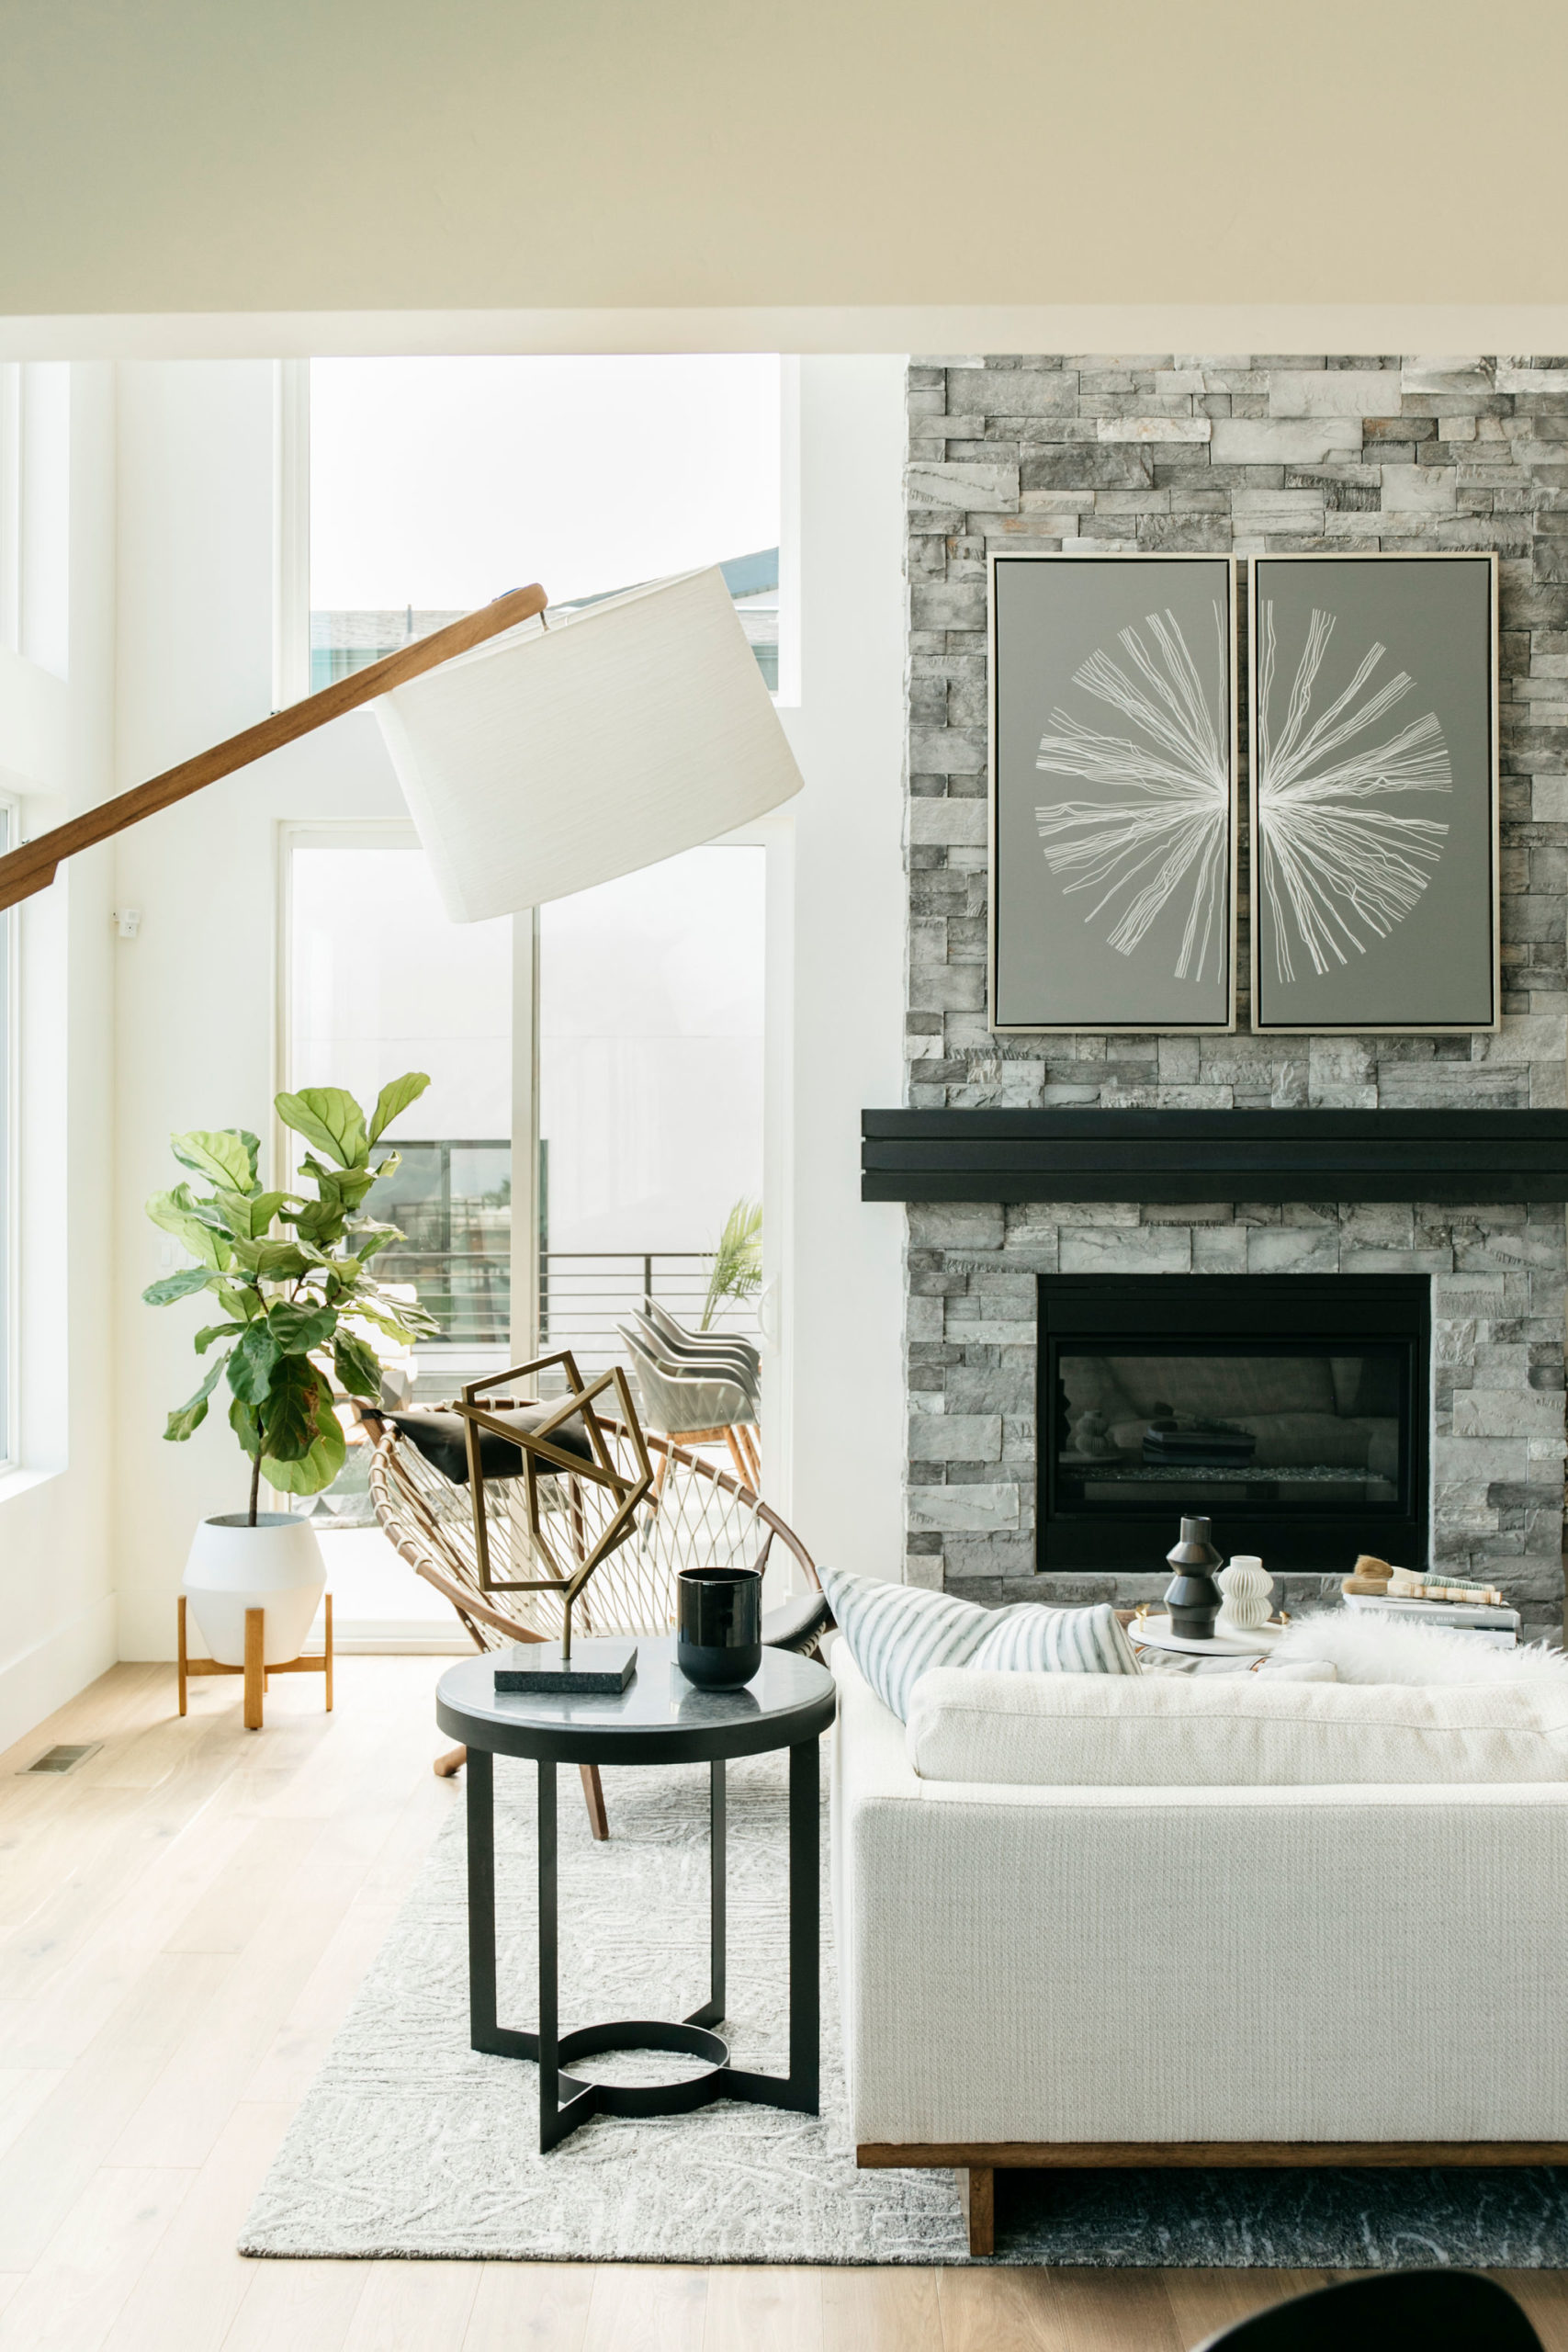
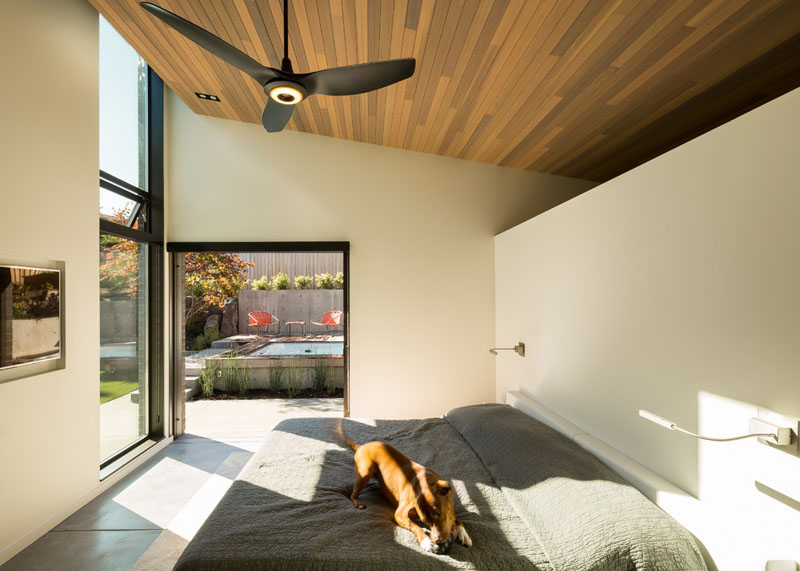
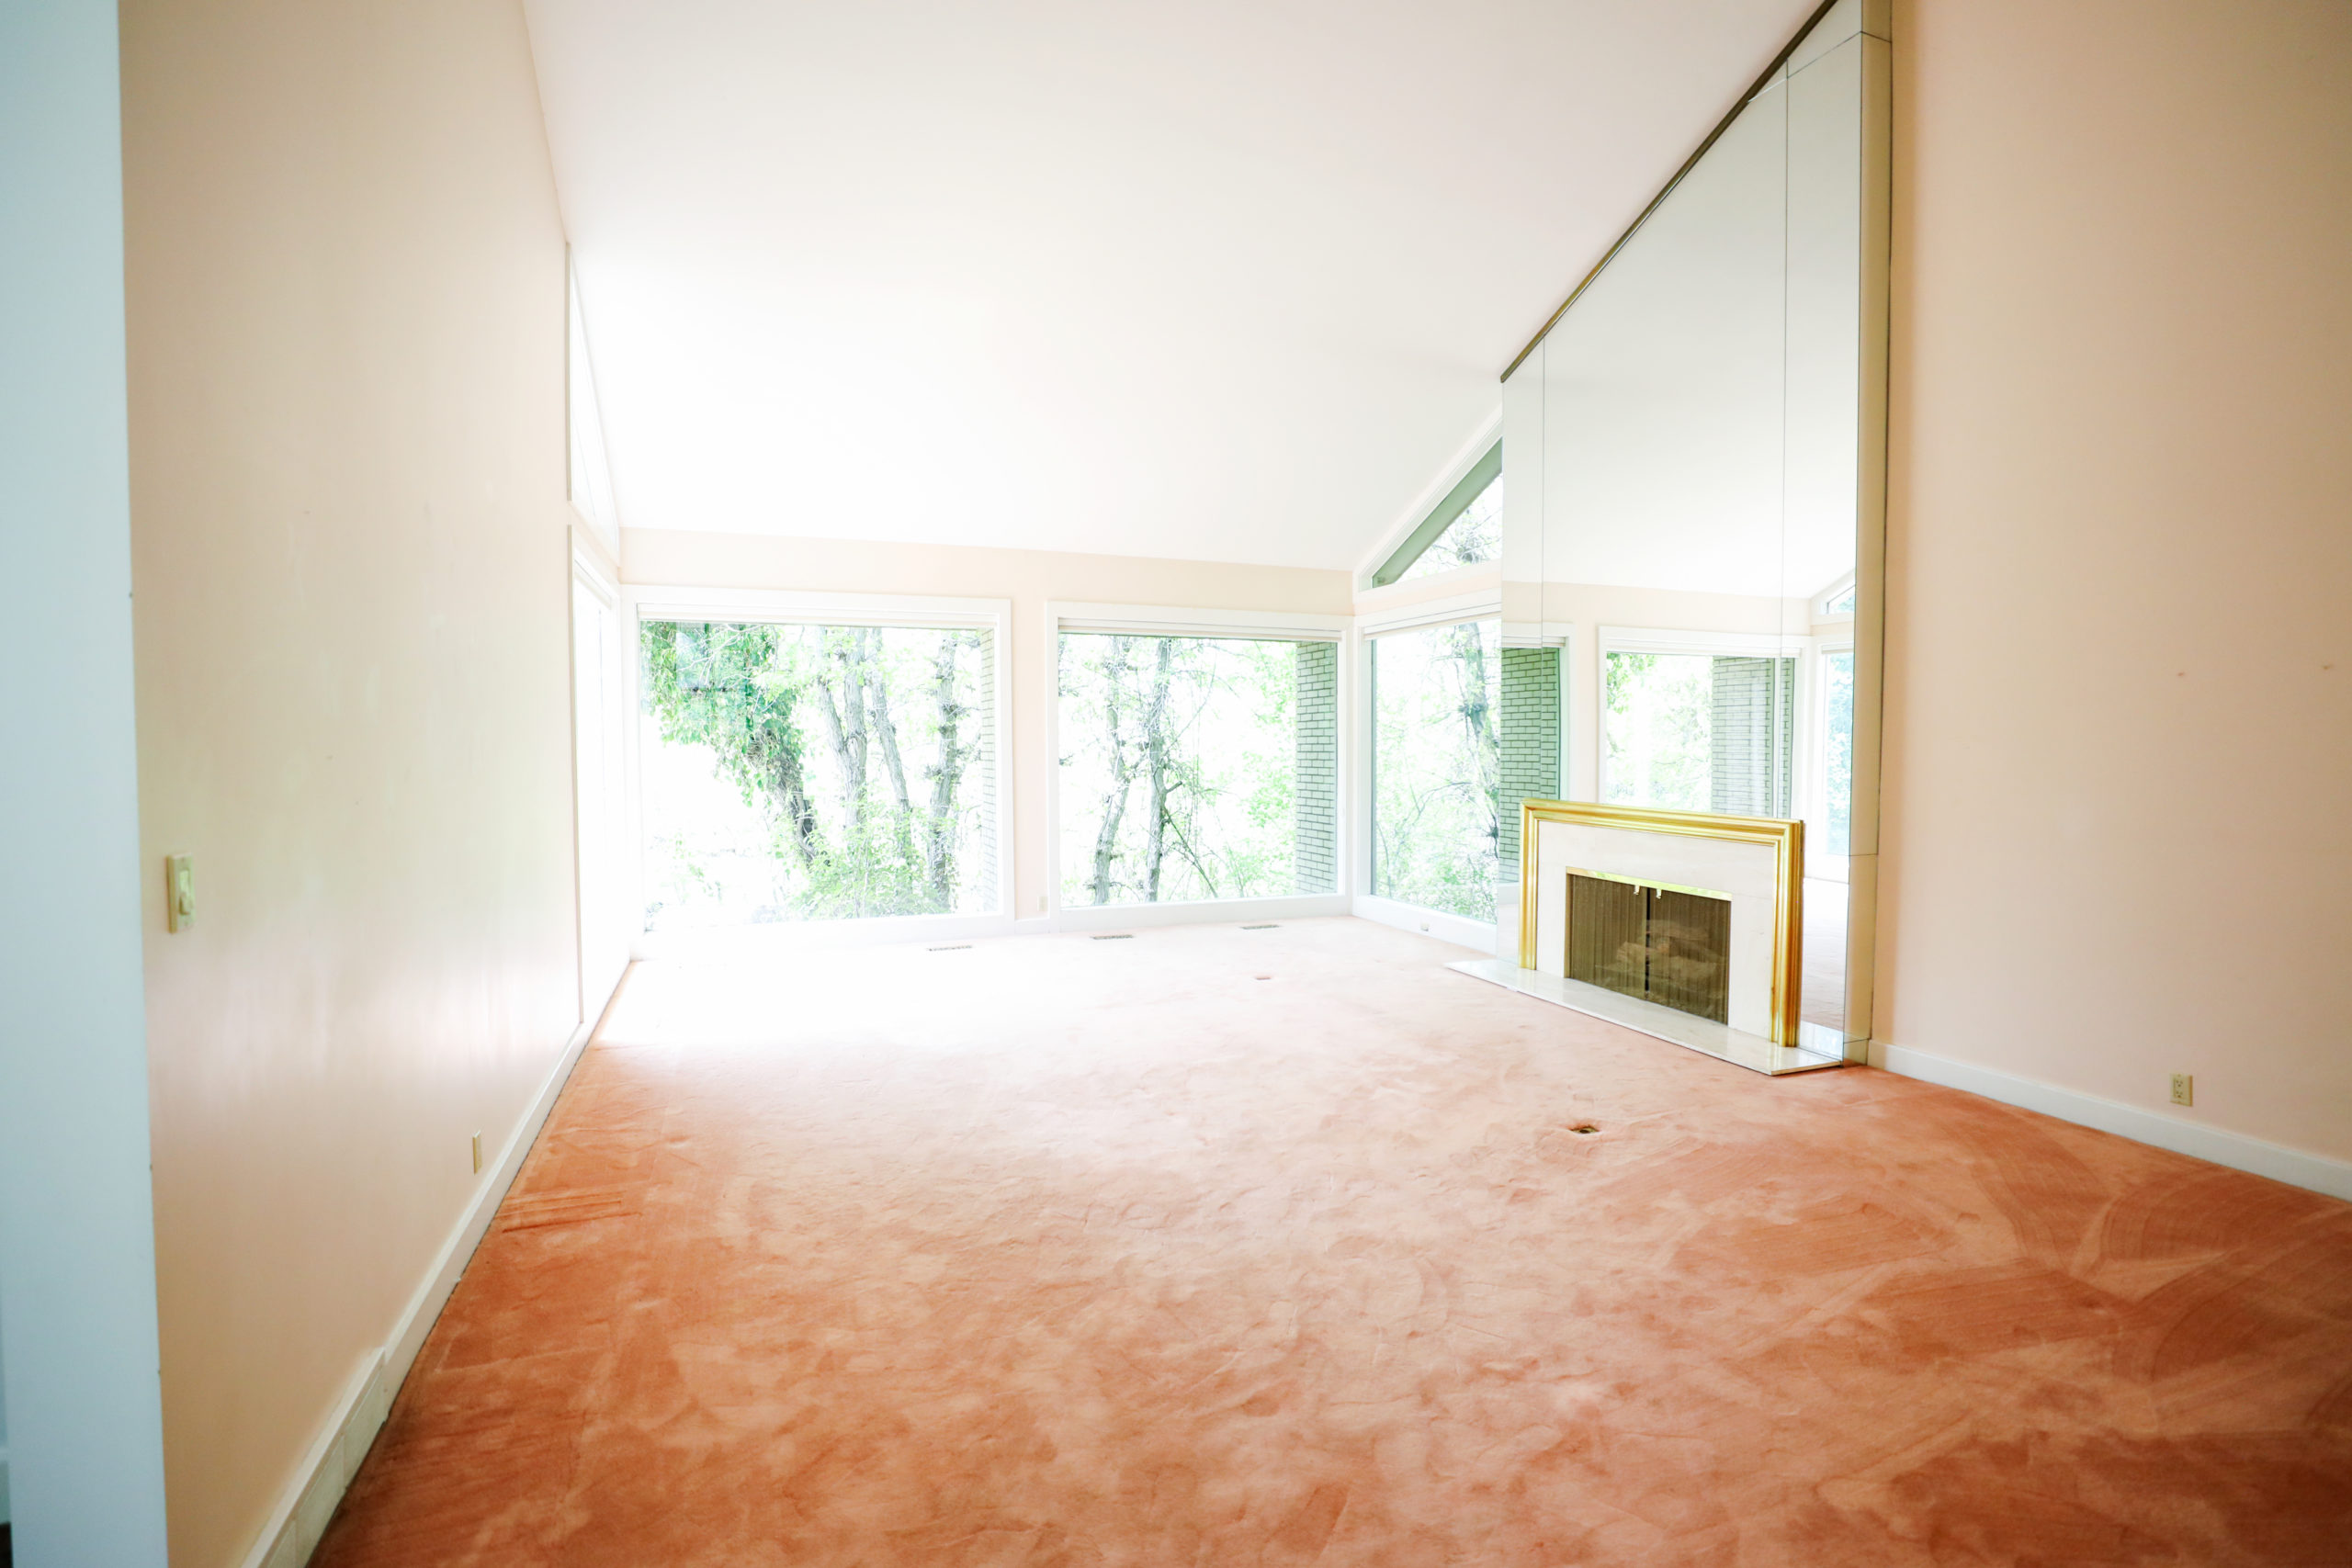
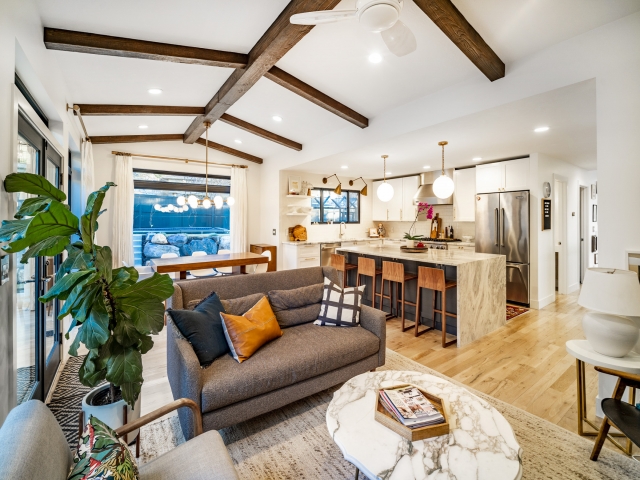
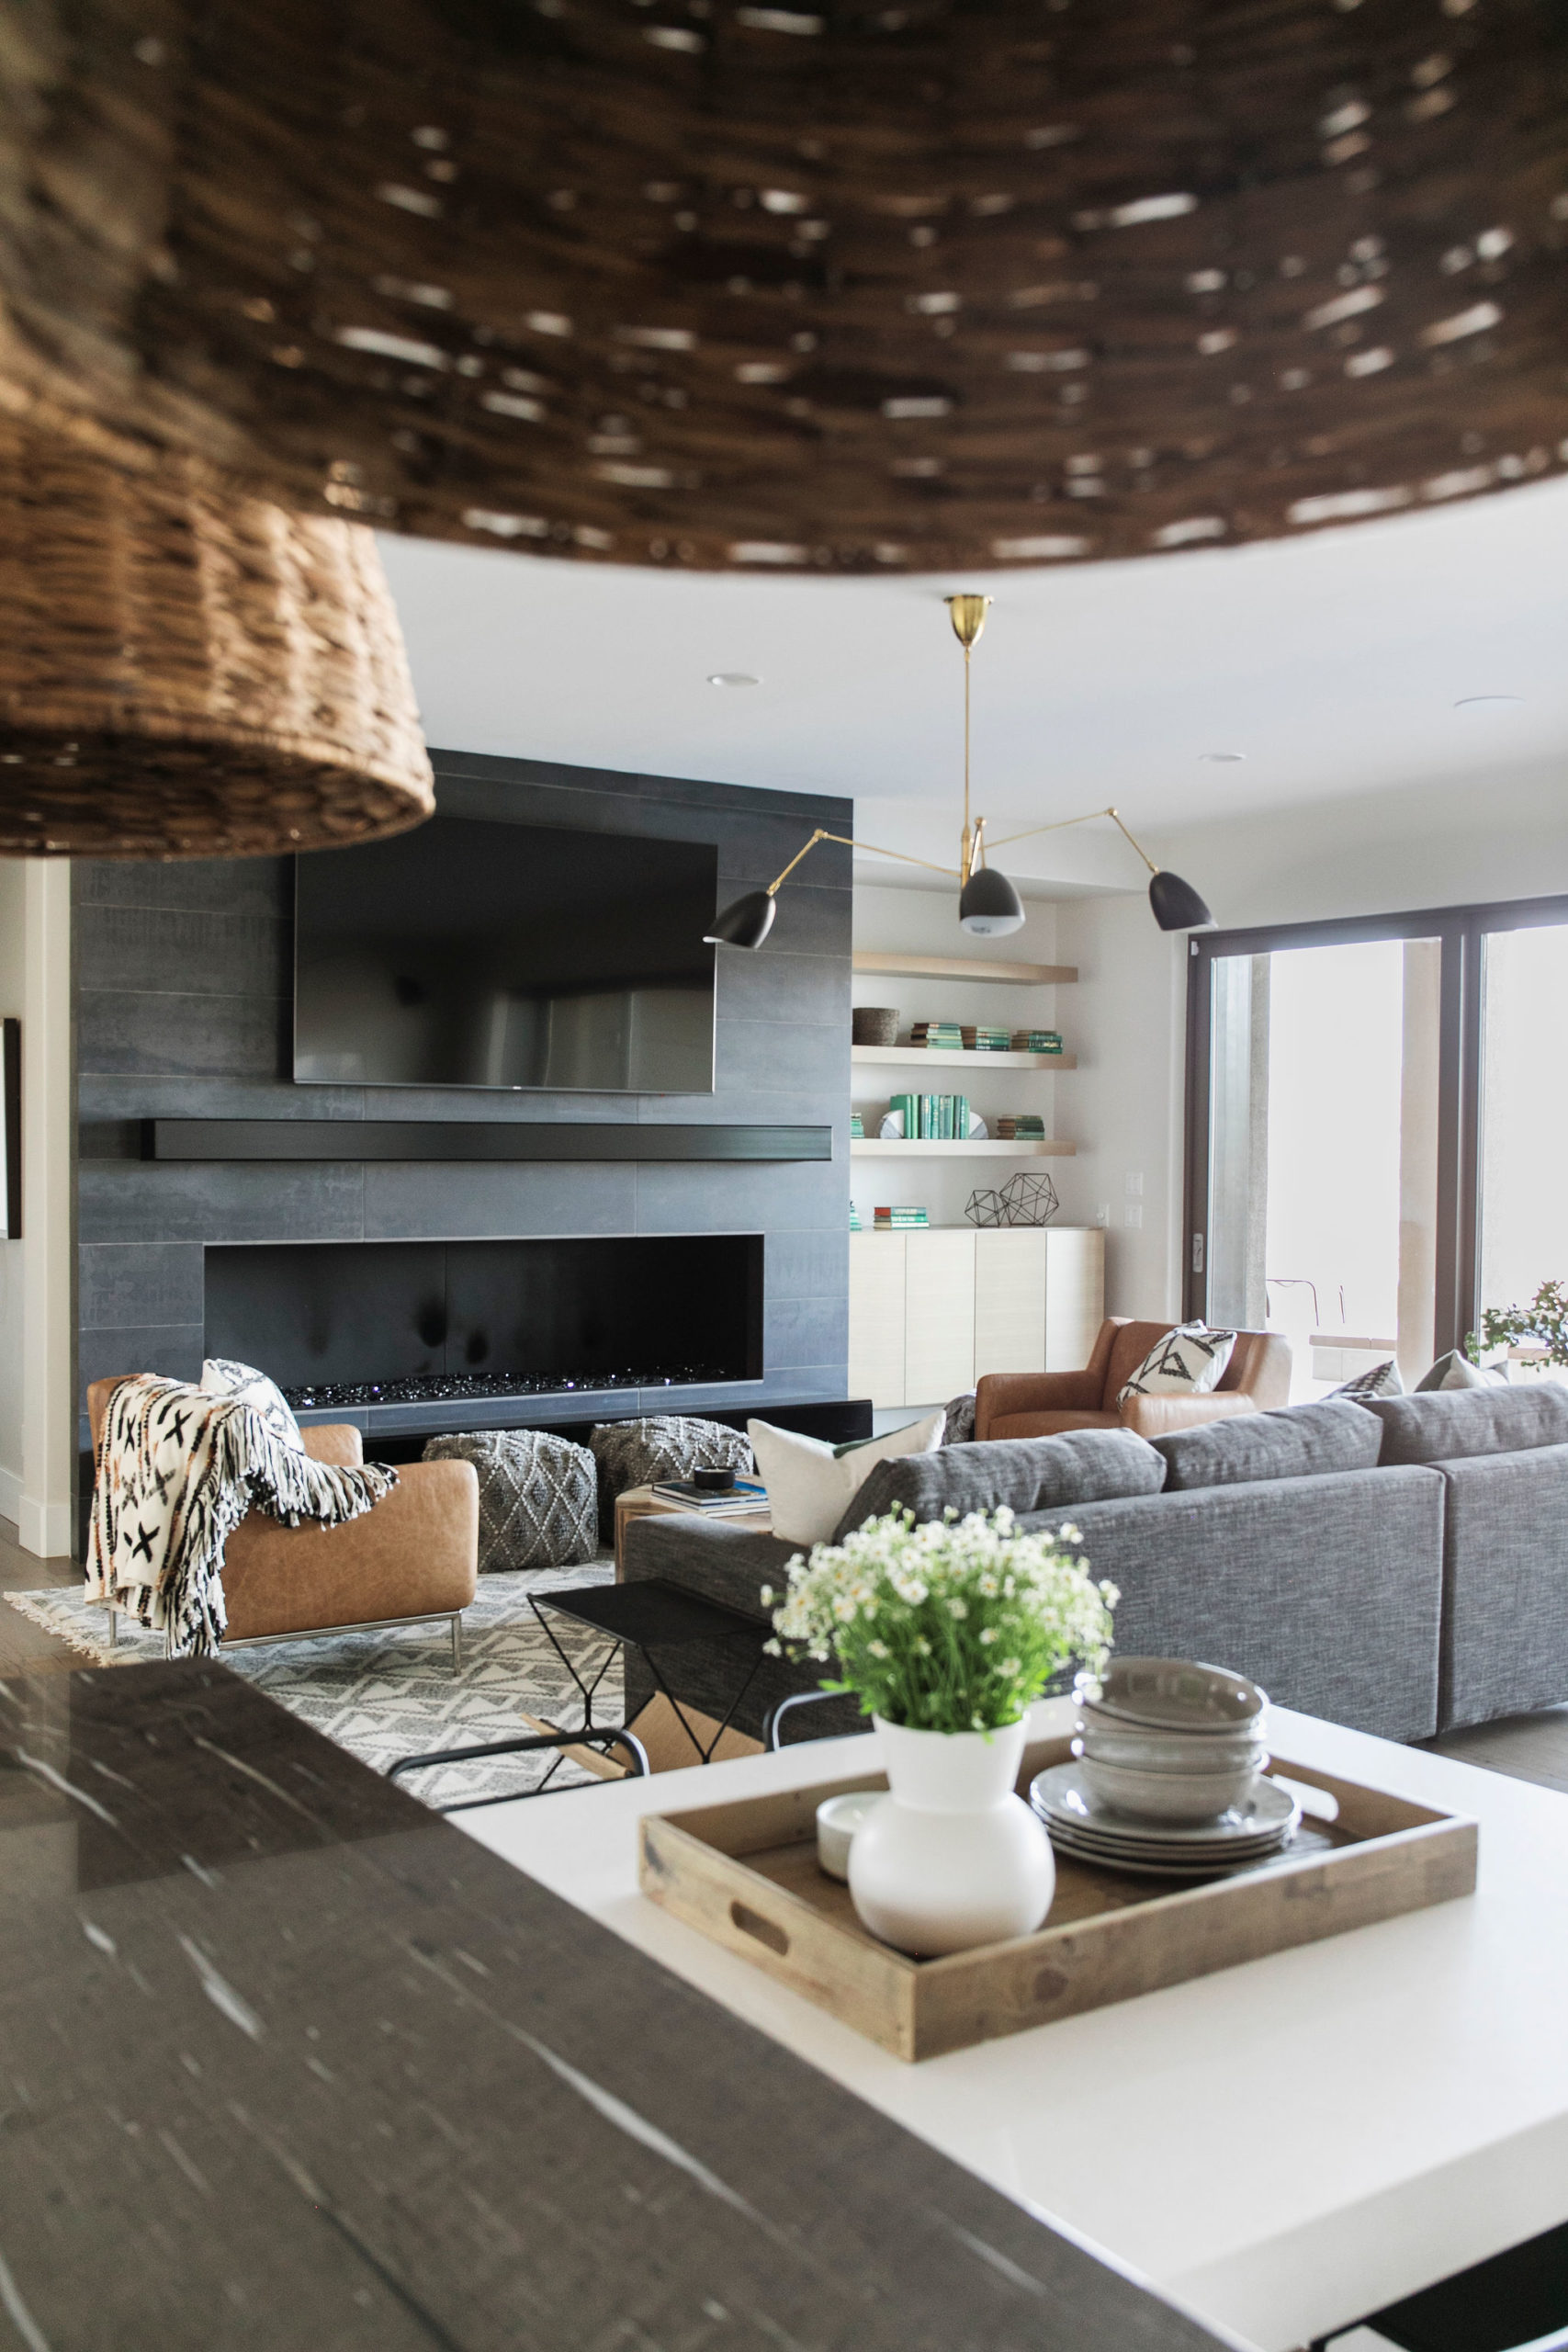
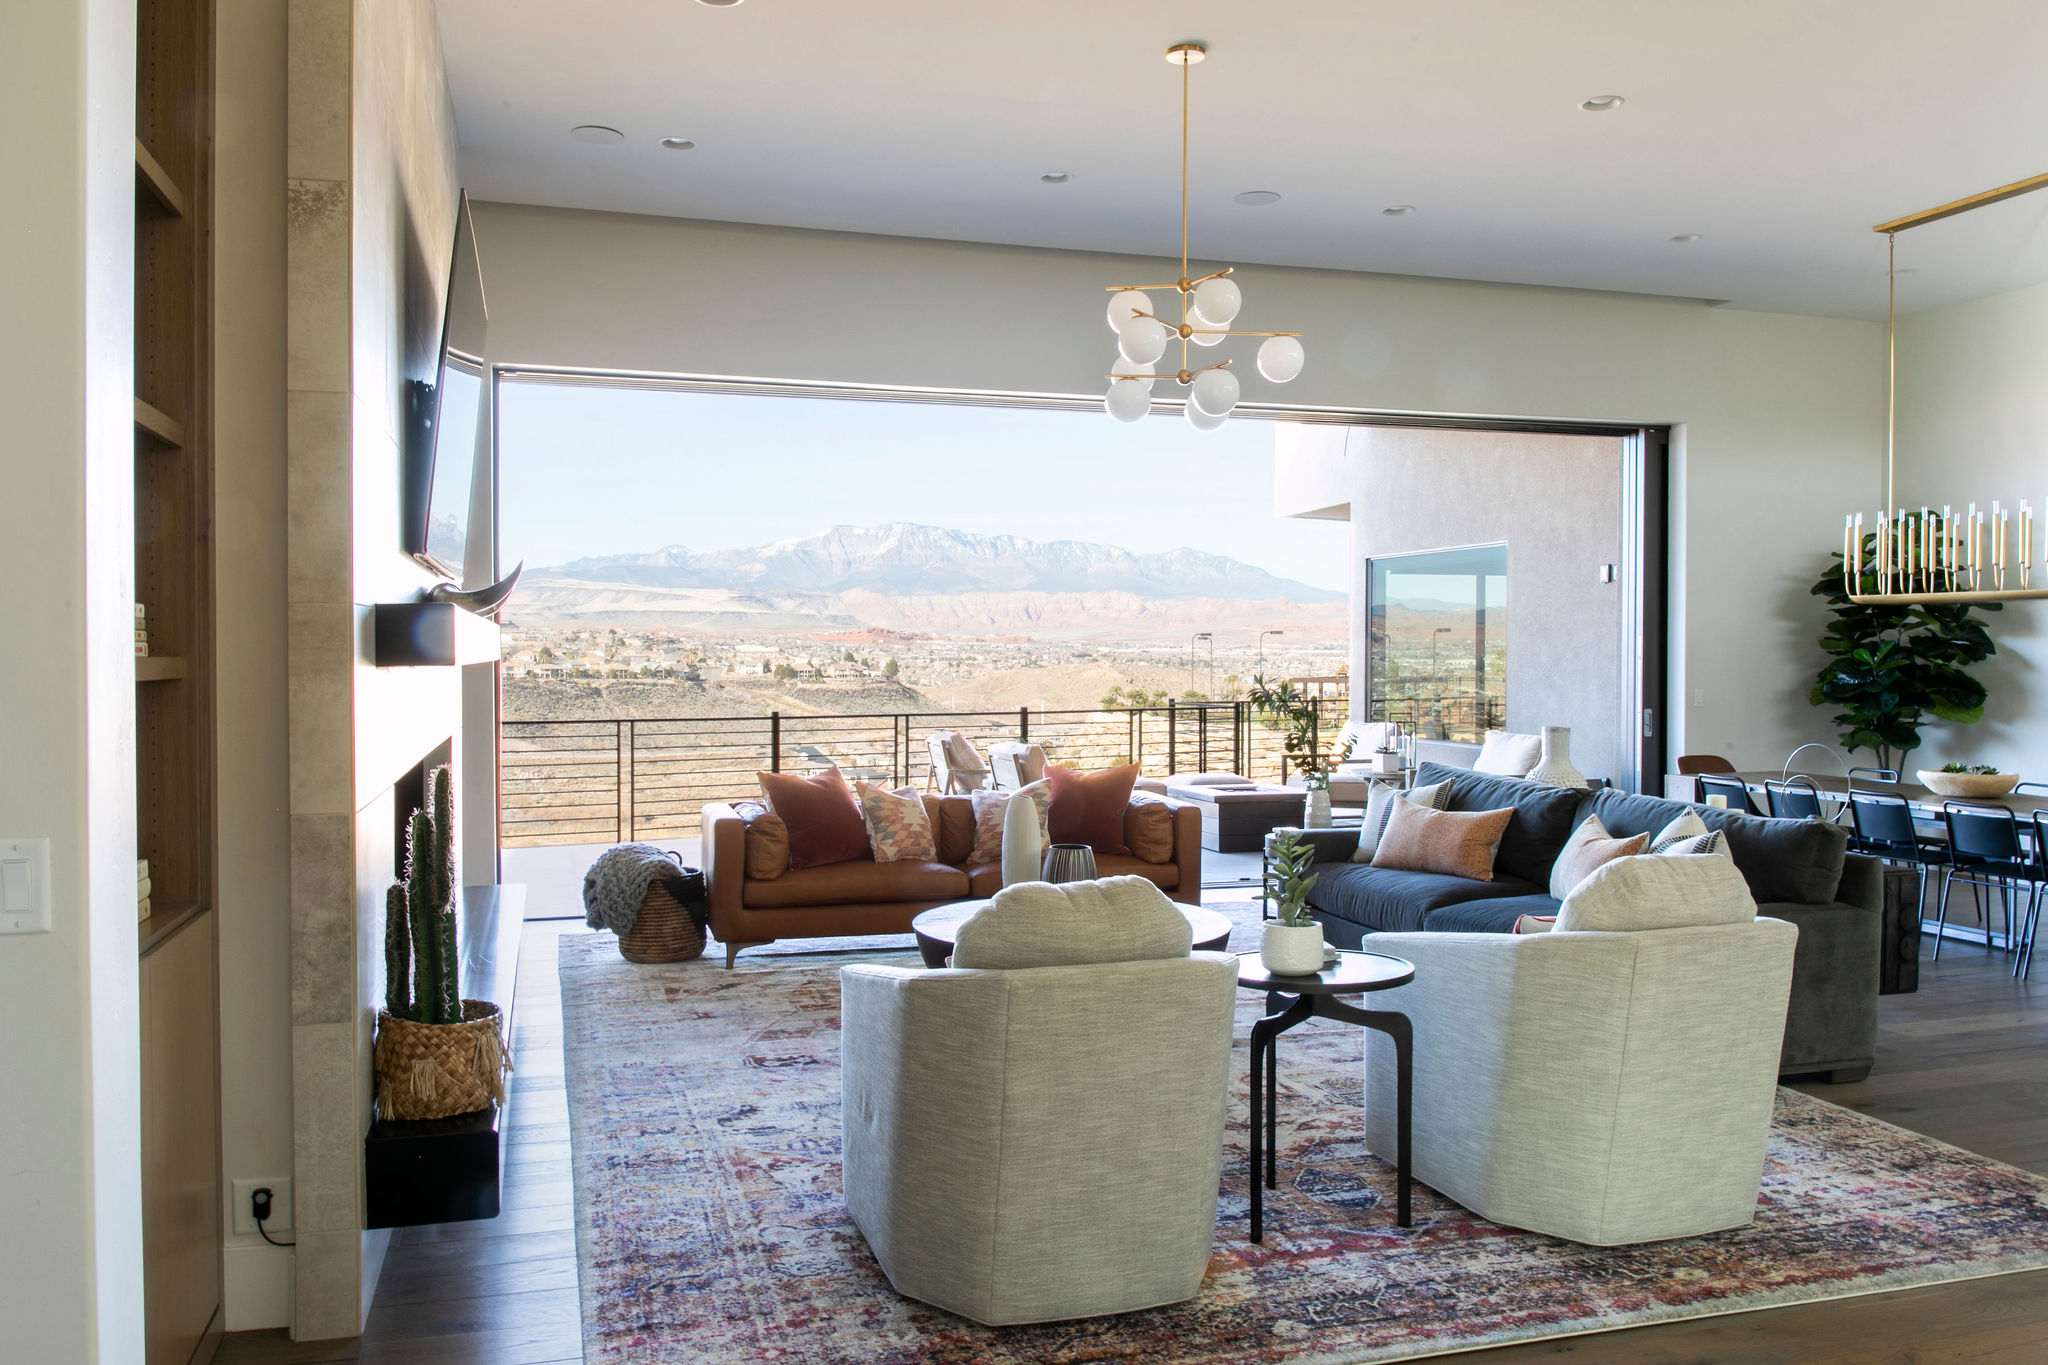
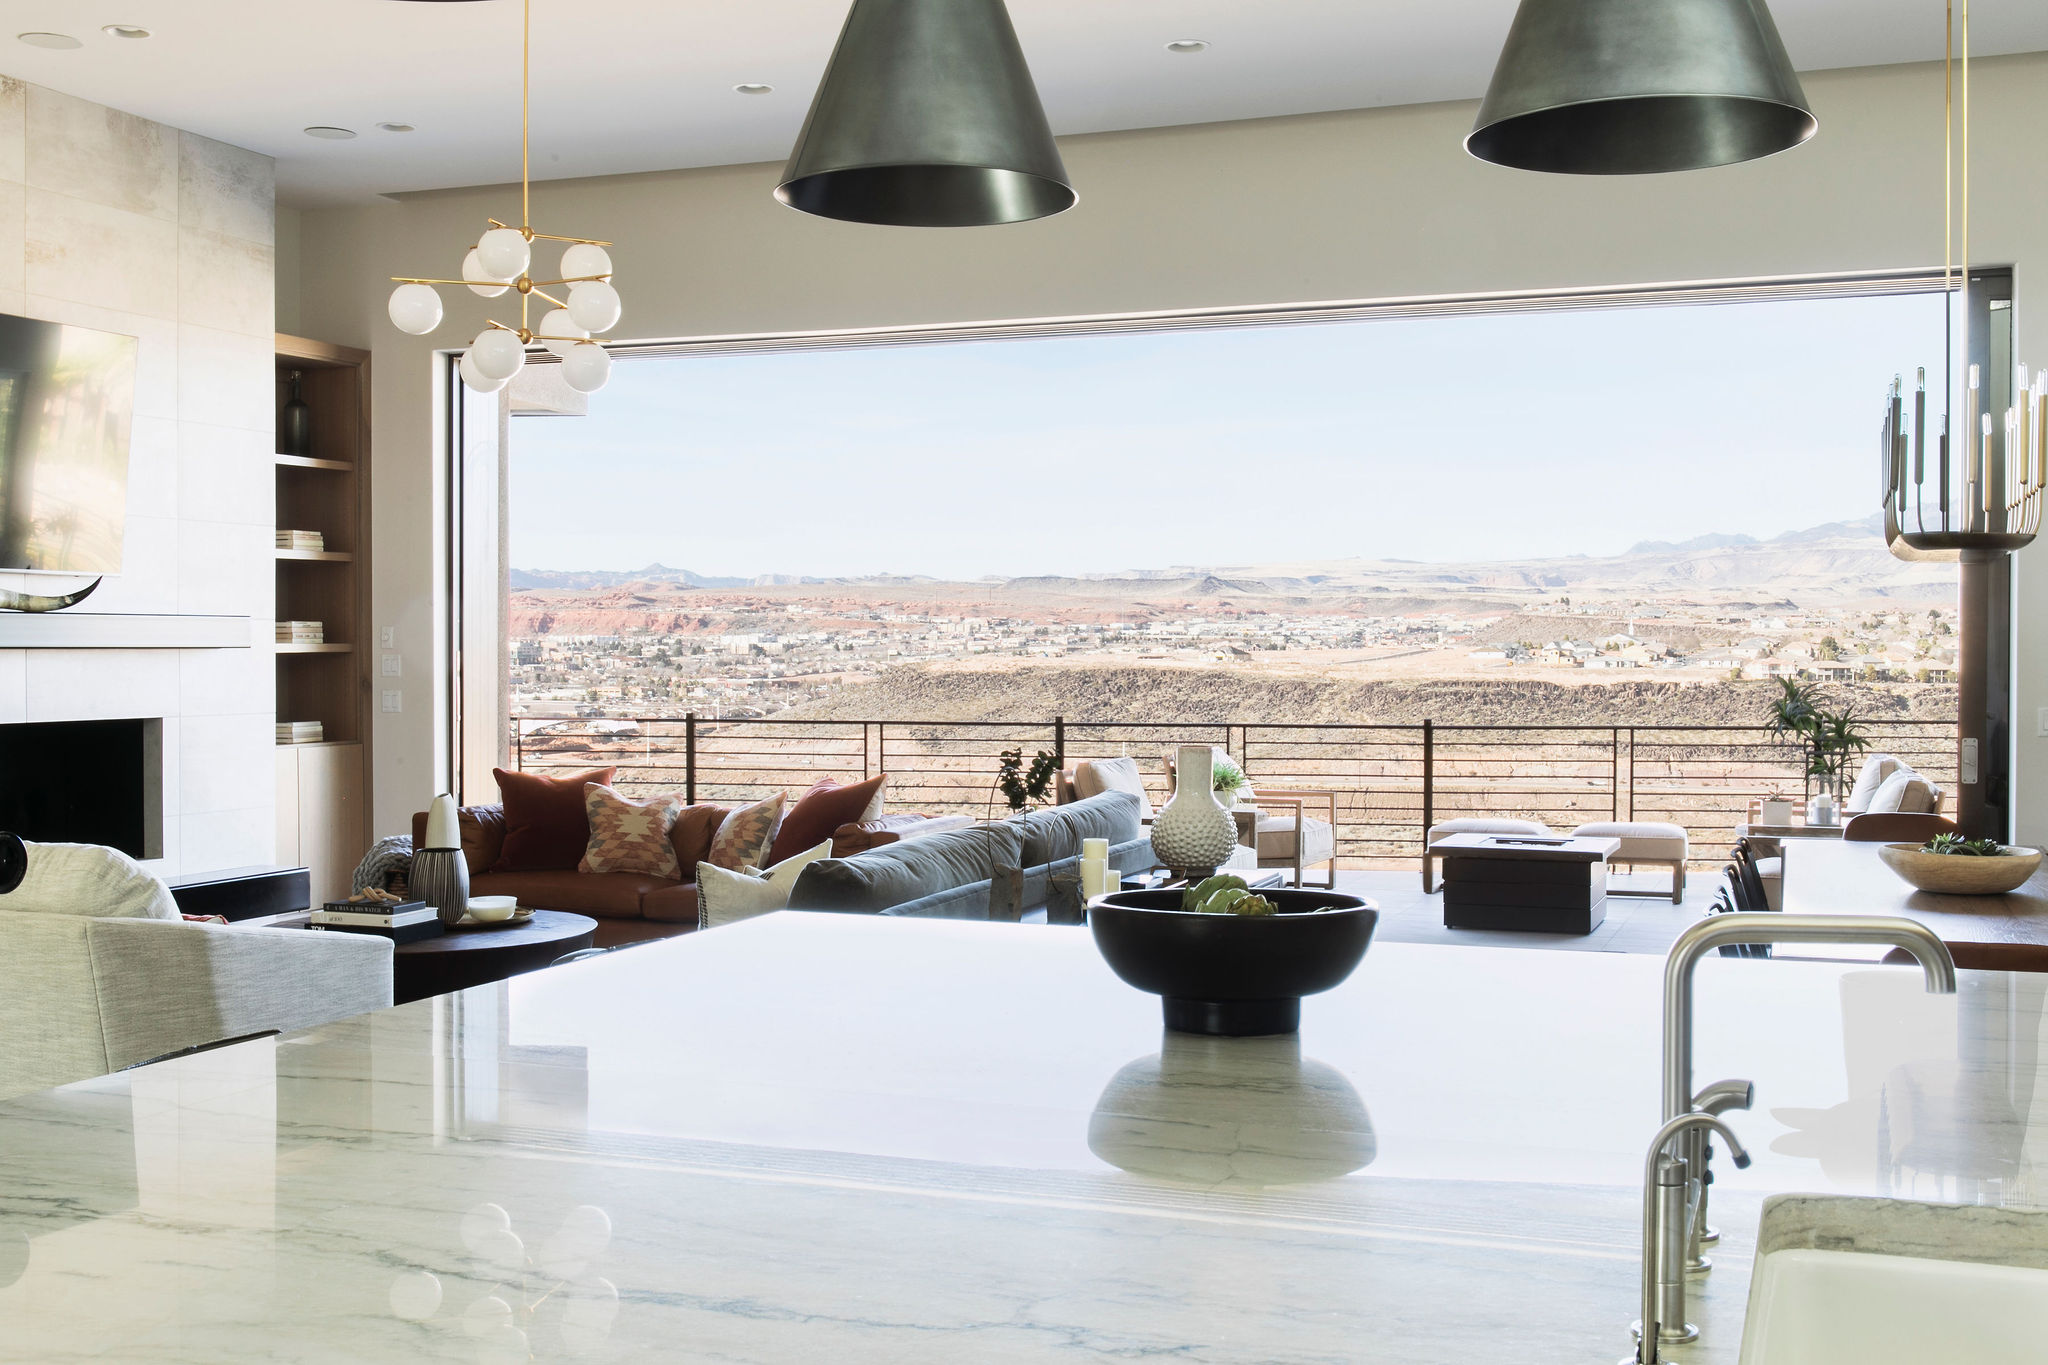
We started our plans and the vaulting and raising of the ceiling in the great room was one of the first big decisions and I immediately pictured wood beams. I checked out their website and couldn’t believe the beams were faux– as in not only were they not load bearing, but they also aren’t real wood. I’ve got to be honest though, I was super nervous about how they would look in person. You never know if something is just going to look good in pictures, and not in real life.
I worked directly with the company to come up with a plan for the space and they shipped them directly to the project. They arrived via freight.
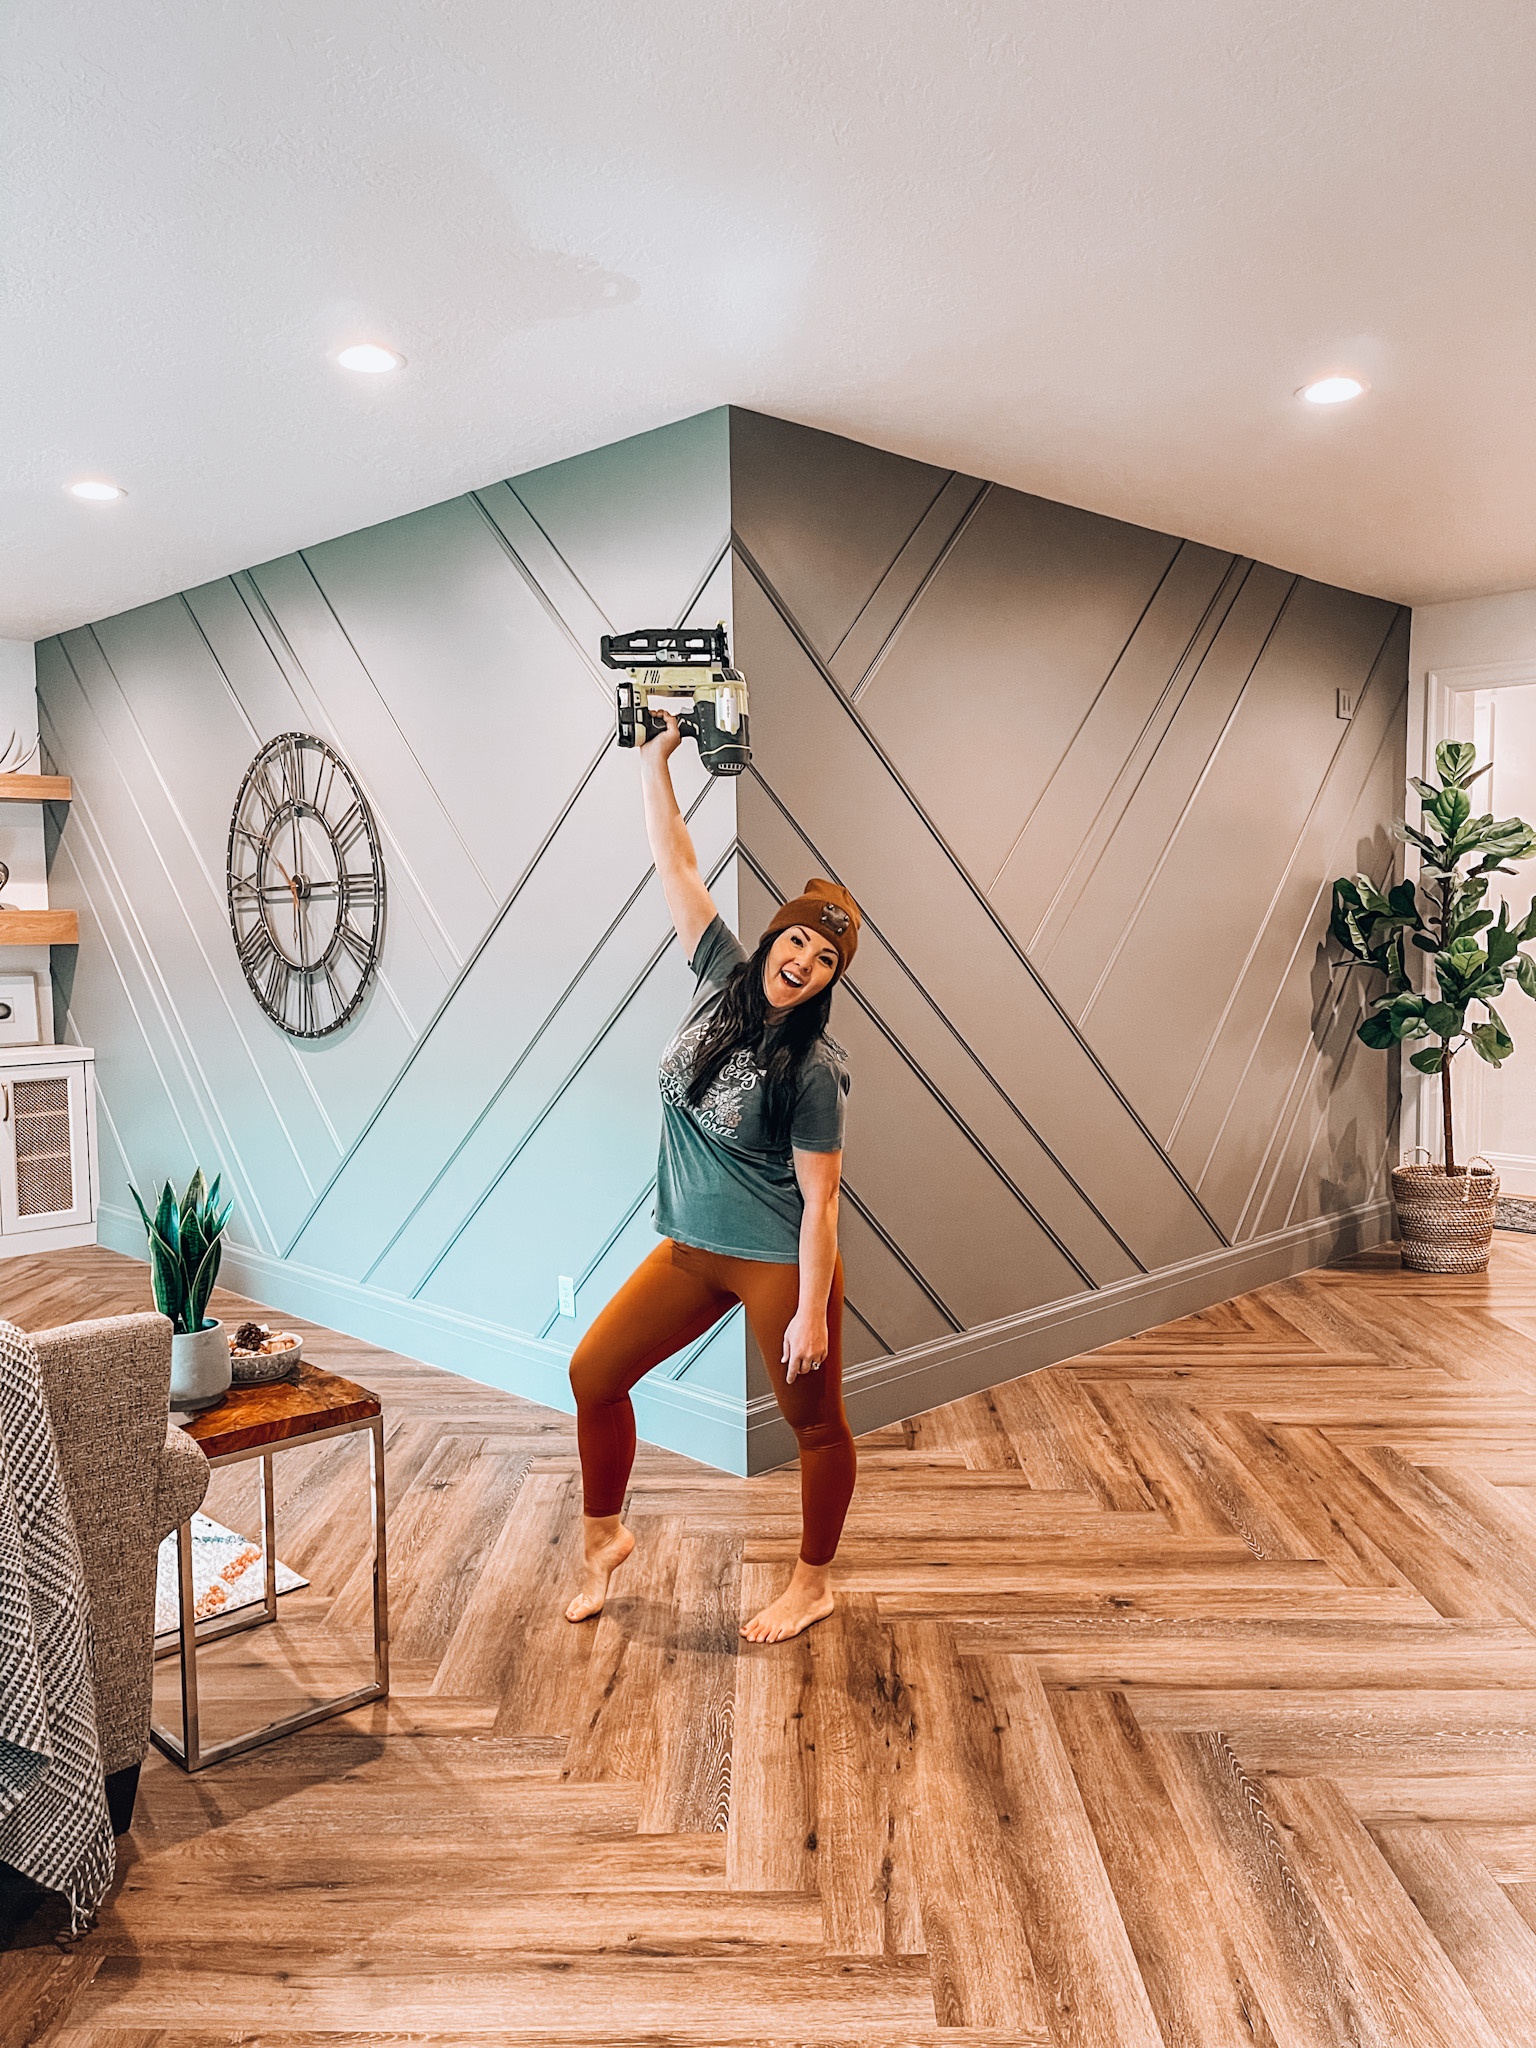
We watched a couple of their videos about how to install them and it seemed straight forward enough. We opened up the box and you guys, Jon and I were kind of freaking out. The color obviously didn’t look like wood at all. Even as we were installing them we were kind of like well, here we go! This could be really bad, or super awesome!
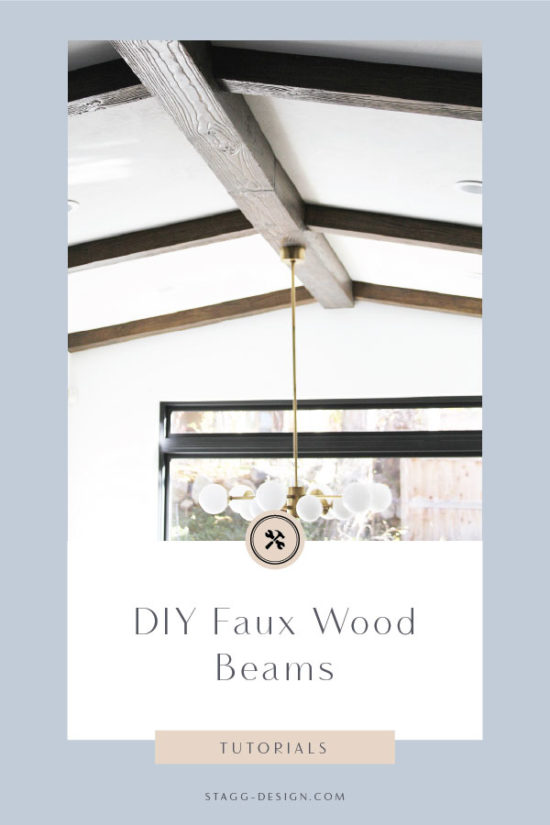
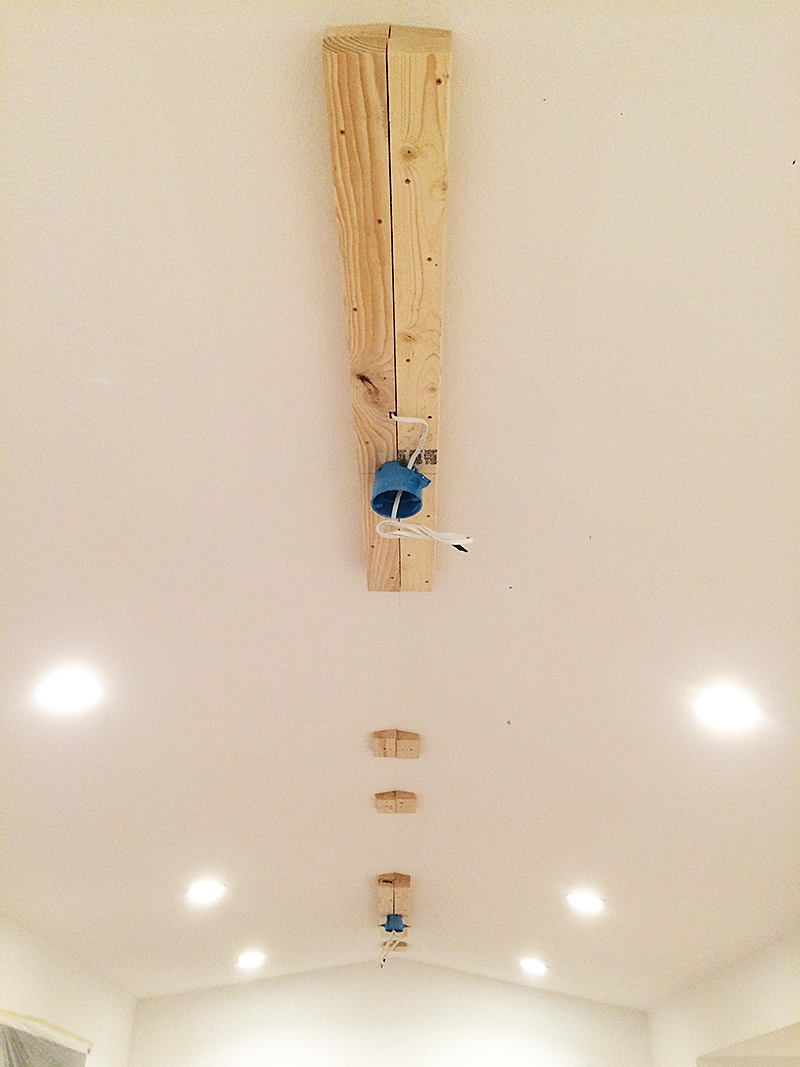
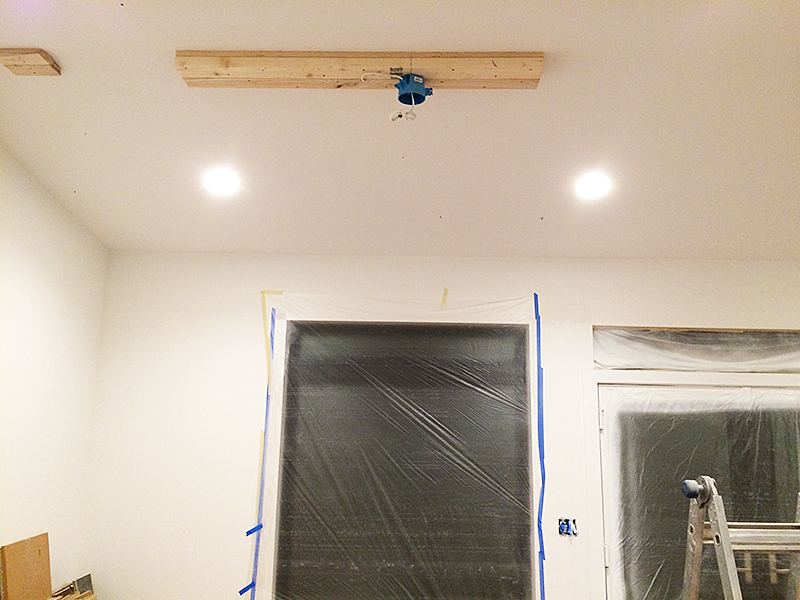
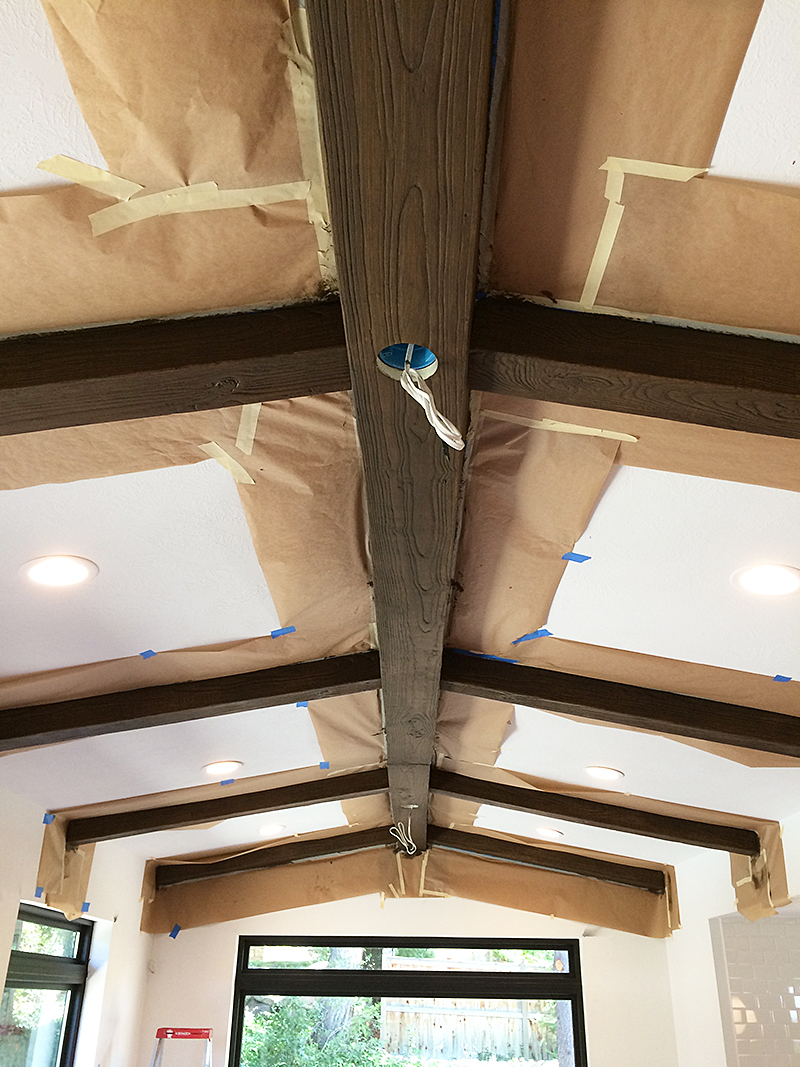
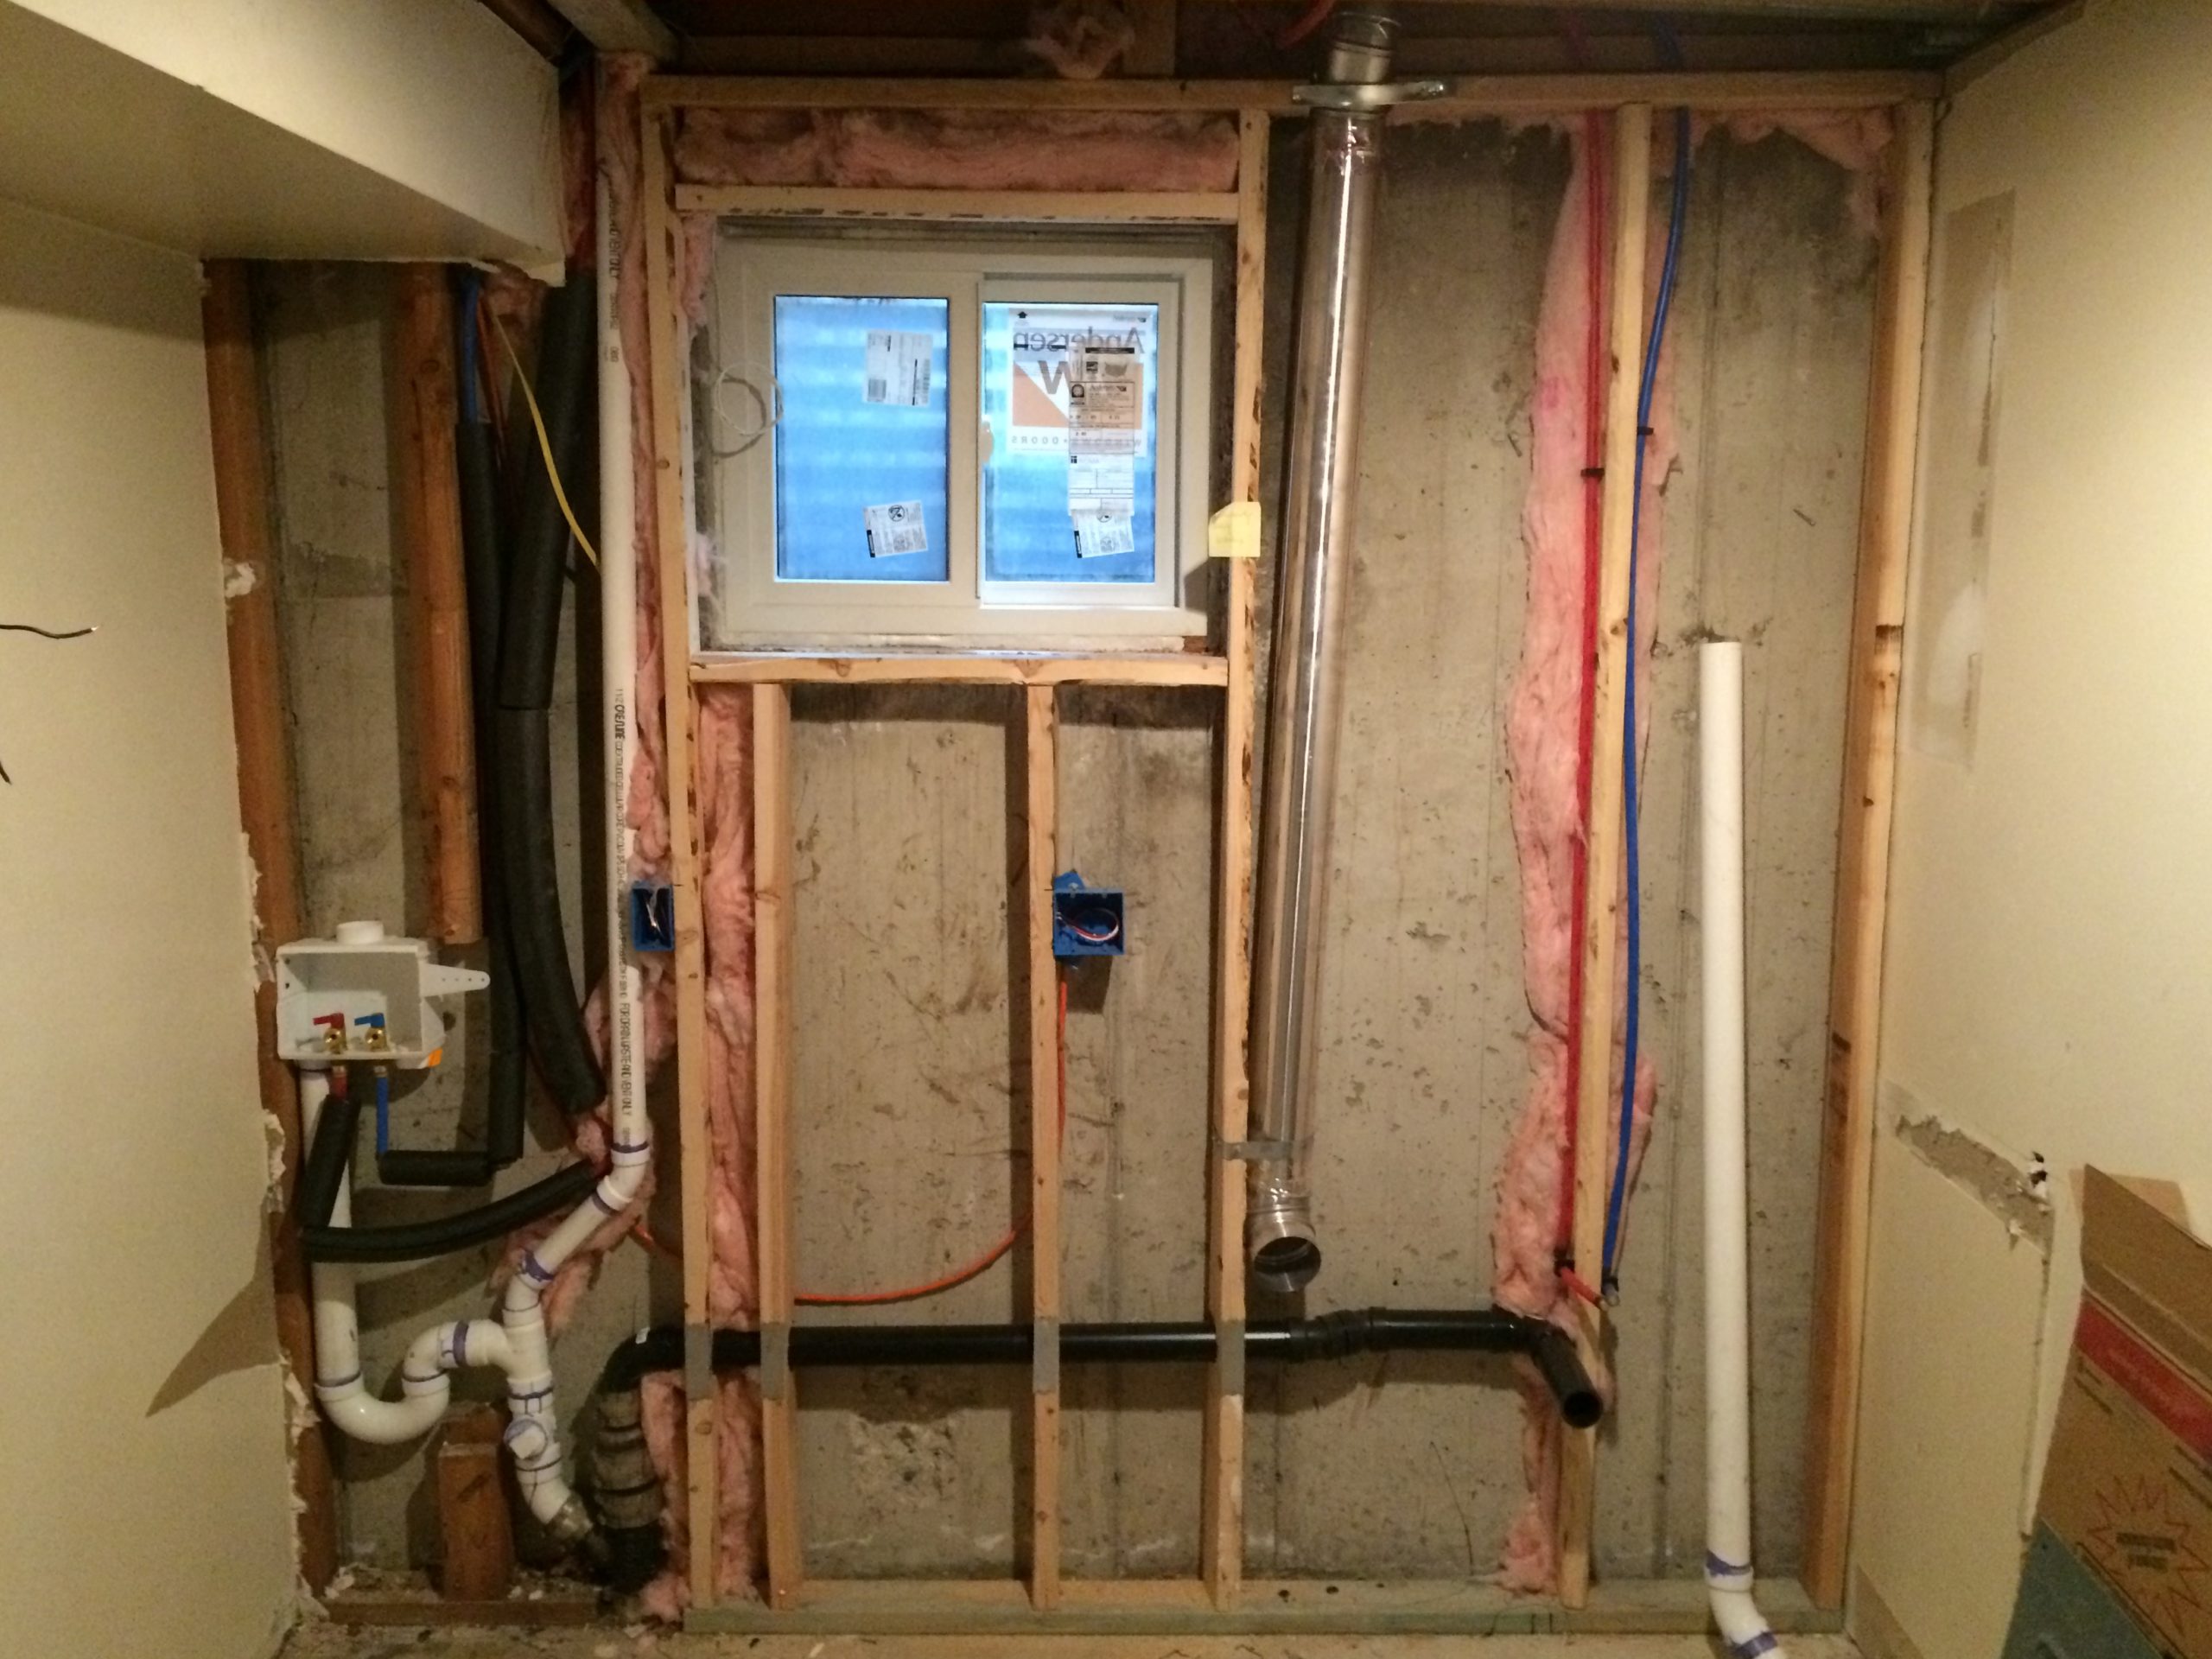
The beams are hollow on the inside and sort of make a U shape. One thing we had to take into consideration– we were attaching both a ceiling fan and a chandelier to the beams, so we needed to install some wood framing to support them. Between Jon, my dear dad, and Jon’s brother, they were able to install them while I held my newborn and occupied Ruby. This is what it looked like as we got going.
I could go into a lot of detail about how to install them, but the company has some excellent tutorials and explanations and we followed them without any trouble.
To explain how the pattern came together, we did one long post down the center, then evenly spaced them on either side. We used a simple miter saw to cut them. They’re kind of like a really hard foam, if that makes sense.
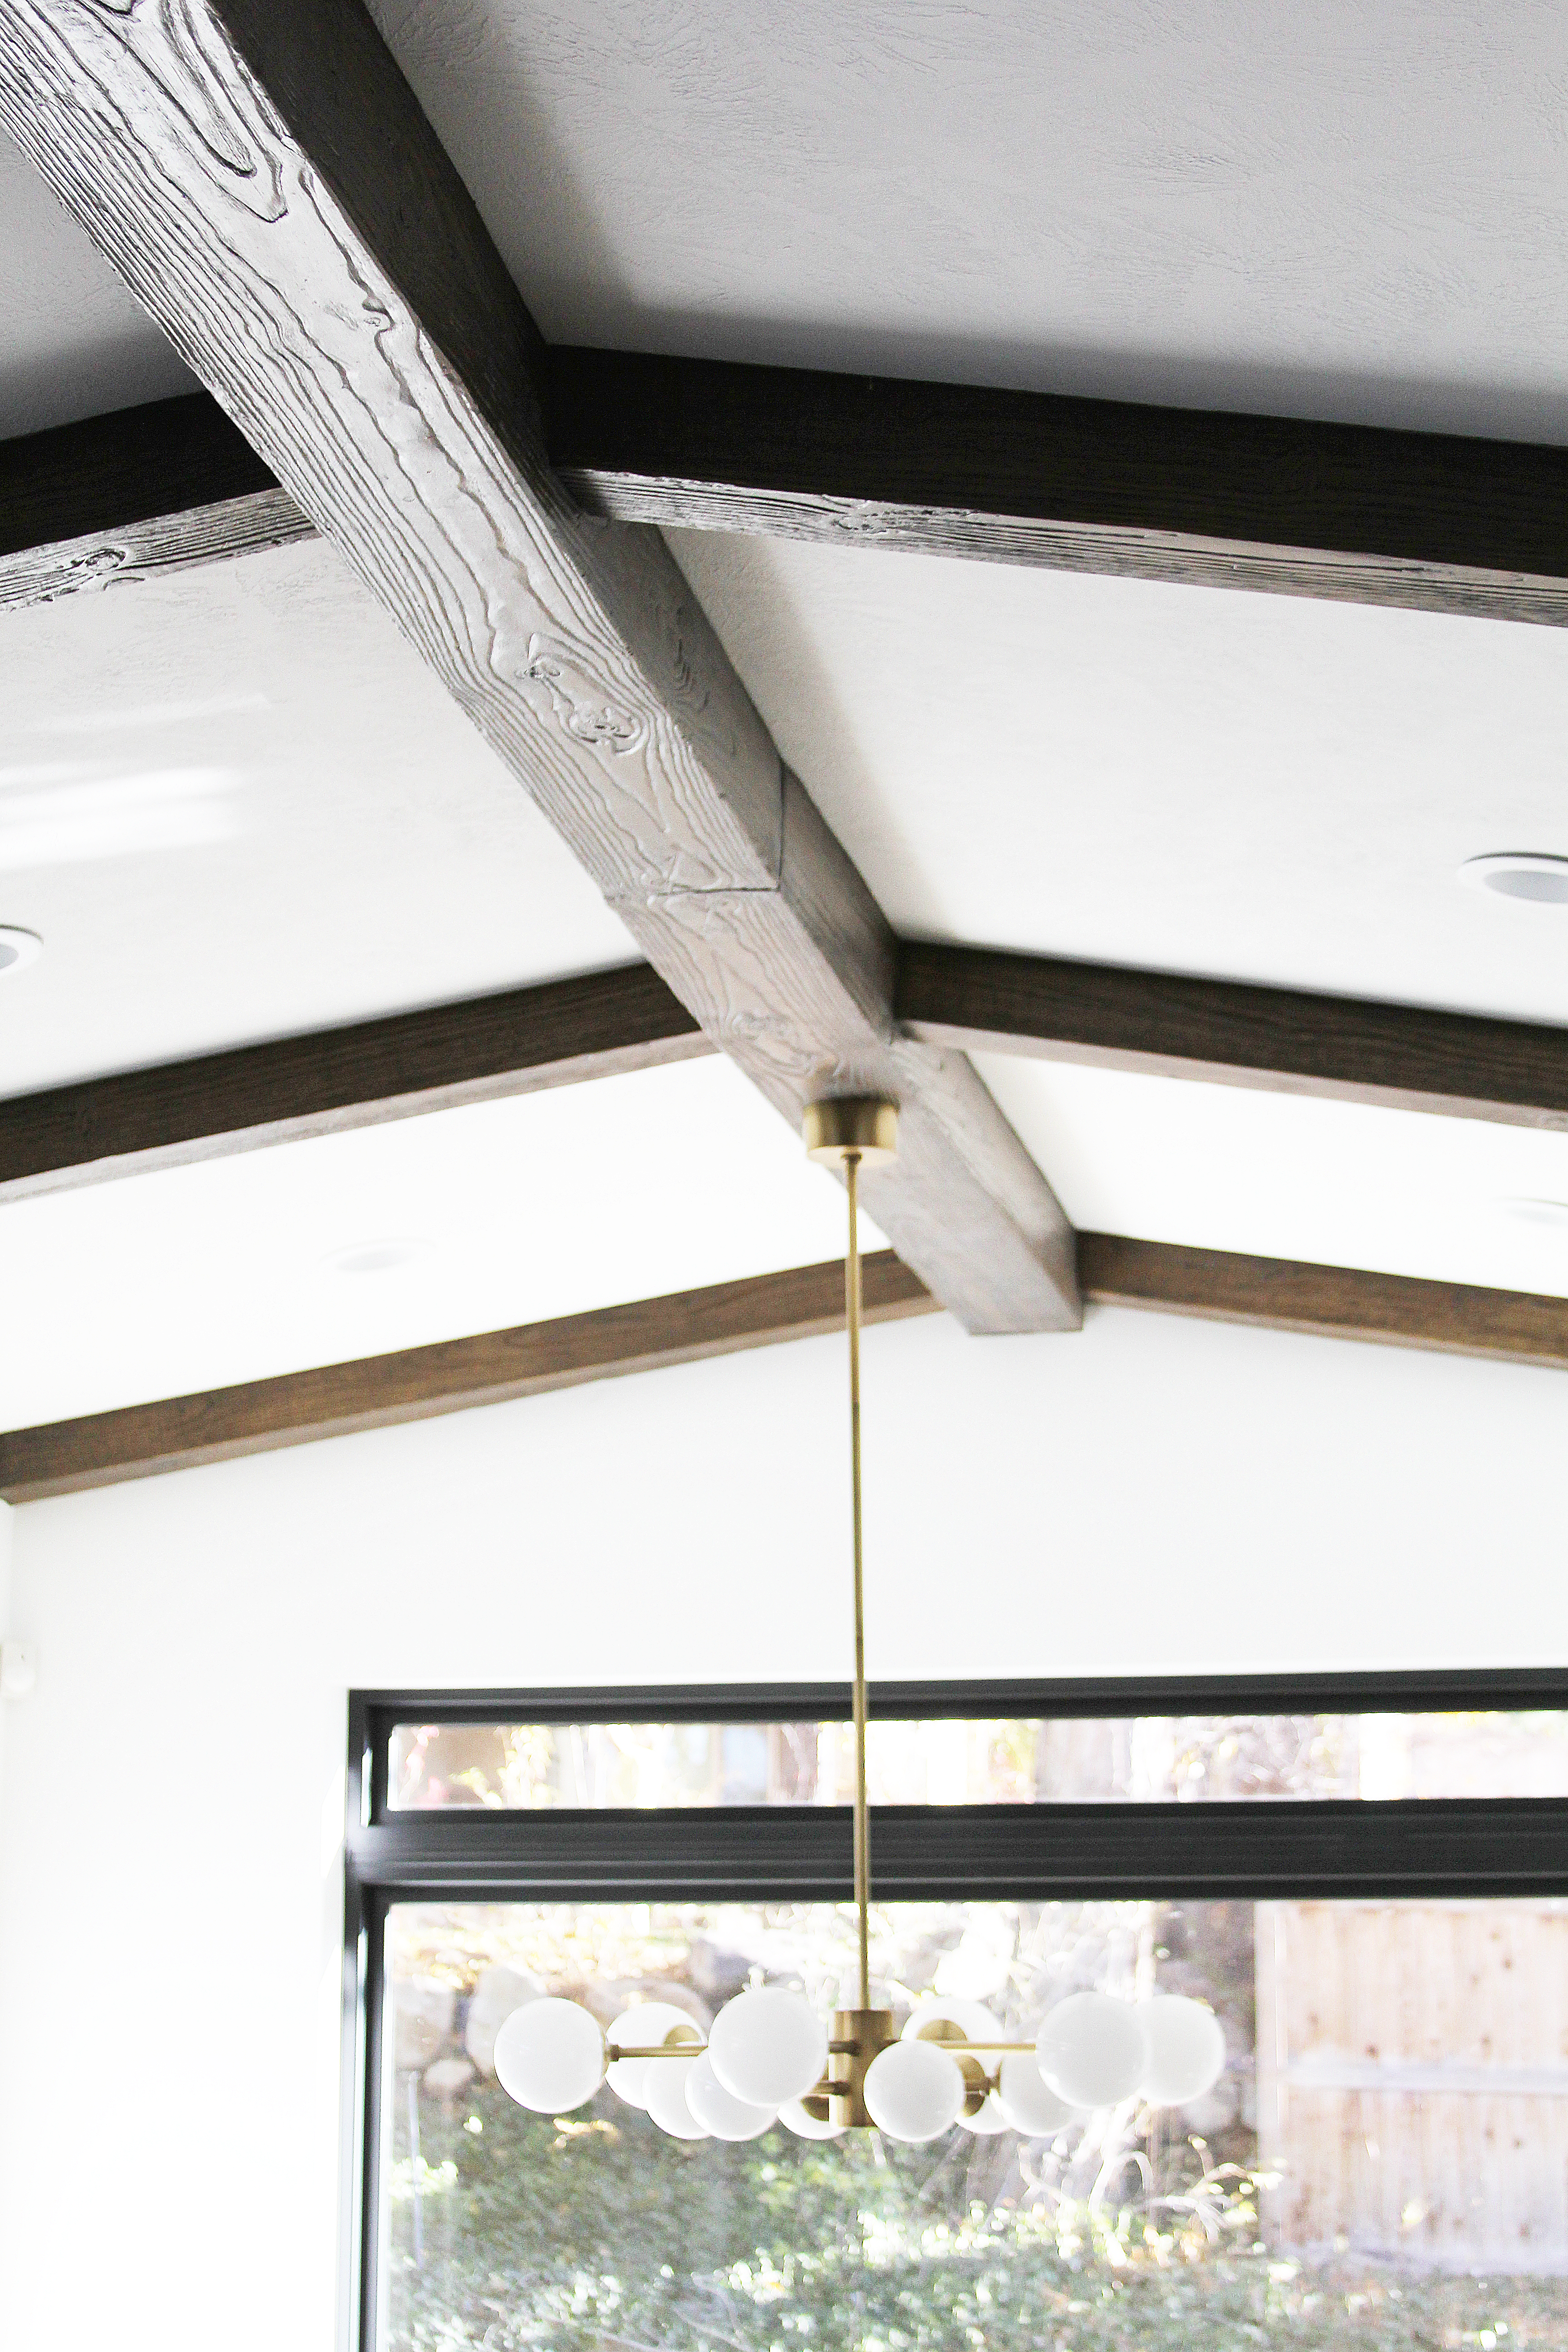
We got them up and they were looking amazing– everything but the color. I was nervous. We talked through how to stain them with our painter and he had never done anything like it before so we tried out some stain samples on a few remnants.
It was unbelievable. The product stained just like wood would. No special stain, just exactly how you would stain a real wood beam. We used Color Putty in B.R. Mahogany to fill the nail holes and Jel’d Stain in Walnut for the beams. Our painter got to work and it was crazy how real they look!
We do have one seam in the center on the large beam, as they don’t come long enough to fit the length of the room, but once it was stained it just kind of blends in and you don’t really notice it. And I can’t imagine the space without them. They totally make it.
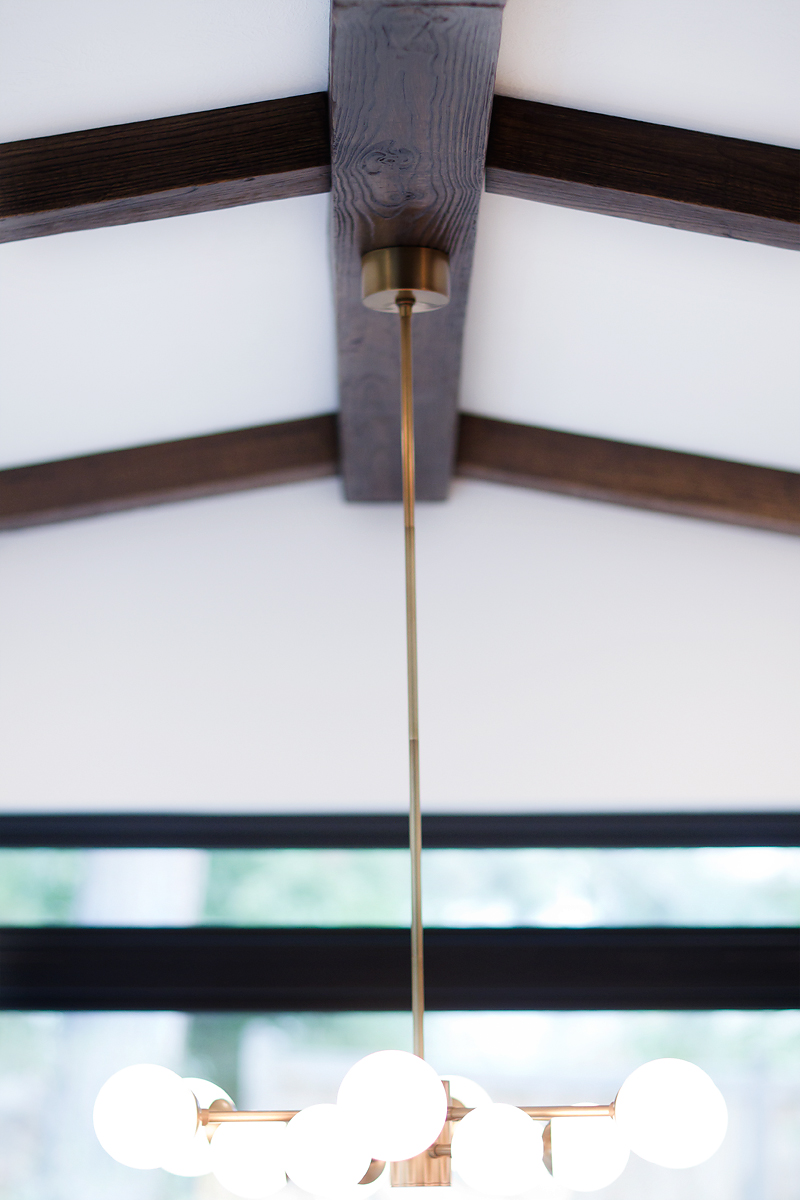
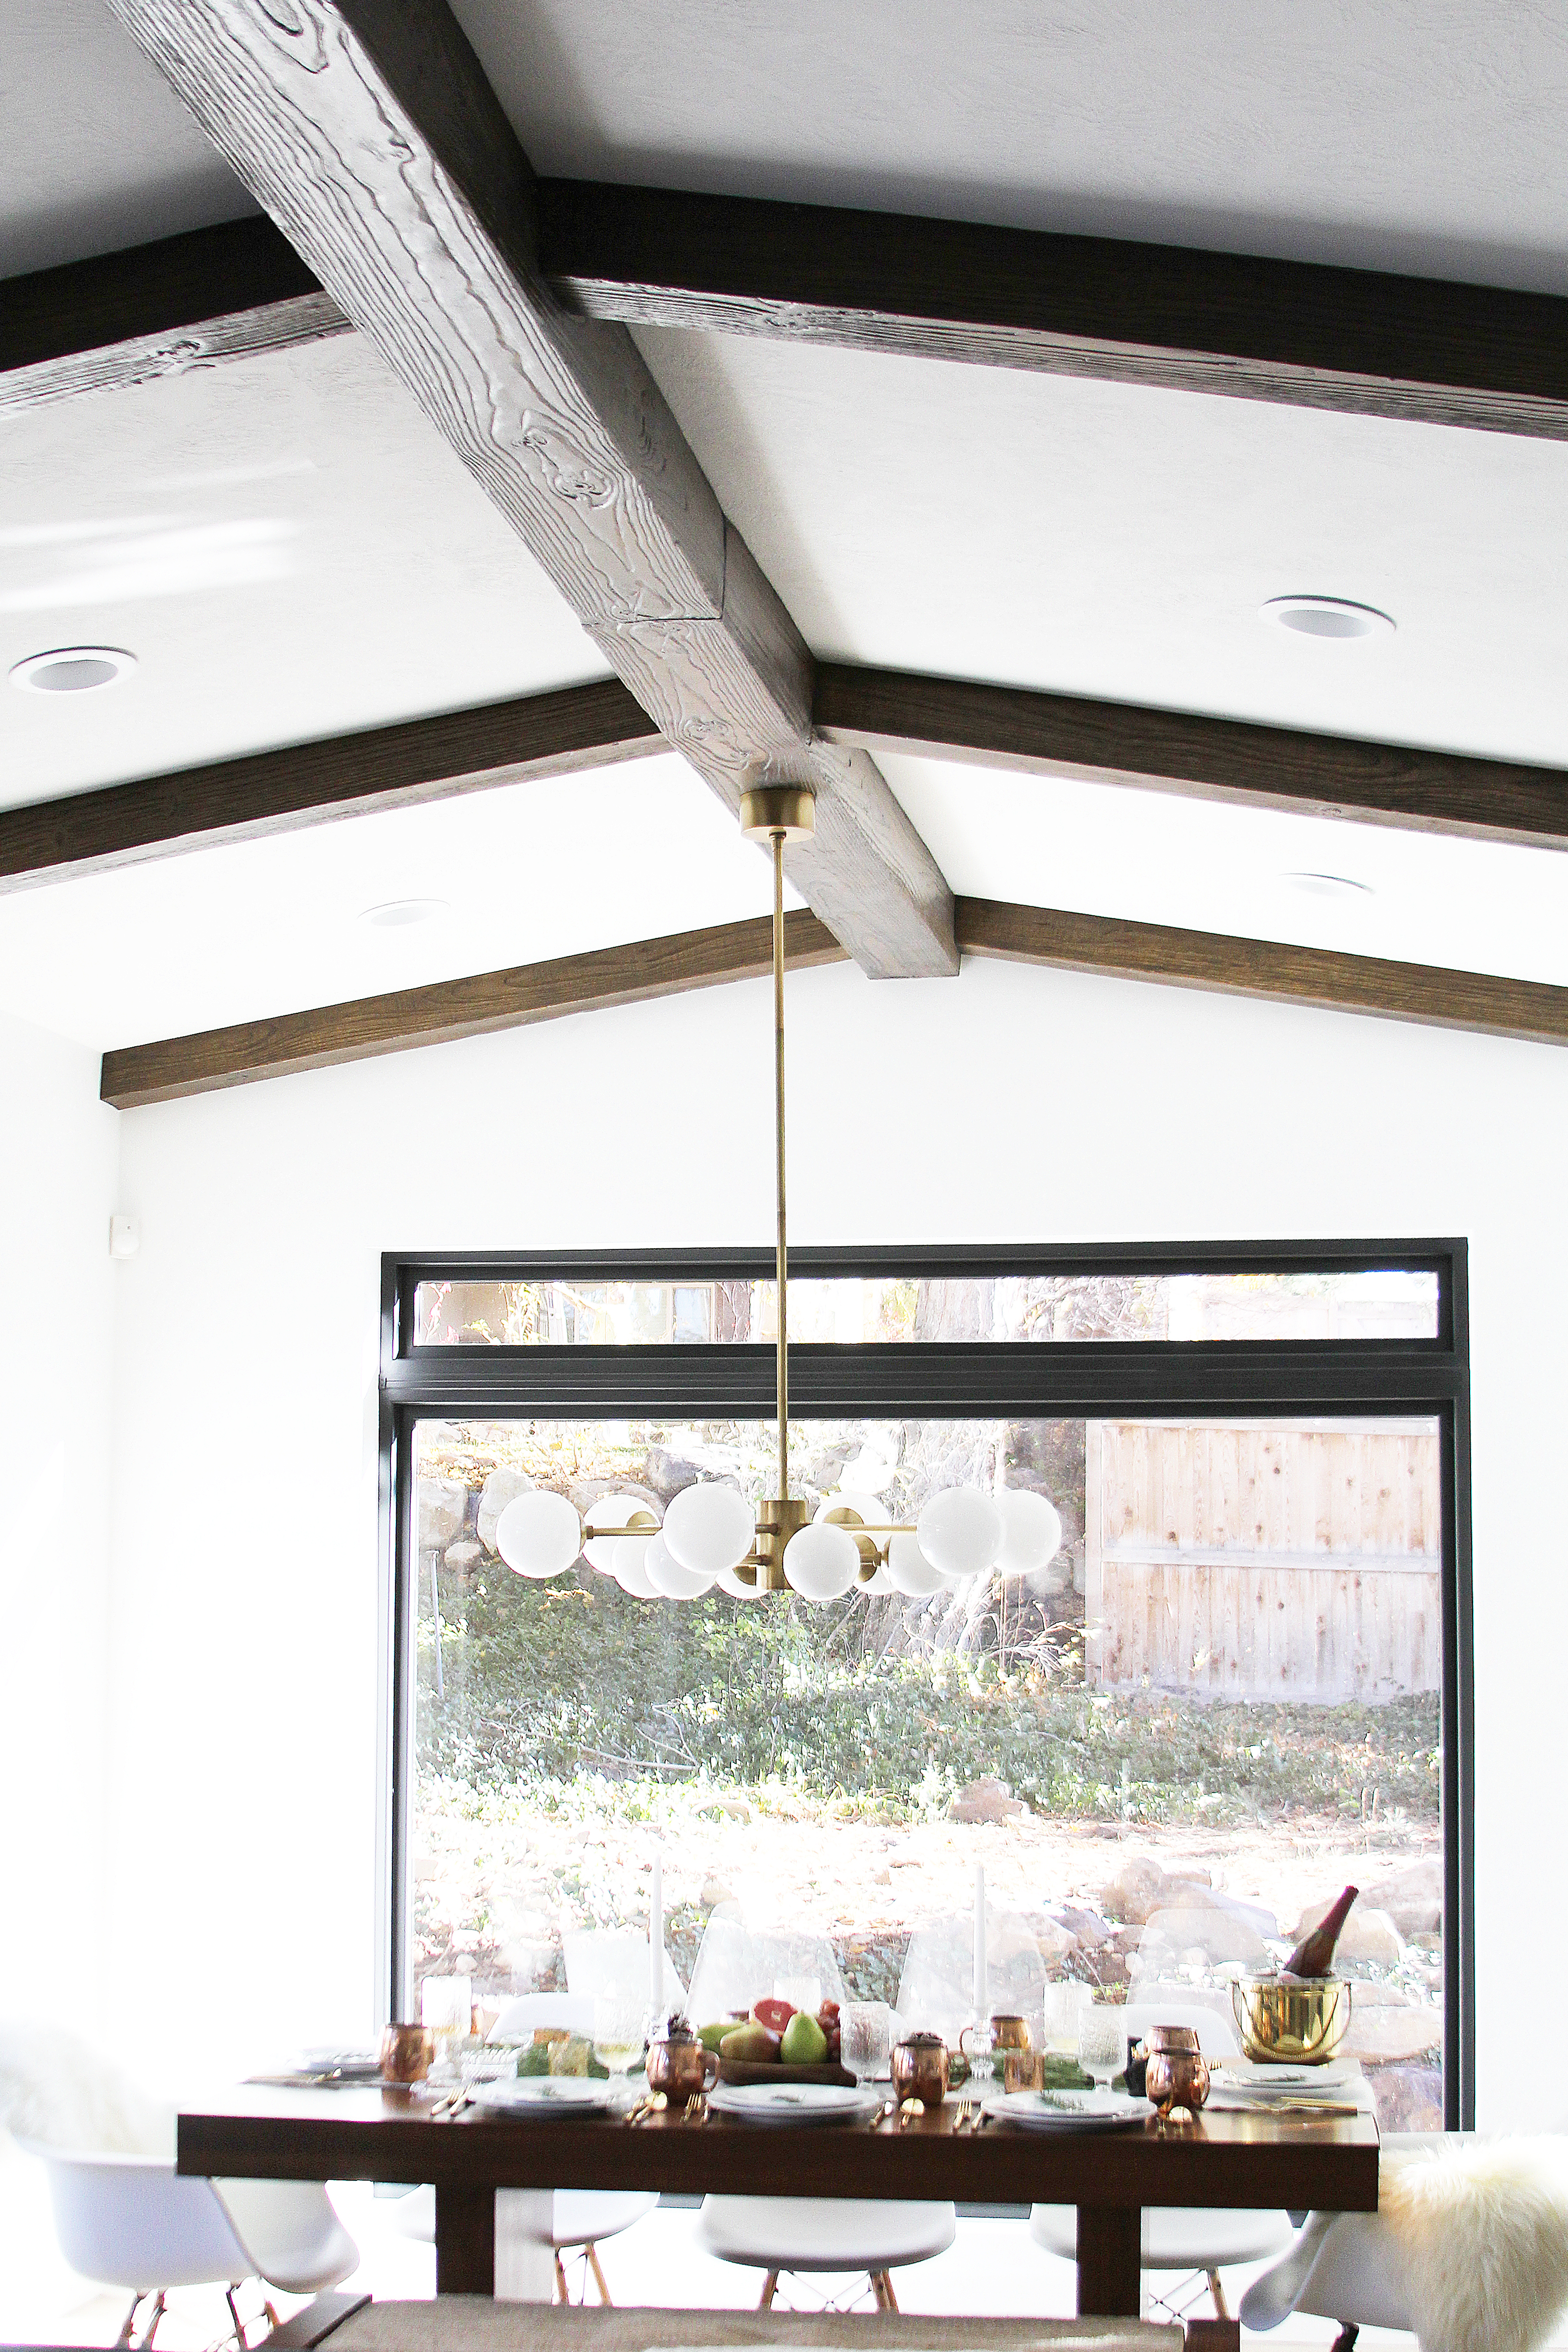
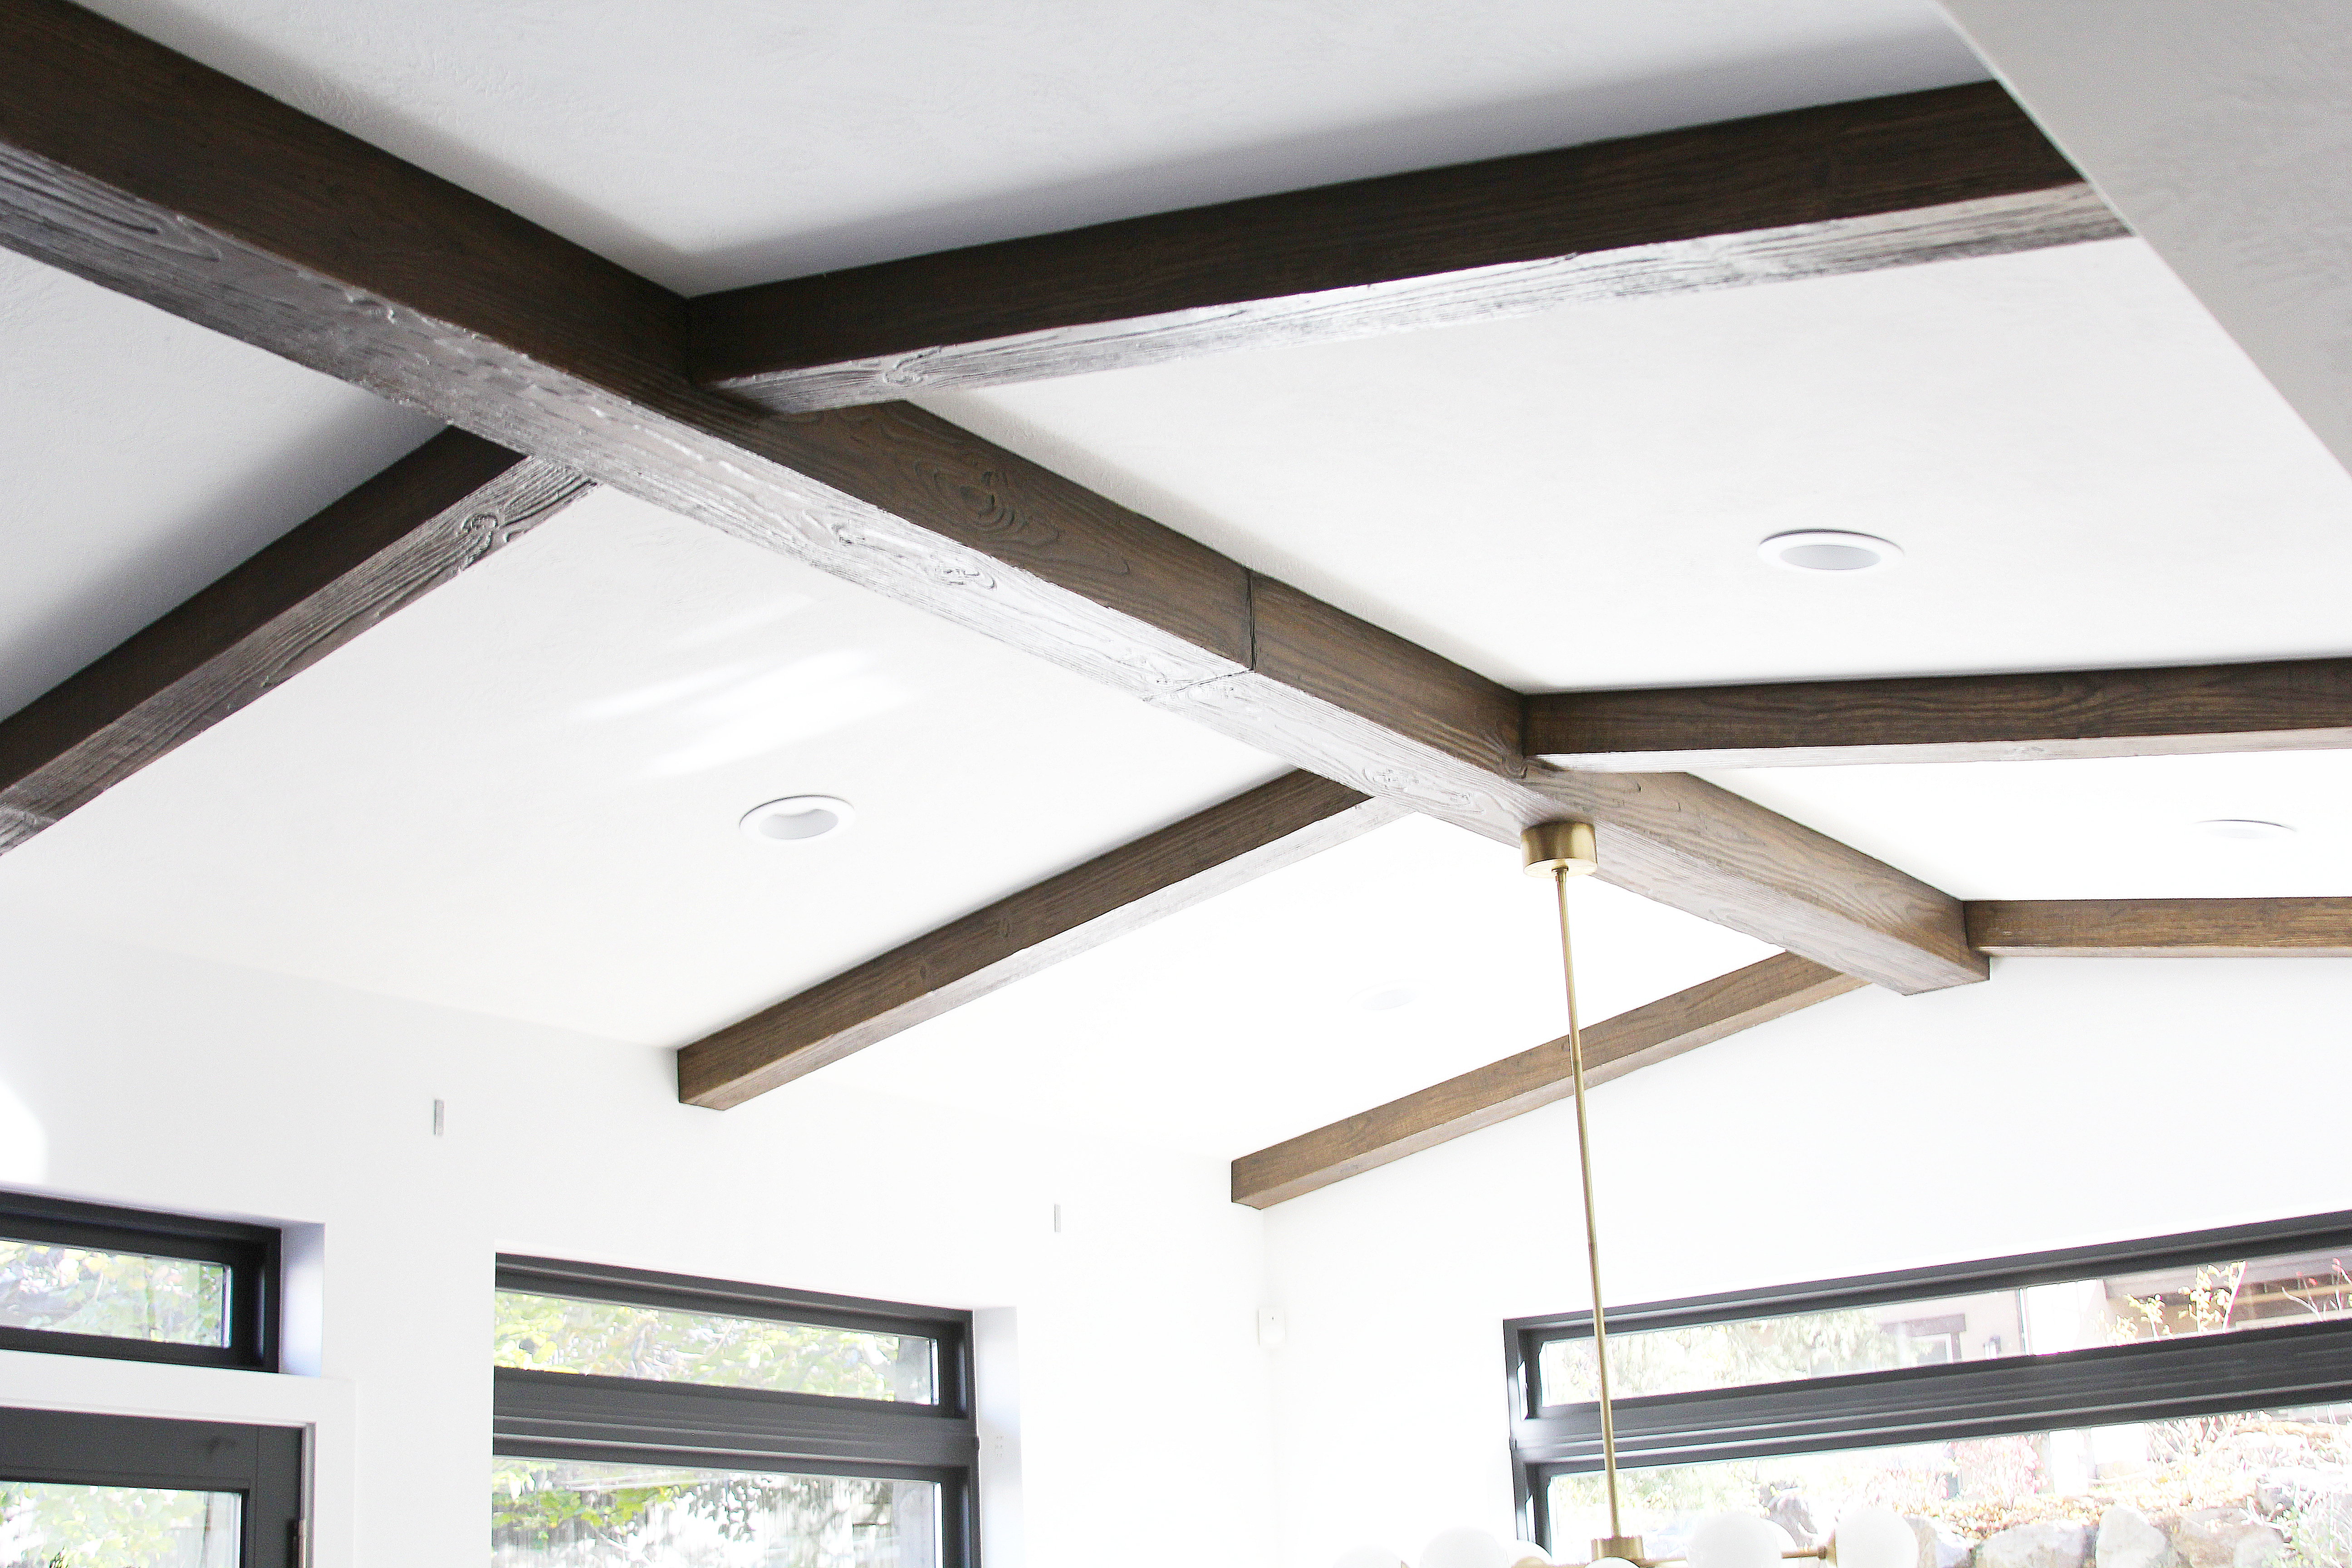
Crazy good, right?? I mean, you would never ever guess those babies aren’t the real deal.
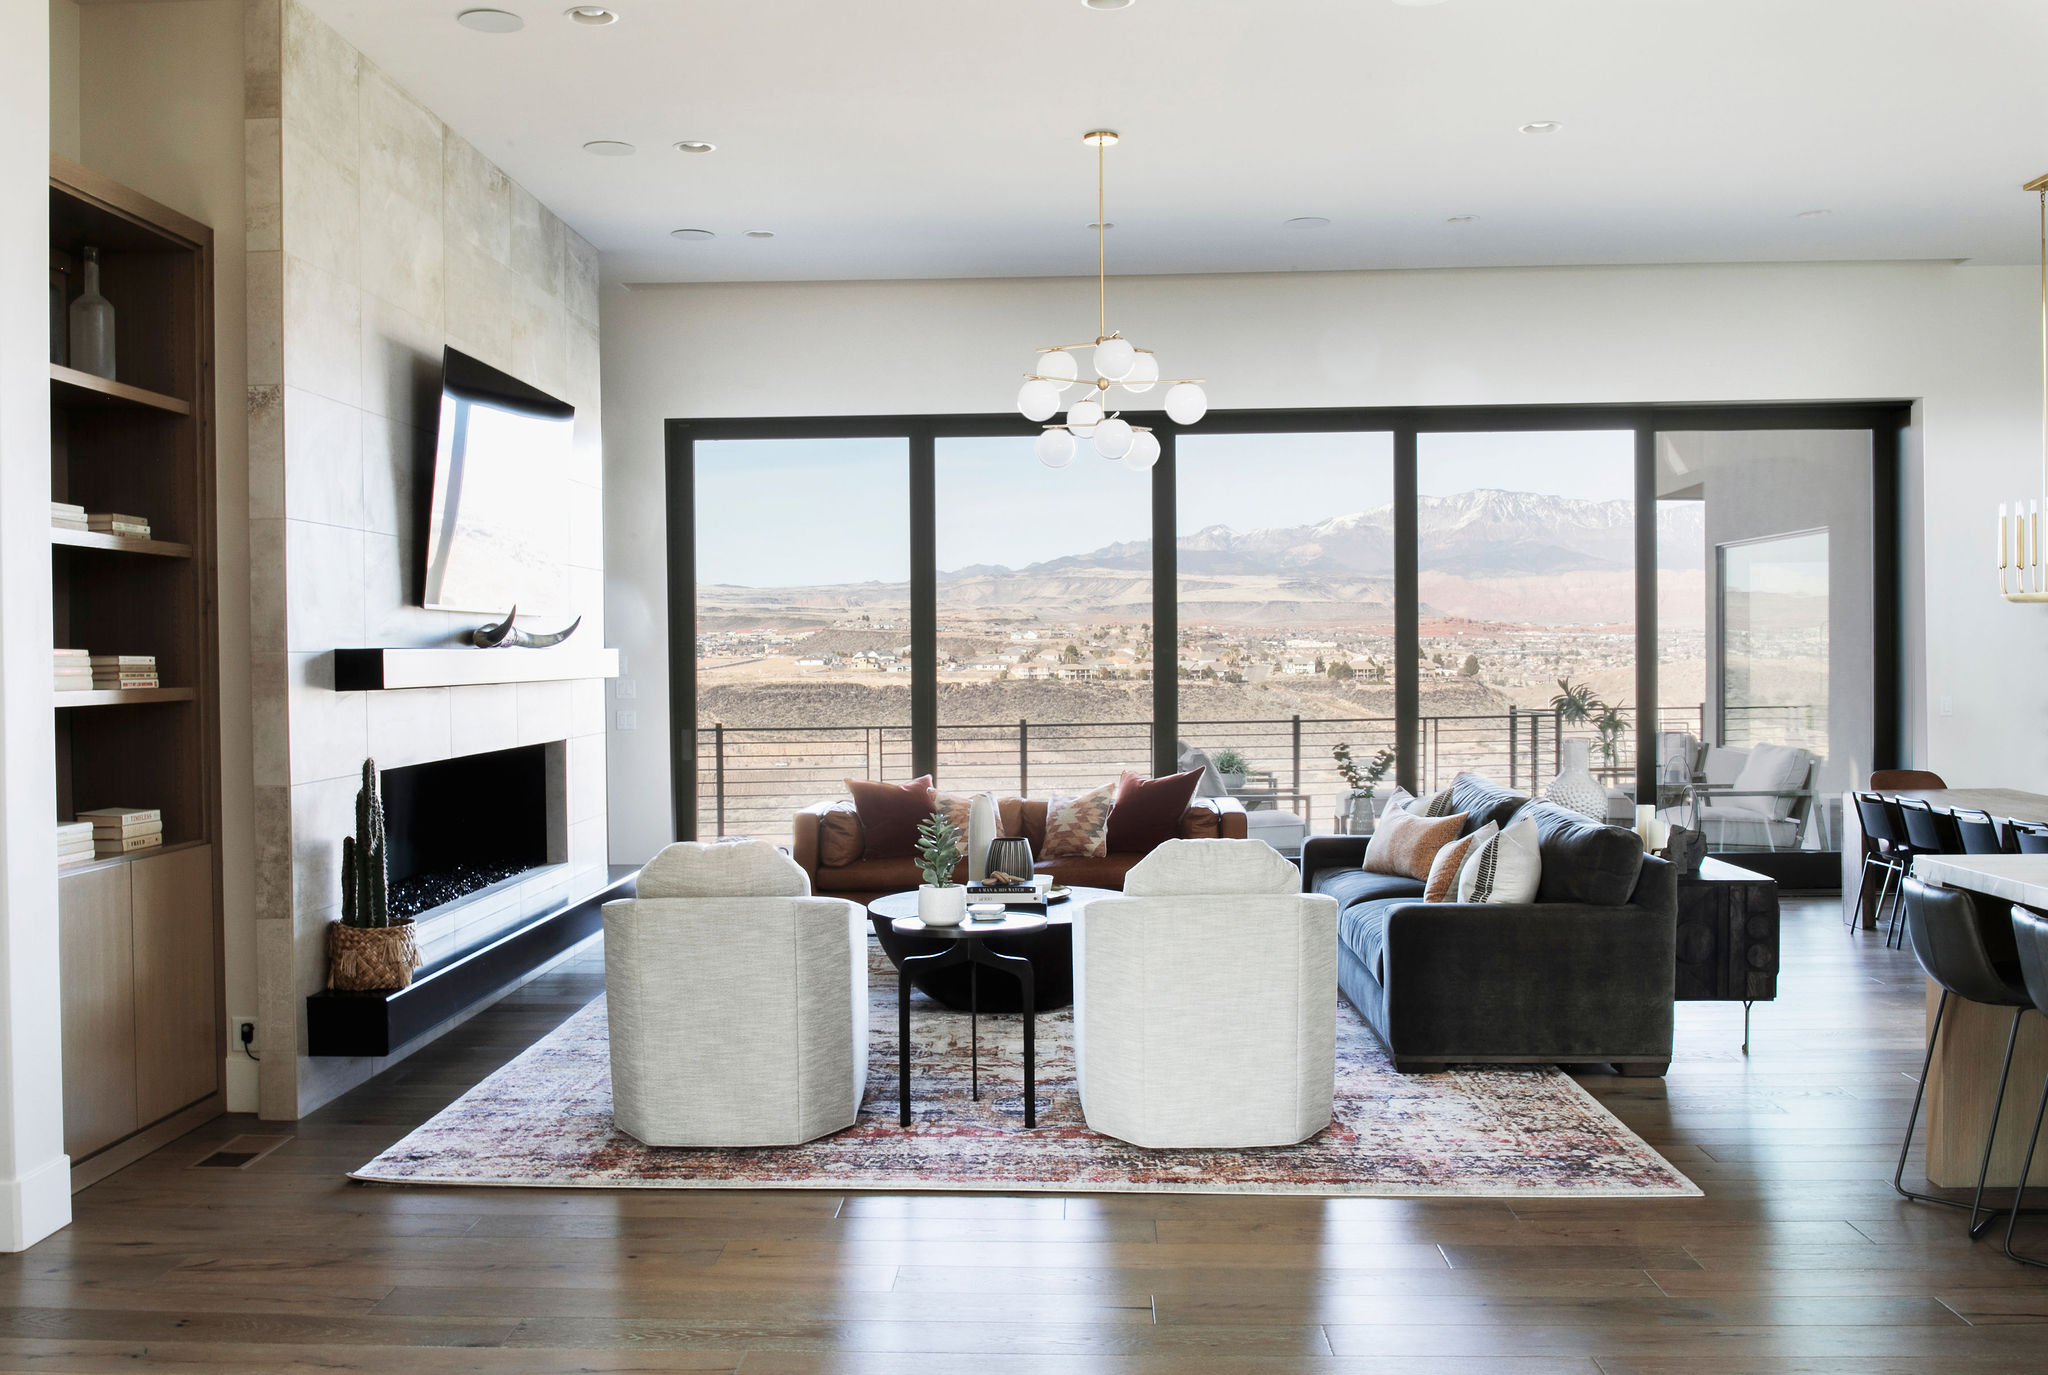
I’m waiting on some drapes to reveal the whole open concept space to you. We ran into a little issue with them and they had to be re-sewn. And I’m hosting a massive holiday party in this room on the 23rd and I have big plans for the room layout so the beams will be highlighted. Can’t wait to show you more.
They really are a show stopper and I’m still in awe about how easy they were to do ourselves. I would completely recommend them. Thank you so so much to Arizona Faux Beams! We love them!
If you have any questions, comment below. The company is also very responsive about questions and concerns.
Happy Monday!

*The beams were provided c/o Arizona Faux Beams
Leave a Reply


back to top
@jenniferstagg
shop

We're a full-service design firm and home furnishings shop built around the philosophy that a well-designed home should be beautiful, personal, cohesive, and complete. We think home is the most important place on the planet and when you live in a home that is perfectly you, it changes your life. Don't believe us? Stick around. We're confident we'll change your mind.
hello there!
Follow Along
@jenniferstagg
Hey, let's be friends
Exclusive projects, discounts, and extra goodies all in your inbox. And don’t worry- your email is for our eyes only.

Oil or water based stain? did you use polyurethane?
Superb work here!! I have to ask, where did you get that suspension above your table? It’s gorgeous 🙂
Wonderful four wood beams diy. Really like this. Very creative job. Thank you for sharing.
Looks great! I love the stain color you went with and can’t wait to see the rest of the room!
Thank you so much!!
hi! can you tell me what dimensions your beams are? we are having a hard time deciding taller vs wider…
Hi! Thanks for following WithHeart, and for your question. The main beam is 8 in. wide and 6 in. tall, and the smaller beams coming off the main beam are 5 in. wide and 4 in. tall. Good luck with your project!
[…] DIY Faux Wood Beams […]
[…] DIY Faux Wood Beams […]
[…] Those faux wood beams still stop my heart when I look up. Yes, remember, they are faux! We installed them ourselves and you seriously cannot tell they aren’t the real deal. Here’s how we built and installed our DIY faux wood beams. […]
These beams are awesome! You provide some artistic and unique design over your ceiling.
Hi – Just came across this page and I think your project turned out really nice! We are in the process of building a new house and had a couple questions. For the wood framing you installed to support the fan, did you mount those into structure above the ceiling (i.e. Roof truss, ceiling joist)? It looked you cut a strip of wood at the wood of the support to match the profile of the sloped ceiling up to the peak, to allow for it to sit flush. For the actual fan, you just mounted the fan directly to the electrical box? It looks like the cover just sits the surface of the faux beam, or is it recessed into the opening you created? Thanks again for the inspiration!
Hi Kevin! Here are some answers to your questions: yes, we attached the fan to our framing of the home. It needs that support. The electrical box is flush with the beam, and the fan is mounted directly to the electrical box. The electrical box itself is attached to the framing that connects to the trusses. Hope that’s helpful!