

")
")
")


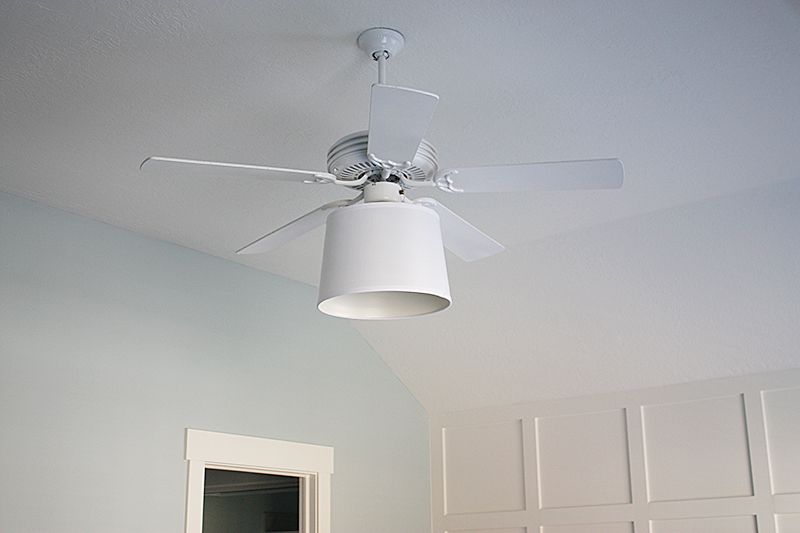
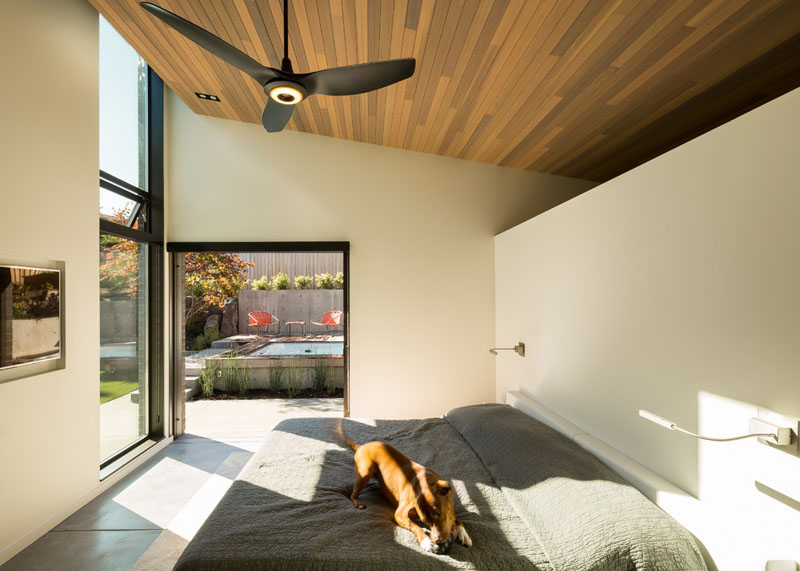
DIY CEILING FAN DRUM SHADE UPGRADE
November 11, 2013
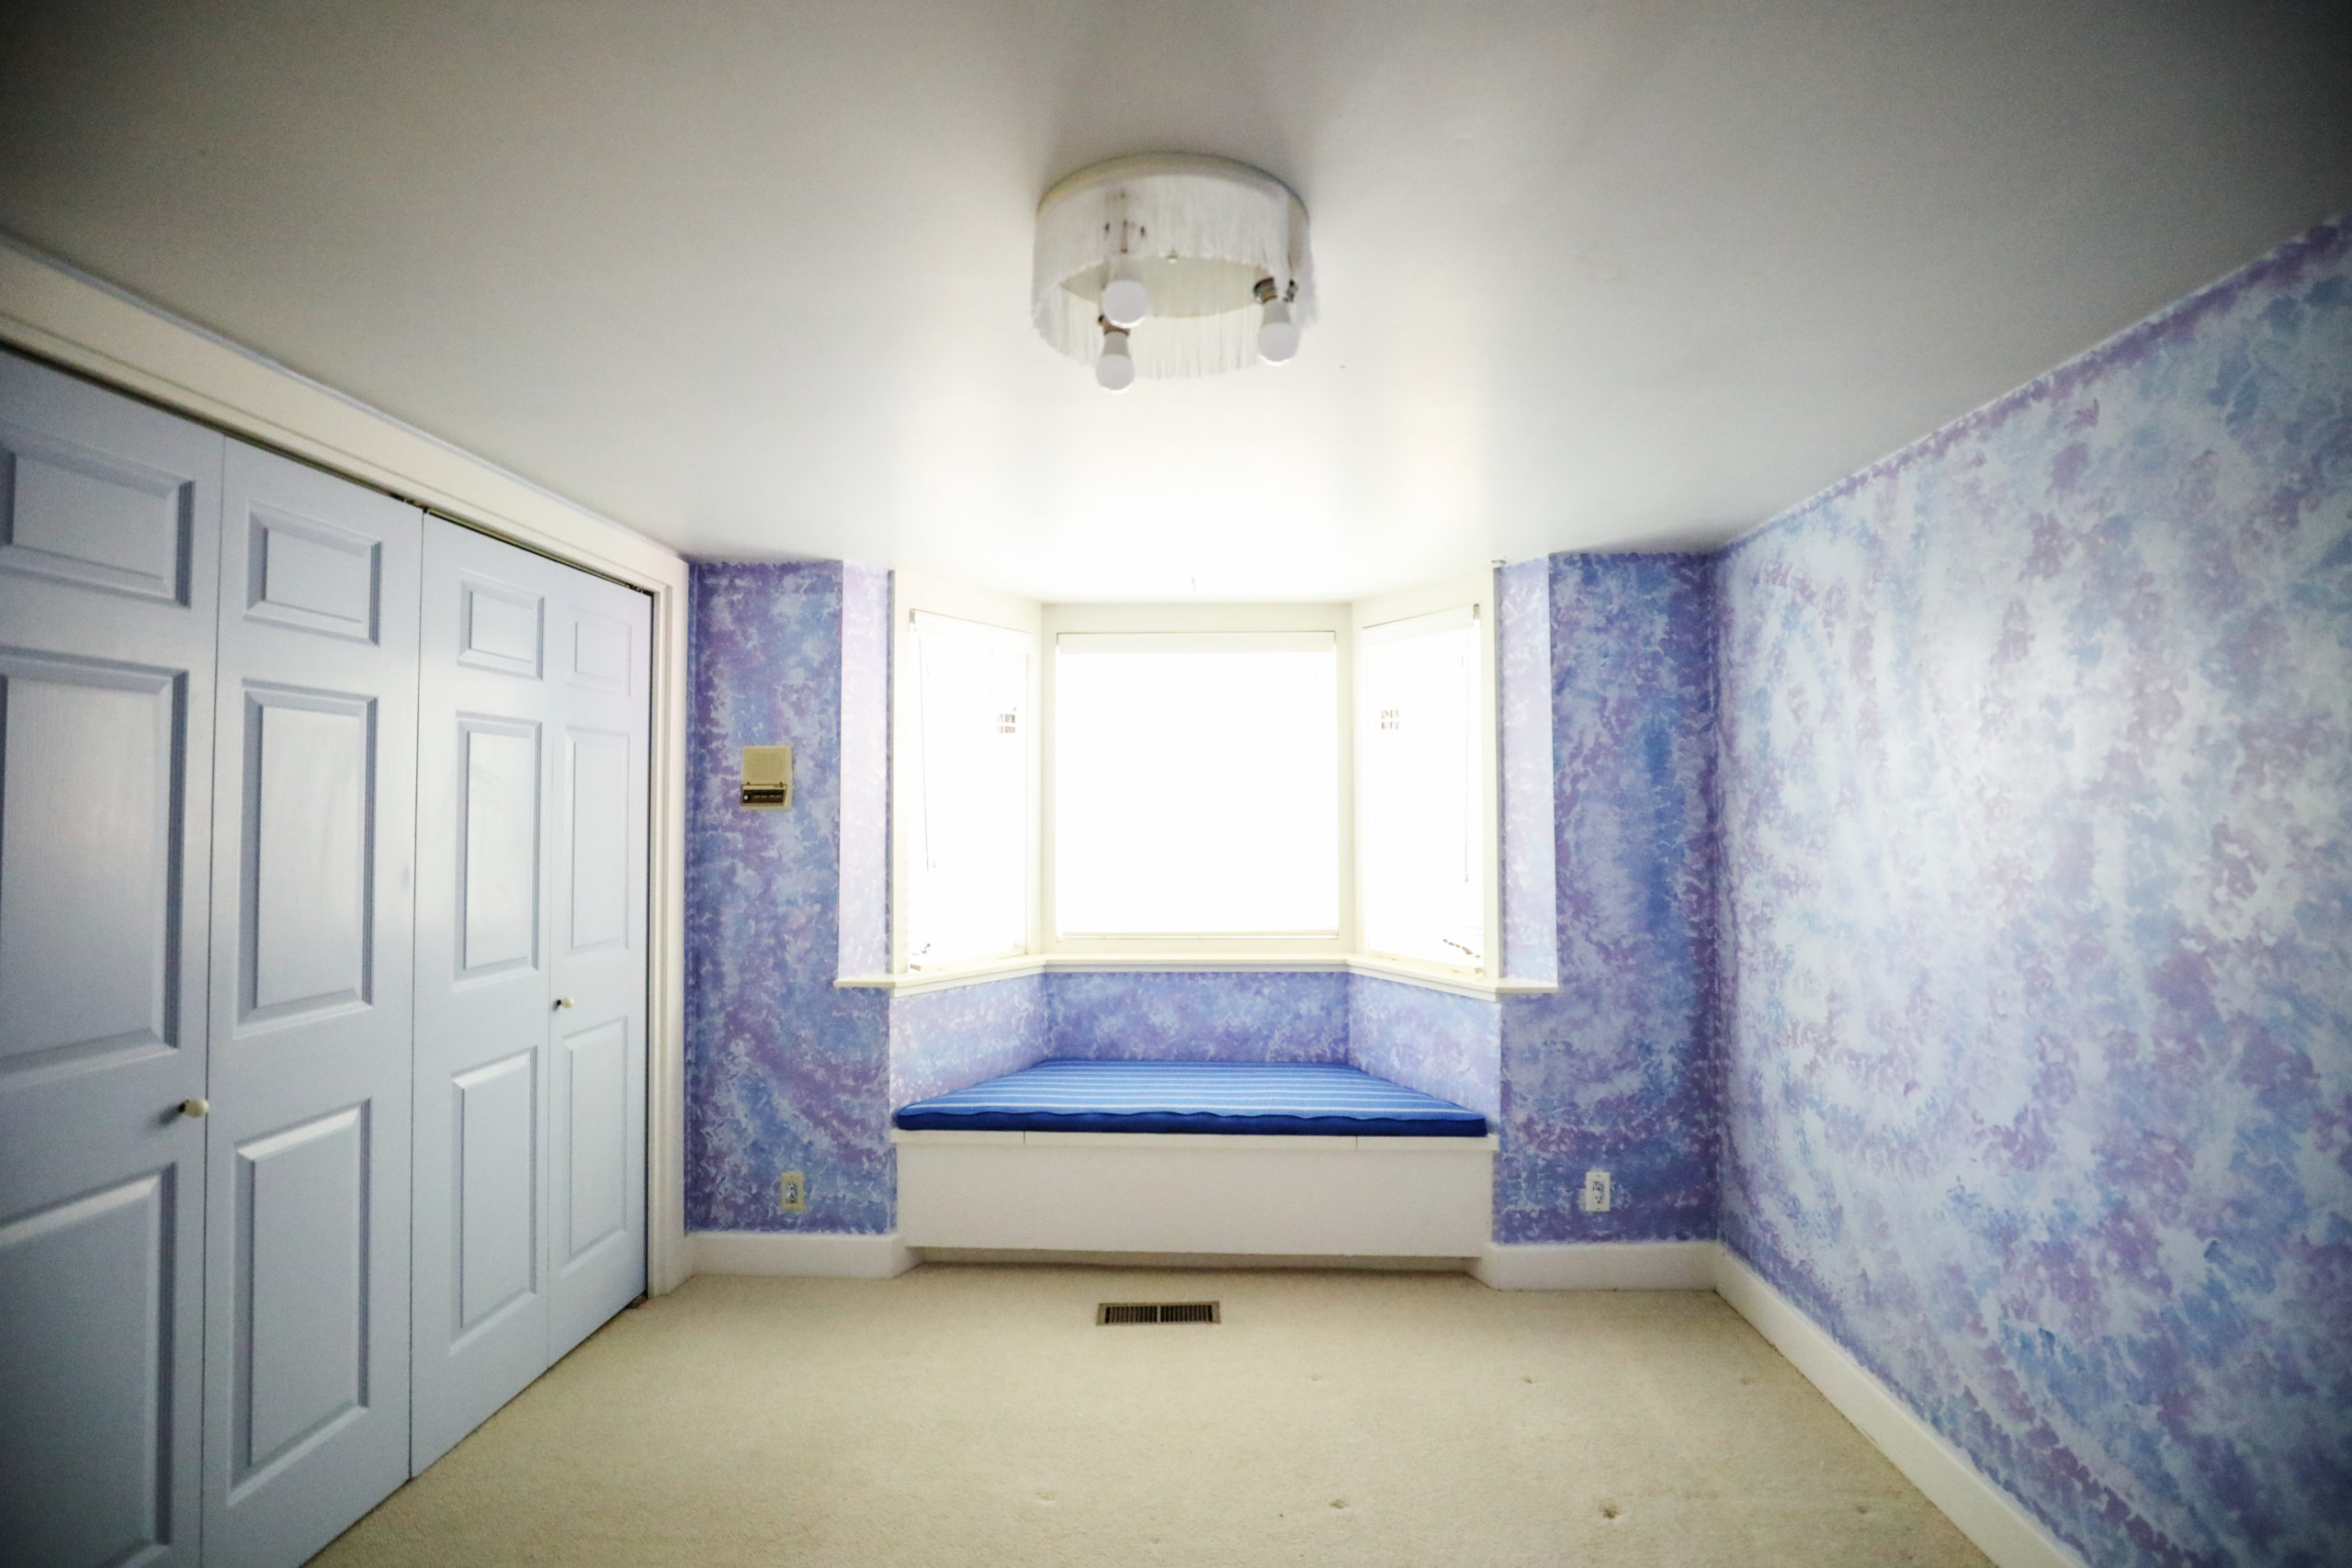
Hope you all had a wonderful weekend! I got started on our guest bathroom remodel (finally!). It’s long overdue, and I’m excited it check it off my to-do list. I also shot an exciting upcoming video with James. Can’t wait to share it with you Wednesday. Here’s a hint– my bedroom has never seen so much of me! It turned out so neat. Until then, I’m sharing a part of my master with you today: my DIY ceiling fan drum shade upgrade.
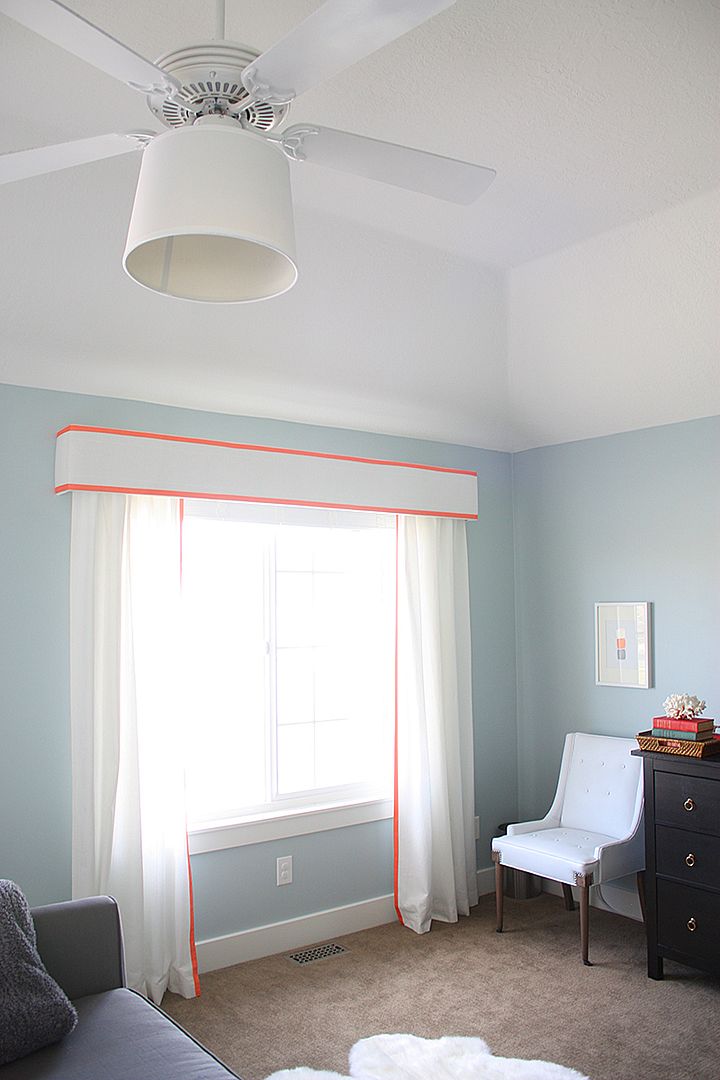
Every night we’ve been staring up at it: an ugly, old, outdated ceiling fan light fixture in our master bedroom. It was taunting us– daring us to do something about its 1990’s style. The fan knew it was safe, at least for a while. Our room gets mighty hot in the summer, and though I’m not a big fan of the (ceiling) fan in most cases, in this one, it is a must. We keep it on day and night when it’s hot.
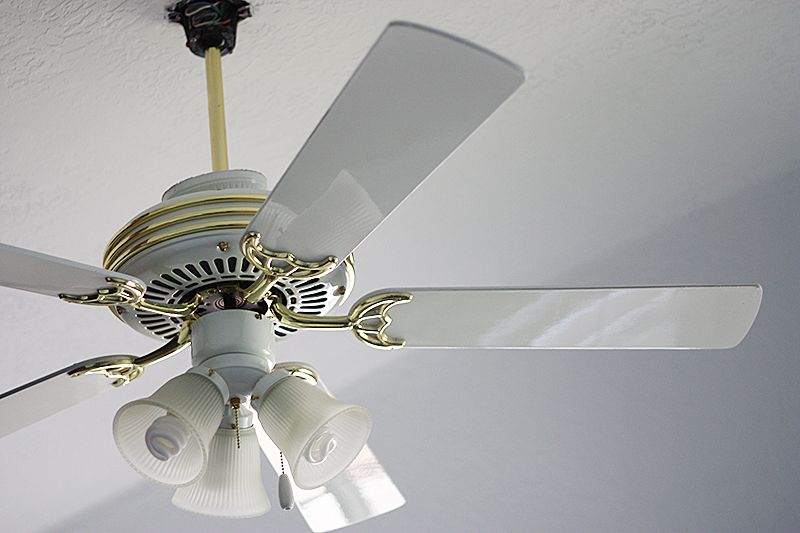
Once I accepted that I had to keep a fan in our bedroom, I started looking for suitable replacements. Surely there had to be a stylish option out there somewhere. But alas, my searches were mostly fruitless. It seems ceiling fan styles haven’t changed much since ours was installed in 1992, and so I chose to instead give it an update on my own.
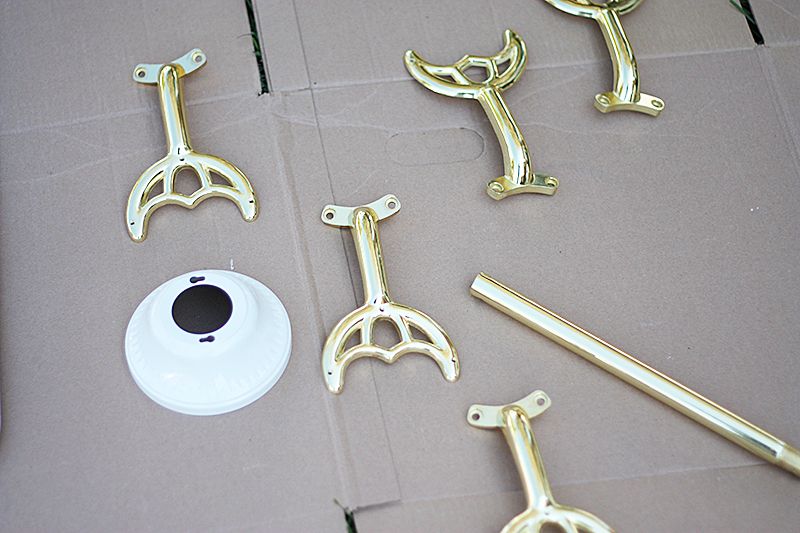
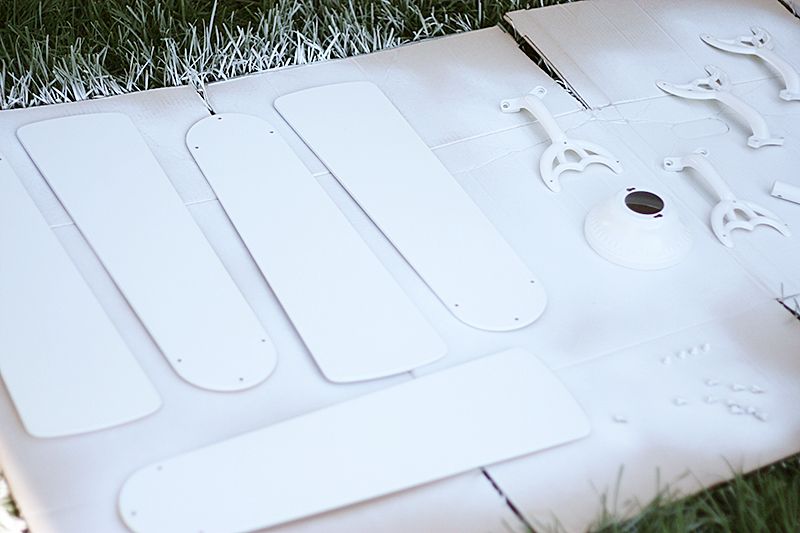
The first thing it needed was some paint. It was already mostly white, but kind of dingy. And while I do love a great brass fixture, in this case it was a dead date giveaway. I deconstructed it very carefully and took photos to help me remember where everything went. I also put the little pieces and screw in sandwich baggies so they stayed together and organized.
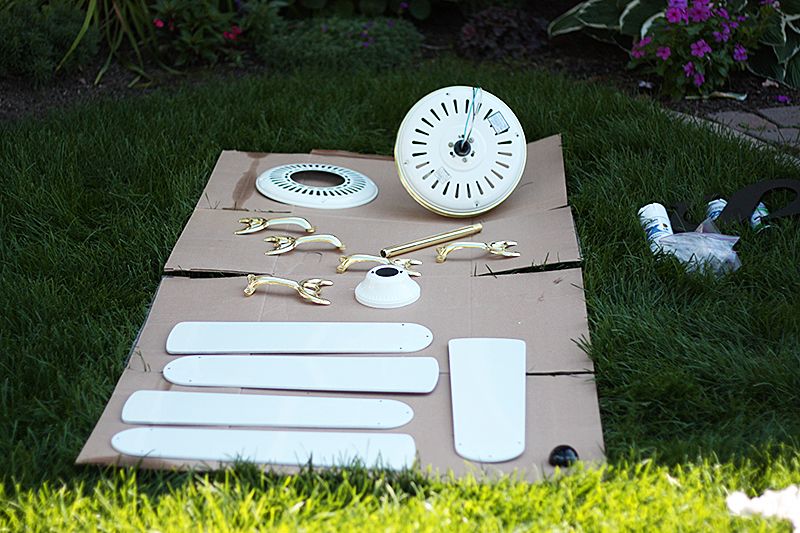
I cleaned the parts throughly with my go-to baby wipes, laid them out on some cardboard, and gave it all a nice white coat of Rustoleum 2X in gloss. The primer is included, so no need to prime then paint. Love a skipped step.
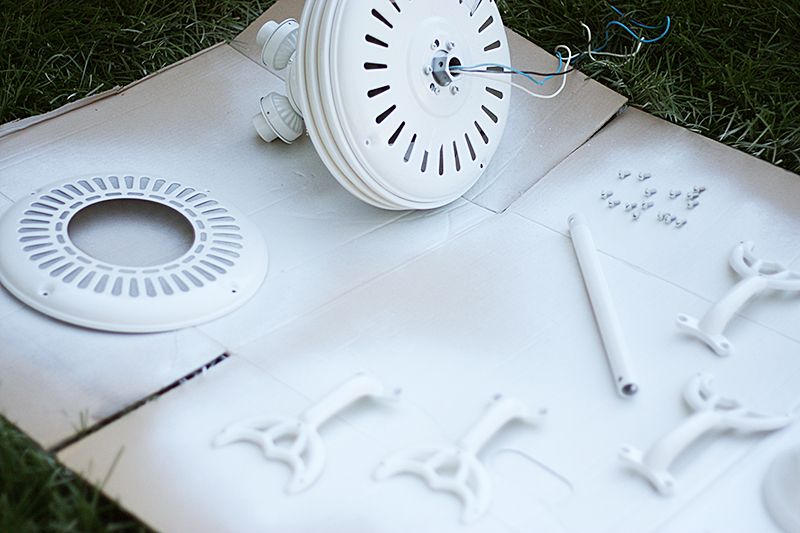
No parts were spared. Everything got a fresh coat. After spraying one side, I let it dry, gave it a second coat, let it dry again, then flipped everything over and repeated the process. It was already looking much better, don’t you think?
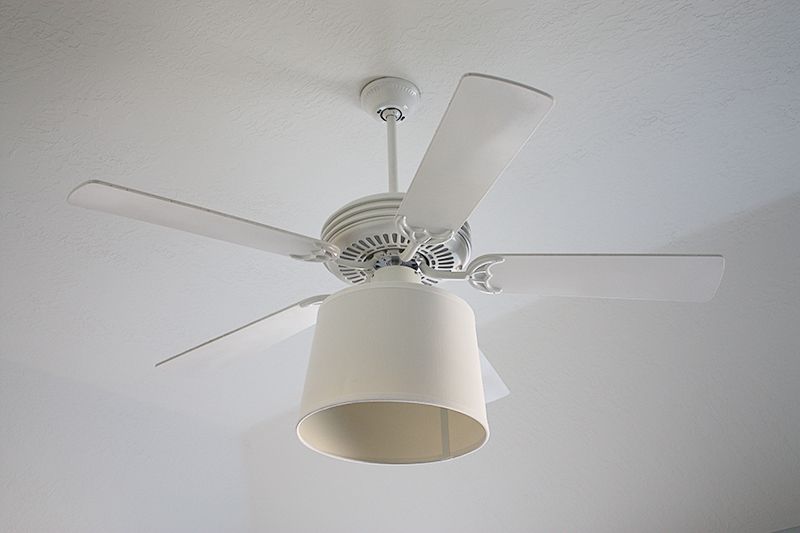
I wanted it to blend in with the room, but also have some style, so I had the idea to attach a drum shade. I found this inexpensive shade at Walmart of all places for $11 (part of their Better Homes and Gardens line). Each fan is different, but for ours, I had to figure out a way to extend the center rod down from the fan so I could attach a shade.
Forgive my non technical terms, but here is my best effort at an explanation of how I did it. I found a threaded rod at my hardware store in the lighting accessories department. It comes in all different lengths, and the one I bought came in a package with multiple options. It was about $3.
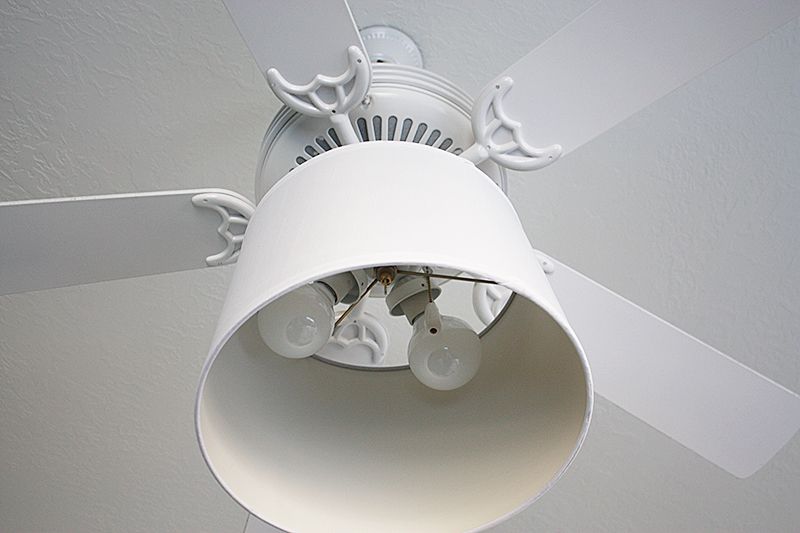
I unscrewed the original threaded rod, and replaced it with my new one. I screwed in the new rod, and then put the shad in place, and screwed on the original nut.
One side note: the drum shade attachment wasn’t big enough for the rod. I had to drill the ring on the drum shade with a larger bit to open it up a bit more. Then it fit perfectly. I imagine every fan and lamp shade combo will be unique, so just keep in mind it may not fit perfectly, in which case you can drill the shade, or do what I did to fix my ikea lamp shade on my spray painted lamps.
The bottom of the drum shade is open, so you can still look up and see inside if you’re directly under it. I found these cool globe bulbs at the hardware store as well, and I think they finish it off nicely.
And there you have it. A ceiling eye sore no more. It was so easy, I should have done it a long time ago. The entire project cost under $20 and an afternoon of work. And come summer time, I’ll be mighty happy I didn’t get rid of the fan and replace it with a (more expensive) different option.
Now go forth, my friends, and give your ceiling fans a facelift. It’s amazing what some paint and a drum shade can do.
Happy Monday!

Leave a Reply


back to top
@jenniferstagg
shop

We're a full-service design firm and home furnishings shop built around the philosophy that a well-designed home should be beautiful, personal, cohesive, and complete. We think home is the most important place on the planet and when you live in a home that is perfectly you, it changes your life. Don't believe us? Stick around. We're confident we'll change your mind.
hello there!
Follow Along
@jenniferstagg
Hey, let's be friends
Exclusive projects, discounts, and extra goodies all in your inbox. And don’t worry- your email is for our eyes only.

My Goodness! I love it! You certainly have an eye for improving and glamorizing a room. Goodbye 1992, Hello gorgeous, modern ceiling fan. I am super impressed.
What a sweet compliment- thank you! And thanks for reading 🙂
Great example showing that ceiling fans can be really stylish too! Nice work.
How many lights did your fan have? I’ve been finding kits for 3 light fans, but not 4 which is what I have. Do you have any photos of the threaded rod and where it actually attaches to the shade?
Thanks!
Hi there, I think the light had three lights. I don’t have any additional photos– the project was from a few years ago. I’m sorry I can’t be of more help!
[…] DIY CEILING FAN DRUM SHADE UPGRADE […]
[…] DIY CEILING FAN DRUM SHADE UPGRADE […]
[…] DIY CEILING FAN DRUM SHADE UPGRADE […]
I have a ceiling fan with 1 light and having a dickens of time trying to find a drum shade that will work, what is the size of the drum size you used?
Hi there! I would just buy a couple options and try them out.