

")
")
")


THRIFTED ROCKING HORSE RESCUE
January 17, 2014
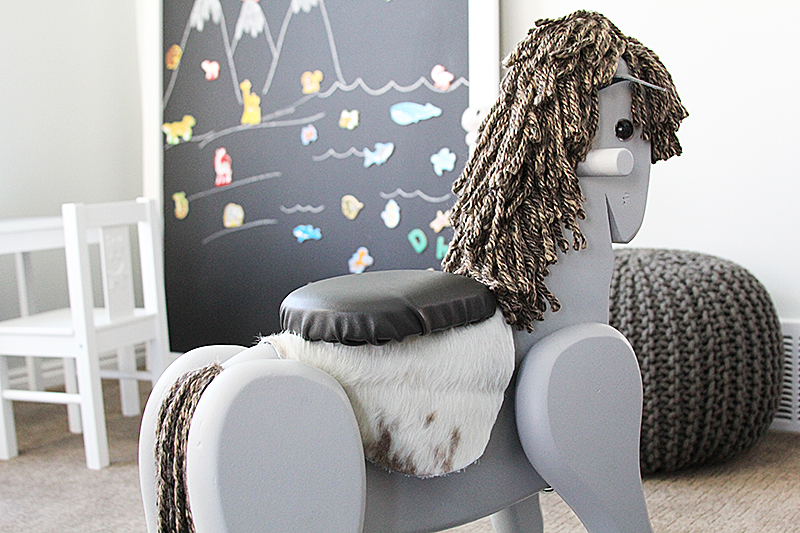
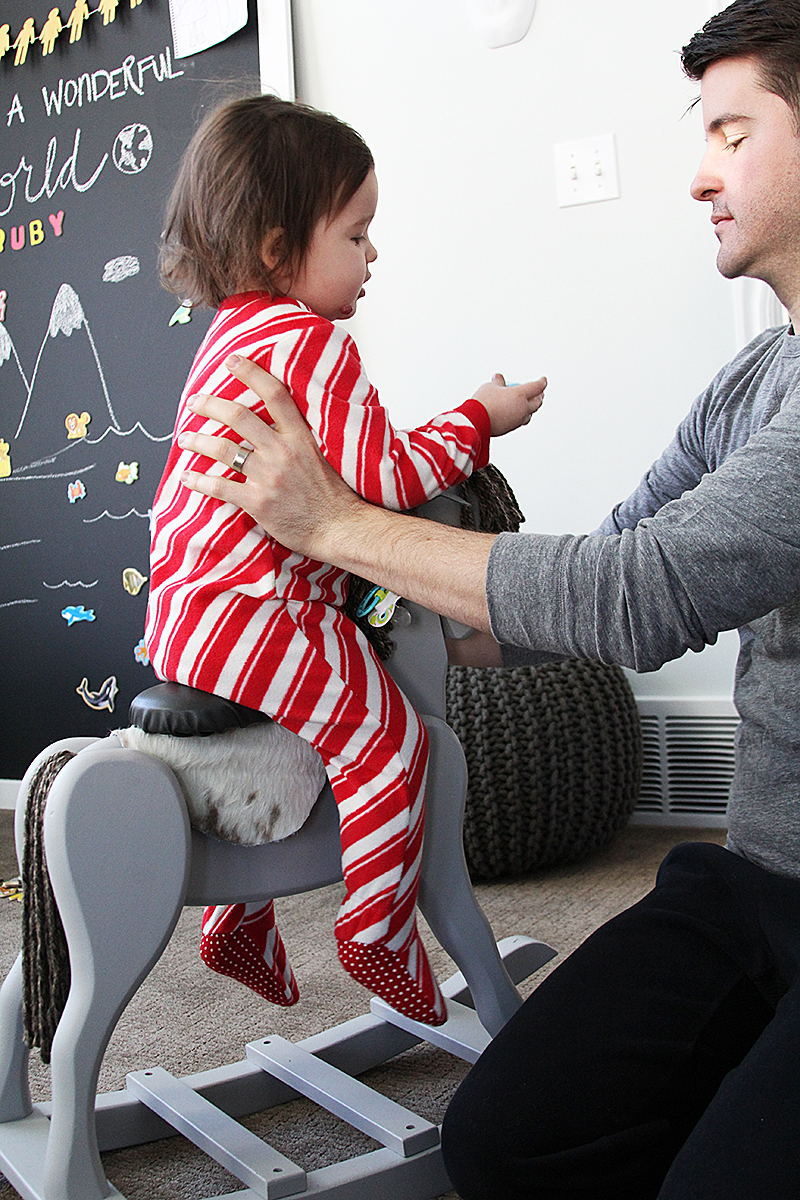
Every child needs a rocking horse, in my opinion. I mean, come on. How can one gallop away from arrows being shot in their direction, or trot toward prince charming, or even ride off into the sunset without one? My Ruby needed a trusty steed for her playroom, and I found this sad looking fellow for $6 at a local thrift store a few months ago.
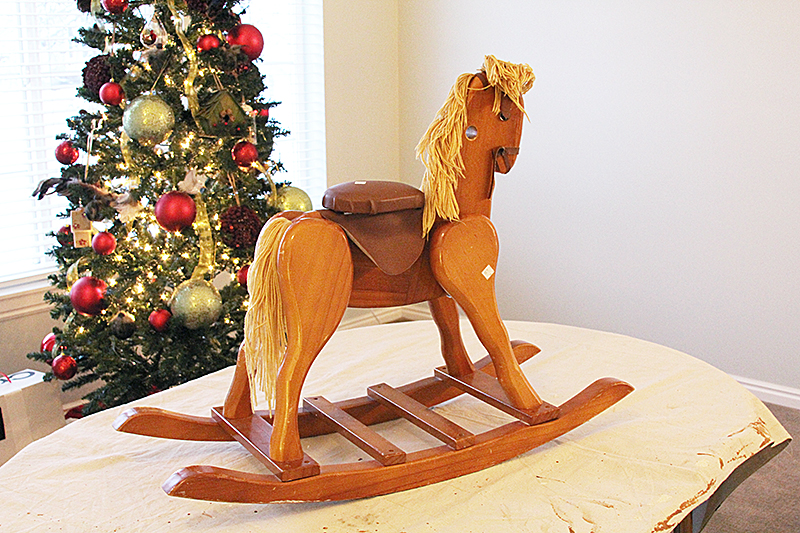
He was brown and dirty. His handlebars were missing and he had clearly been abandoned. But I knew it would just take some love and a makeover and he could be a stallion worthy of my little miss.
First on the agenda: a fresh coat of paint. We had been testing paint colors for the upstairs bathroom so I had several small cans of gray paint sample outcasts. I found one that was the same hue as the teepee fabric. Sweet! I didn’t have to spend a dime on paint. (I always save paint samples for small future projects. It’s a way to avoid just wasting it, and it saves you money!).
Before I took it apart, I snapped a lot of photos so I could remember how to put everything back together.
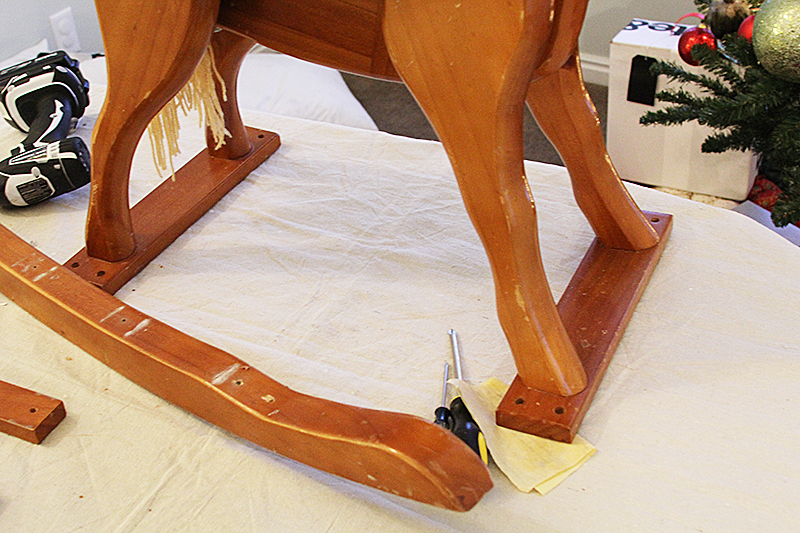
The horse was constructed really well. It was solid wood. And someone was a smarty when they made it– all of the legs were already labeled right and left. Pulling out all of the little nails was a job. They were in there pretty tight.

I taped off the eyes, removed all of the hair (it was stapled in, so I used some pliers to pull it all free), I gave it all a nice gentle sanding, wiped off all of the dust with a clean cloth, then painted three nice coats using a quality roller. I only brushed a very small part around the eyes. I recommend using a roller when painting as much as possible to avoid brush strokes, as that’s one of the dead giveaways your project was a DIY rather than a professional job.
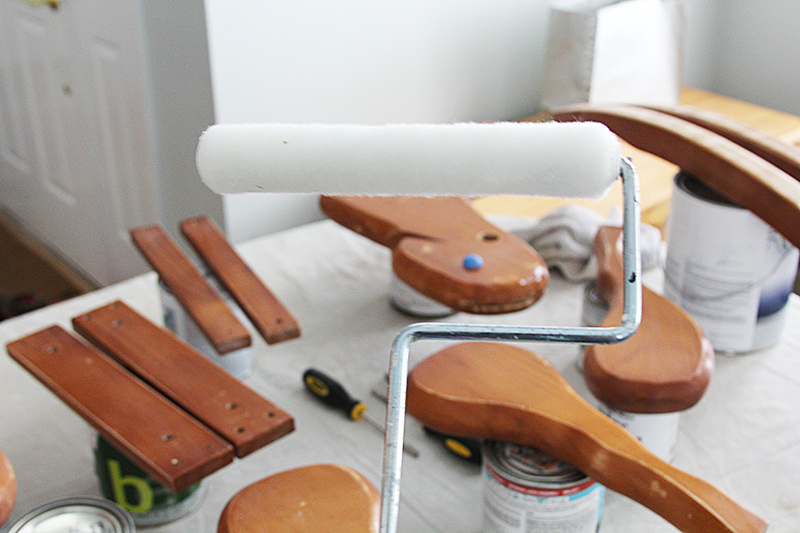
I also got a new handle, cut it to size, then sanded the edges so it was nice and rounded and smooth. It got three coats of paint as well.
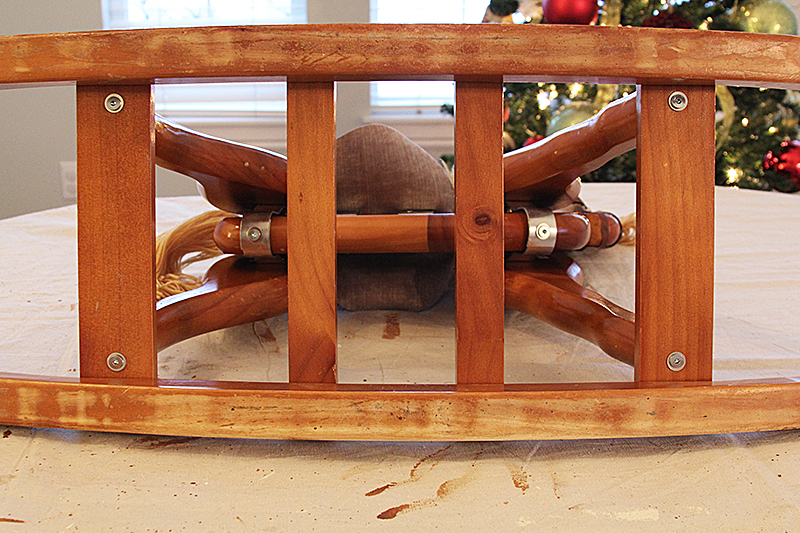
After it was all dry, I carefully put it all back together and got started not the finishing touches, starting with the saddle.
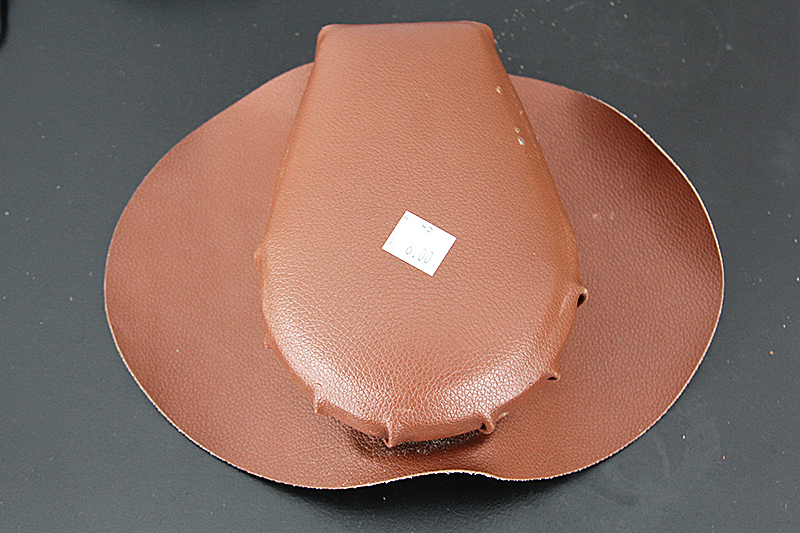
I wanted it to feel and look more like a real horse, not just a toy. I found a bag of “leather scraps” at Michael’s for $6. It was sort of like a grab bag of different colors and textures, but it had this beautiful white/gray piece. I loved it.
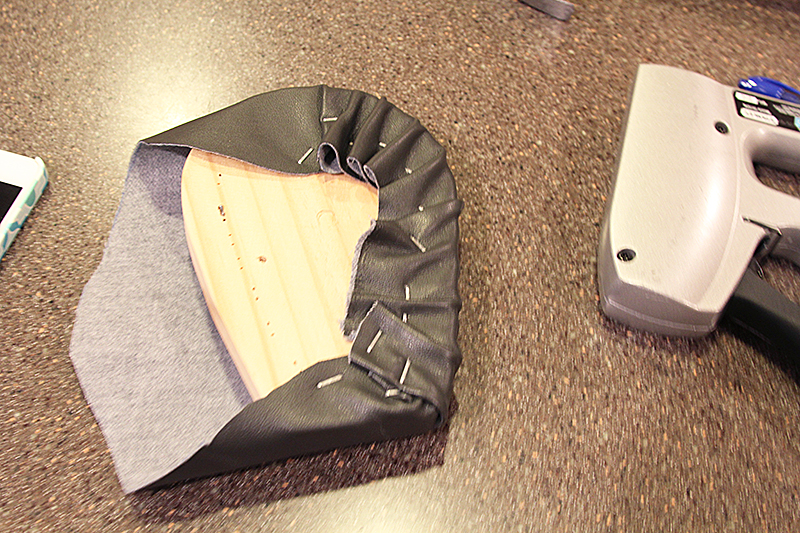
I used the existing pieces as a pattern and cut out a saddle out of the leather. I used a pen to trace where the slits for the attachment were, then used a razor blade run over it again and again until it made the same size slit.

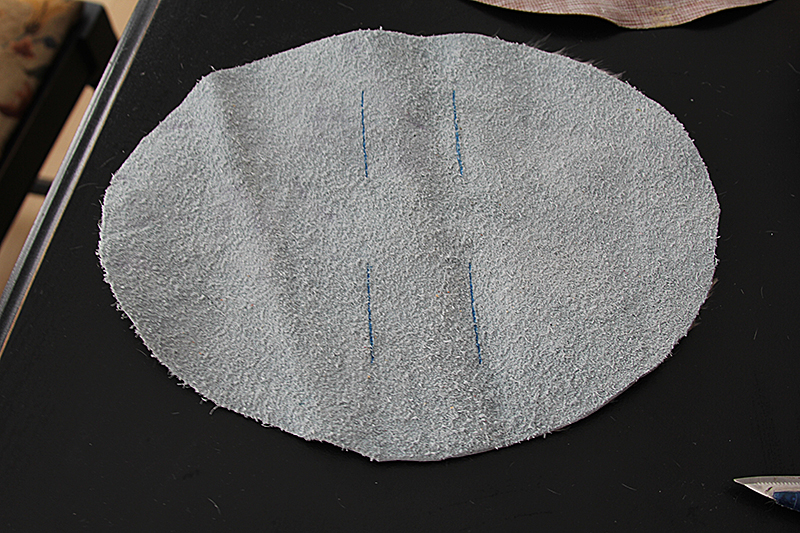
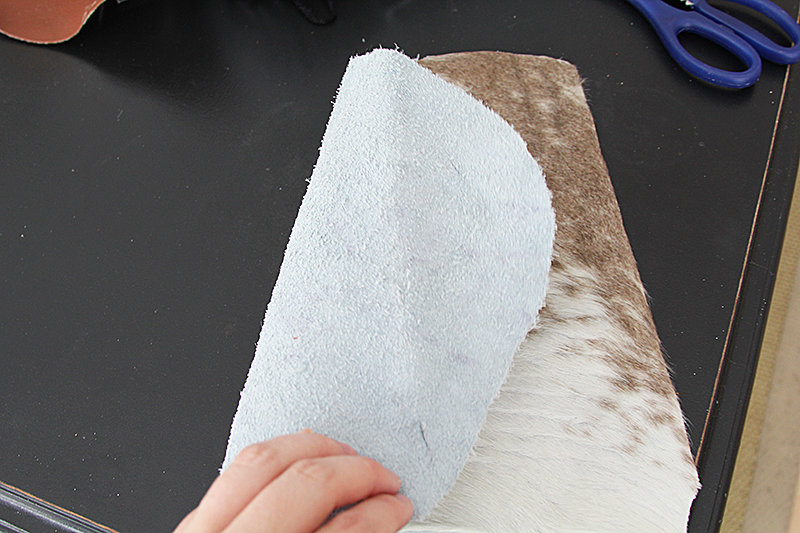
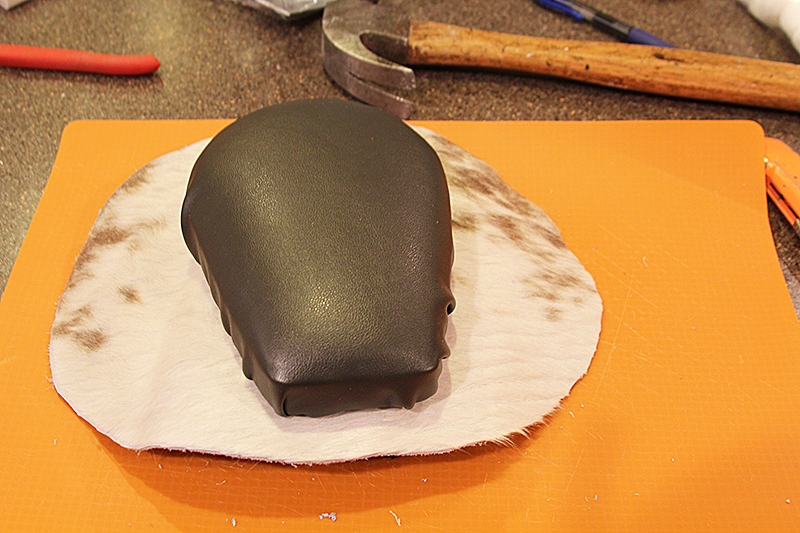
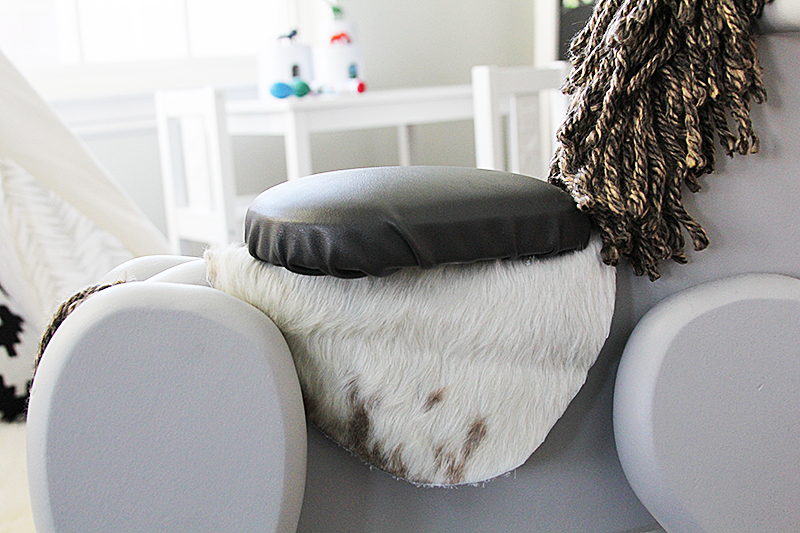
I had some of this pretty gray vinyl leftover from a different project and used it for the seat cover and ears. It is soft and buttery feeling– not plastic like some vinyl. I again used the original pieces as patterns. After removing all of the screws and staples, I laid the pieces flat on the new fabric, then used a pen to trace around them. I cut them out, and stapled the new seat cover. I folded the ears in the right position, then nailed them into place.

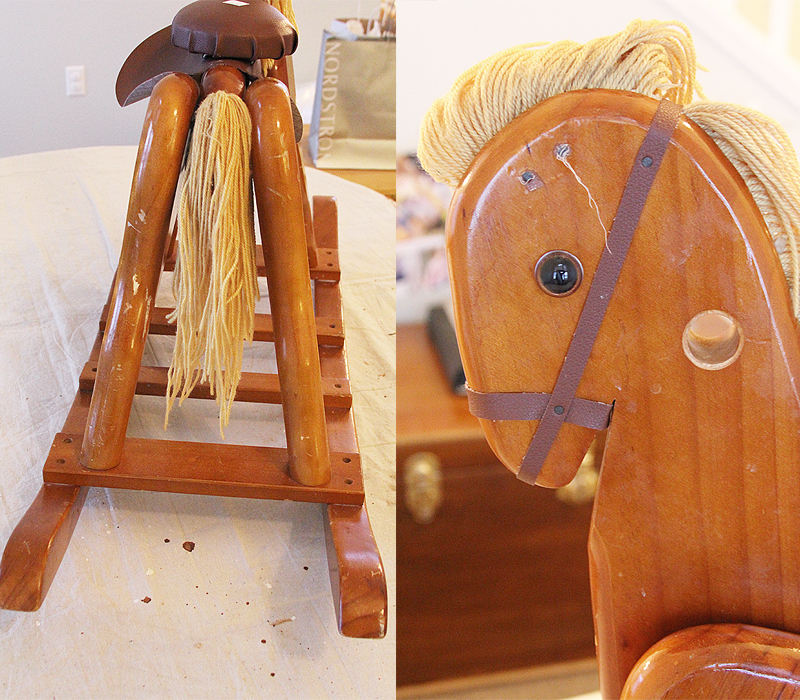
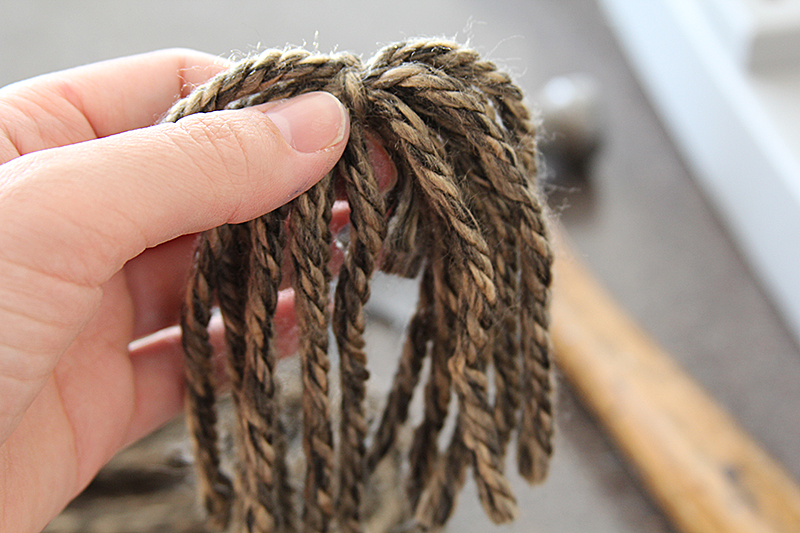
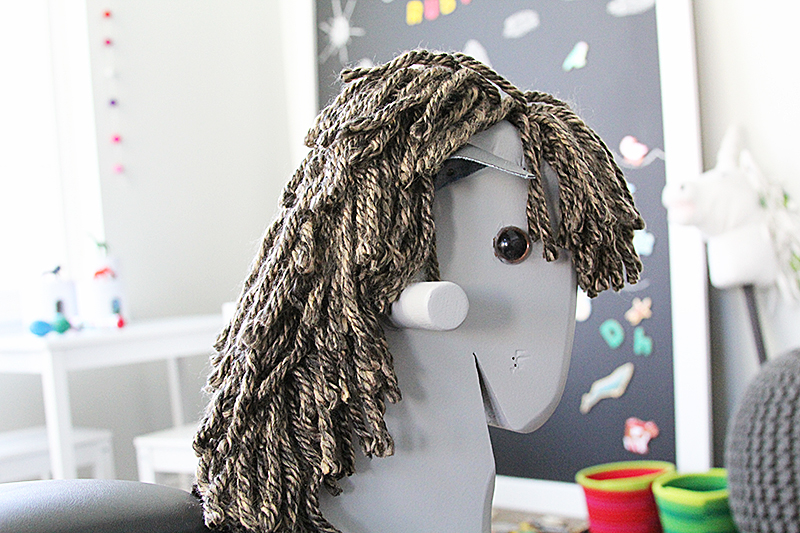
For the hair, I was down to the wire. It was Christmas Eve (yeep!) and I needed yarn. I went to the only store open– Walmart– and grabbed a few different options. This ultra soft brown/gray mixed yarn was the clear winner. I think it looks more like real hair than yarn and it’s thick.
For the mane, I looped the yarn around and around a little bit looser than my hand, then tied a piece tightly with a knot. I then cut the opposite side all the way through the yarn so it made sort of a ponytail with two sides. Then I used 1/2 inch staples and my staple gun to secure it back into place. It was surprisingly easy.
I did the same thing for the tail, but longer hair. I gave him a little trim to make sure the hair wasn’t in his eyes. I was going to make a new bridle, but frankly, I ran out of time and now that he doesn’t have one, I kind of like him free and wild.
I just love how this project turned out, and I think it’s such a pretty piece in the room. And since rescuing this horse from the depths of thrift store abandonment, I have seen two other solid wood rocking horses that would make great toys for someone, if you’re willing to just put in a little work. Because I used leftover materials I already had on hand, I spent less than $20 on the horse, the yarn, and the leather.

And I think he is a rockin’ rocking horse, if I do say so myself. Now go find yourself a rocking horse rescue at a thrift store or yard sale.
PS: I’m over on the darling blog Bubby & Bean sharing my top 5 ways to help a new mother. All of these suggestions were kind deeds performed for me, and I’m so very grateful!
PS 2: Check withHEART over on What To Expect (thanks for the shoutout!)
PS 3: Thanks to Design Addict Mom for the feature on Ruby’s playroom!
PS 4: Check out this groovy article on my DIY headboard on the DIY Decorating Addict ITunes App Magazine. Who knew there was such a thing as a ITunes Magazine, but there is. And it’s super cool.
PS 5: Happy weekend!

Leave a Reply


back to top
@jenniferstagg
shop

We're a full-service design firm and home furnishings shop built around the philosophy that a well-designed home should be beautiful, personal, cohesive, and complete. We think home is the most important place on the planet and when you live in a home that is perfectly you, it changes your life. Don't believe us? Stick around. We're confident we'll change your mind.
hello there!
Follow Along
@jenniferstagg
Hey, let's be friends
Exclusive projects, discounts, and extra goodies all in your inbox. And don’t worry- your email is for our eyes only.

[…] dreamed this piece up after I had a bunch of leather scraps left over from Ruby’s rocking horse. They were so pretty, and I was just hanging on to them until I figured out what to use them for. […]
[…] rocking horse was a thrift store rescue I refinished for Ruby two years ago for […]
How is the yarn holding up? I recently got a rocking horse and the only thing I needed to change was the mane and tail. Yarn is the medium I plan on using, but I know that it can unravel/fray. Any update as to how it worked? Beautiful project, you did an amazing job!
Hi Stephanie, it’s holding up great! My girls aren’t super rough, but we haven’t had any issues at all. Hope that is helpful!
How much yarn is needed to make the mane and tail? You said you looped the yarn around your hand for the mane. Is that the width or length of you hand?Thanks!
Hi there, yes, the width of my hand, then cut one side. I hope that makes sense!
what kind of yarn and how much do I buy.. yours is nice and thick
I have a 30 year old rocking horse that is in pretty good shape but the tail and mane need to be replaced. How did you remove the old mane and tail? Mine looks to be in pretty tight!
Hi Cathy! I used a flat head screw driver (you could also use a butter knife) to pop the staples out. It takes a little work!
Hello! I am refinishing an old rocking horse that did not originally have a mane but I would like to add one! I understand how you made the mane but am having trouble understanding how you attached it. I have a staple gun but am a little unsure how to position the yarn bundles and staple them in order for them to look full like yours did and where you won’t be able to see the staples.
Hi Morgan, I just put the yarn flat on the wood, and put the staple straddling the very center of the yarn to hold tin place. Does the help?
Are the “two ponytails” of each bundle of yarn going up and down or side to side?
I’m not totally sure what you’re asking, but they all go up and down.
I also don’t understand how to position the yarn bundles so you won’t see the staples… if you are standing over the horse looking down, are the yarn bundles placed vertically (up and down) or horizontally (side to side) ??
I also am confused about how to place the yarn bundles so the staples are not seen…. if you’re standing over the horse looking down, do the yarn bundles go vertically (up and down) or horizontally (side to side)???
I know its been awhile but any guess as to how many bundles you used to get it so full?
Hi =)
I’m planning on giving an old rocking horse i found at a garage sale a makeover for my little ones for Christmas this year and I just know this is going to be so helpful and inspiring so thank you! Mine still has the handlebar but it slides right out. Can you tell me more about how you secured yours?
Hi! Thank you for following WithHeart, and for your question. Our daughters love the rocking horse we restored for them, and I’m sure you’re kids will love yours too! I’d suggest putting a good amount of wood glue in the hole, and pushing the handle bar through the hole. Twist the handlebar around a few times to ensure wood glue covers the full surface and makes a good bond. Then wipe off the excess glue with a wet rag or paper towel before it starts to dry. We glued the handlebar before we painted the rocking horse, but you could probably glue it in after you paint if you had to. Good luck!
Could you tell me where you purchased your replacement handle bars? I purchased a wooden rocking horse at goodwill for $5, but it is missing the handle bar and I’m having a difficult time finding a replacement. Thank you!
Hello! Just at Home Depot!
hi – lovely!
How did you secure the saddle to the horse?
Thank you! Everything was staples, and the original screws. I basically just put it all back together the way I took it apart.
This came out so awesome! My mom just recently gave me my old rocking horse that I want to refresh for my baby thats on the way. Do you happen to remember how much yarn you used?
Hello! Thank you! I think I used two packages.
How did you reattach the seat ,,I am working on my first and the wooden seat is screwed on I had hoped to cover the “saddle” but then realized I would be unable to screw it back in place 🙁
Hello! I just drilled through the leather using a power drill.
How did you secure the seat? I’m going to rescue the rocking horse I got at goodwill today for $5 and it doesn’t have a seat but I was thinking of putting one on.
I thrifted a rocking horse as well. Sadly it’s also missing the handles .
Where did you buy yours?