

")
")
")


NO SEW TRIMMED DRAPES AND PELMET BOX
November 5, 2013
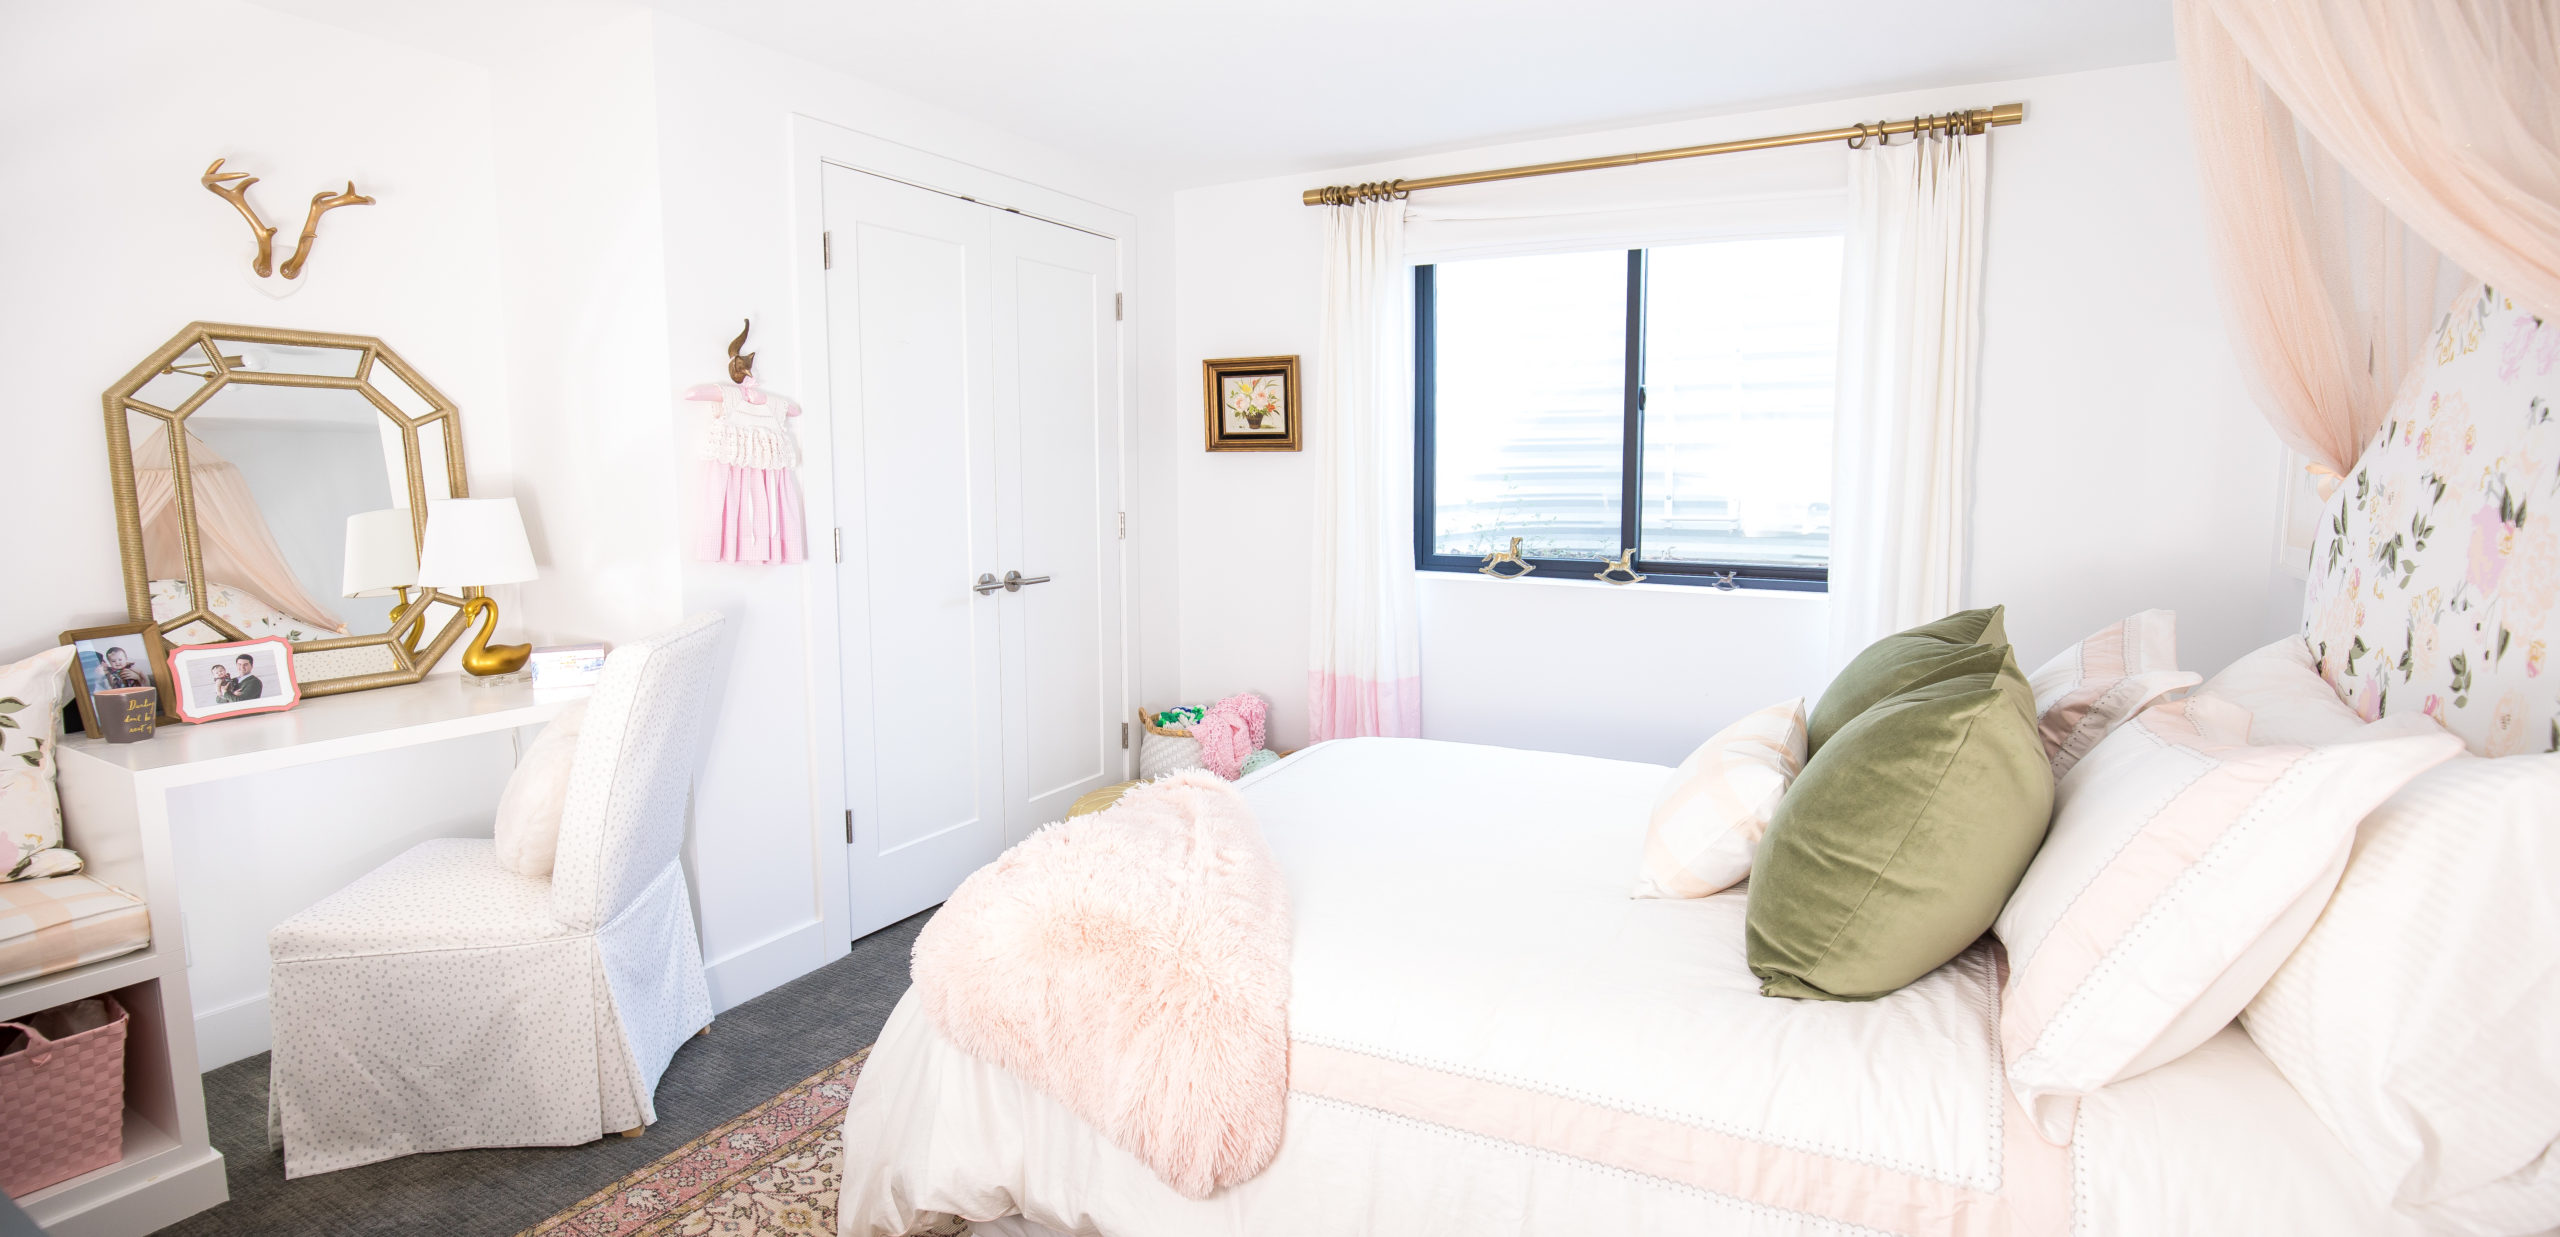
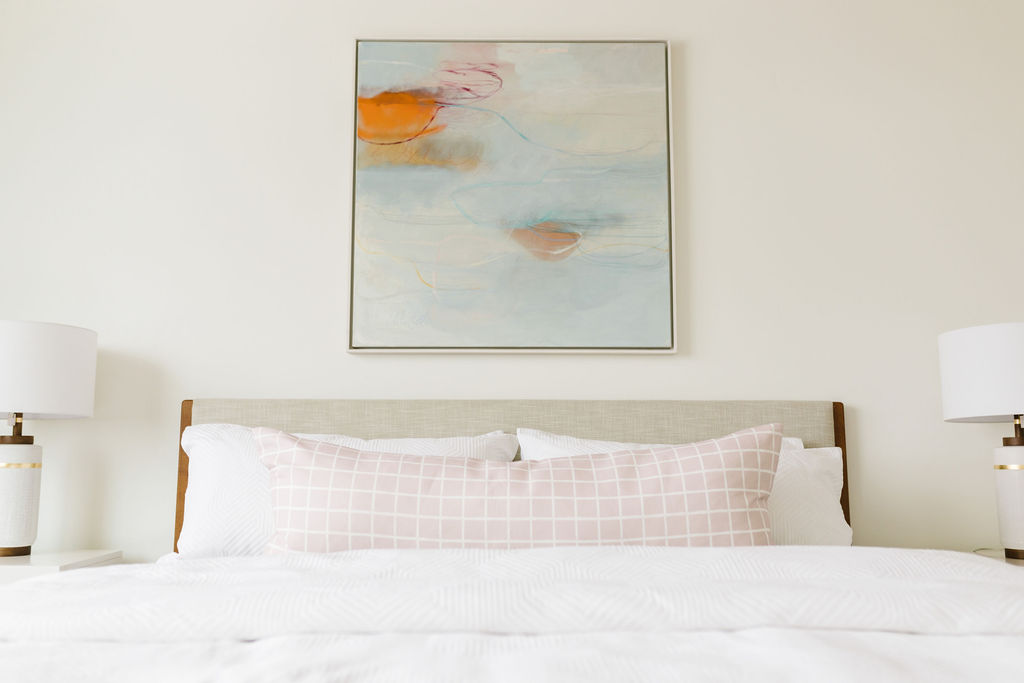
Our strategy with our home remodel has been to go from room to room, complete the reno and design, then move onto the next. I wanted to avoid cutting corners and leaving the design concept partially completed, then lose some of the continuity.
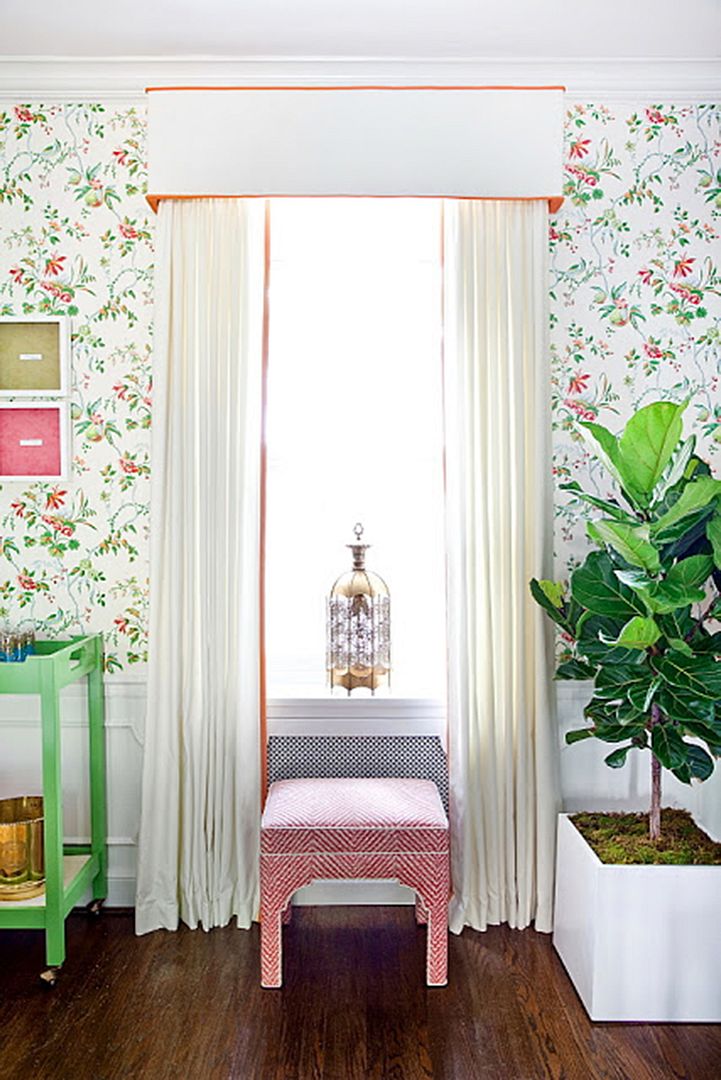
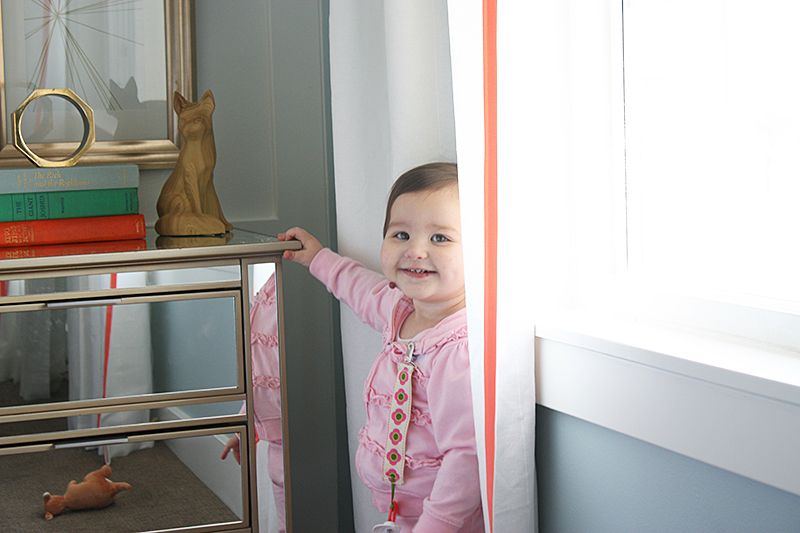
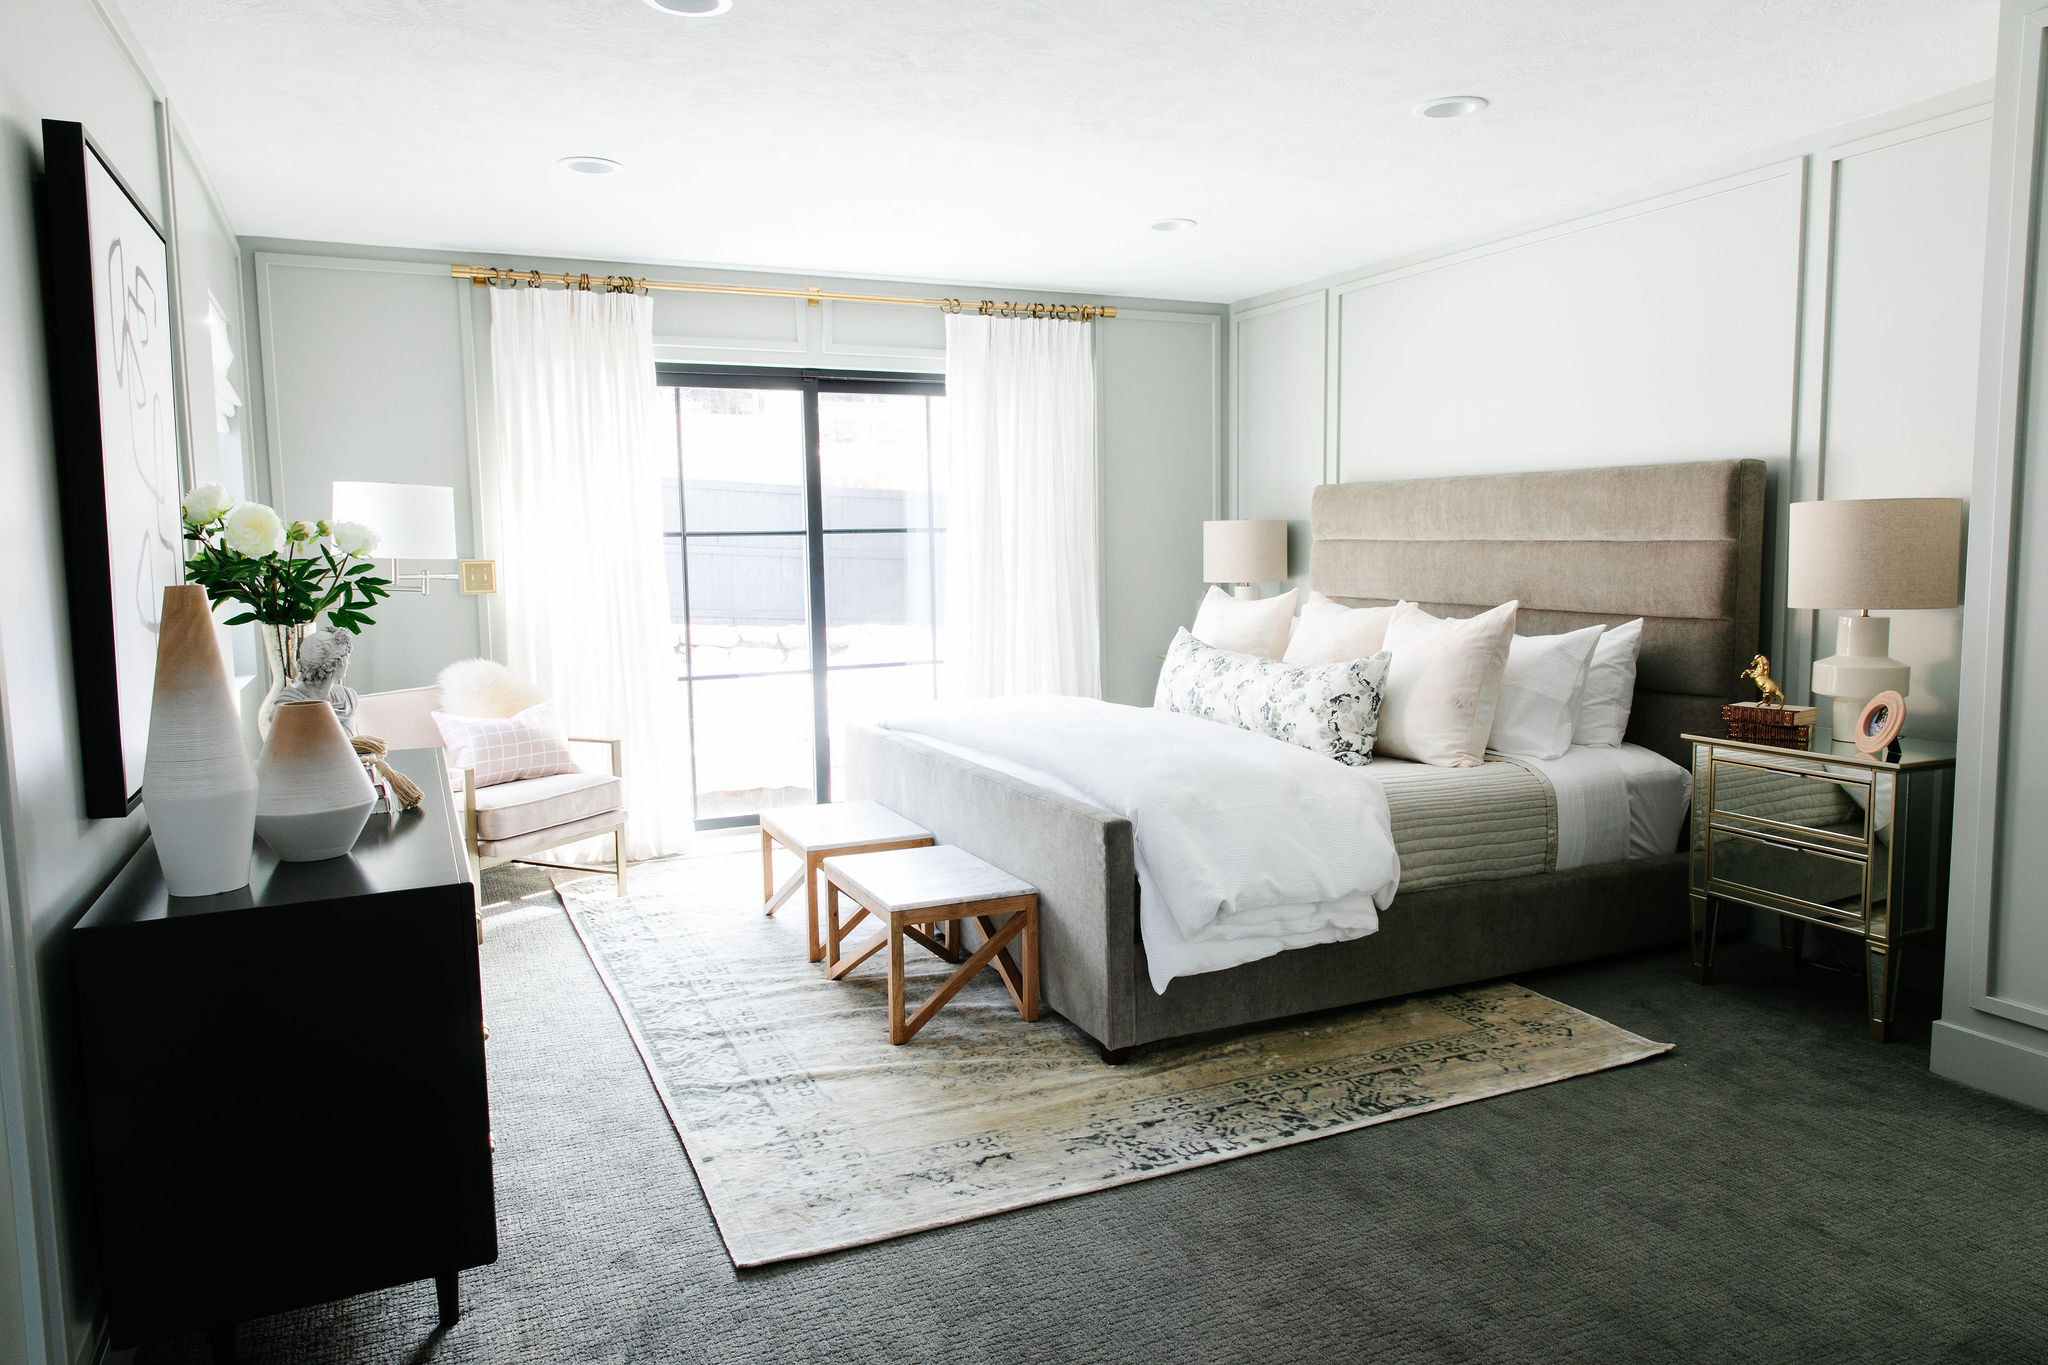
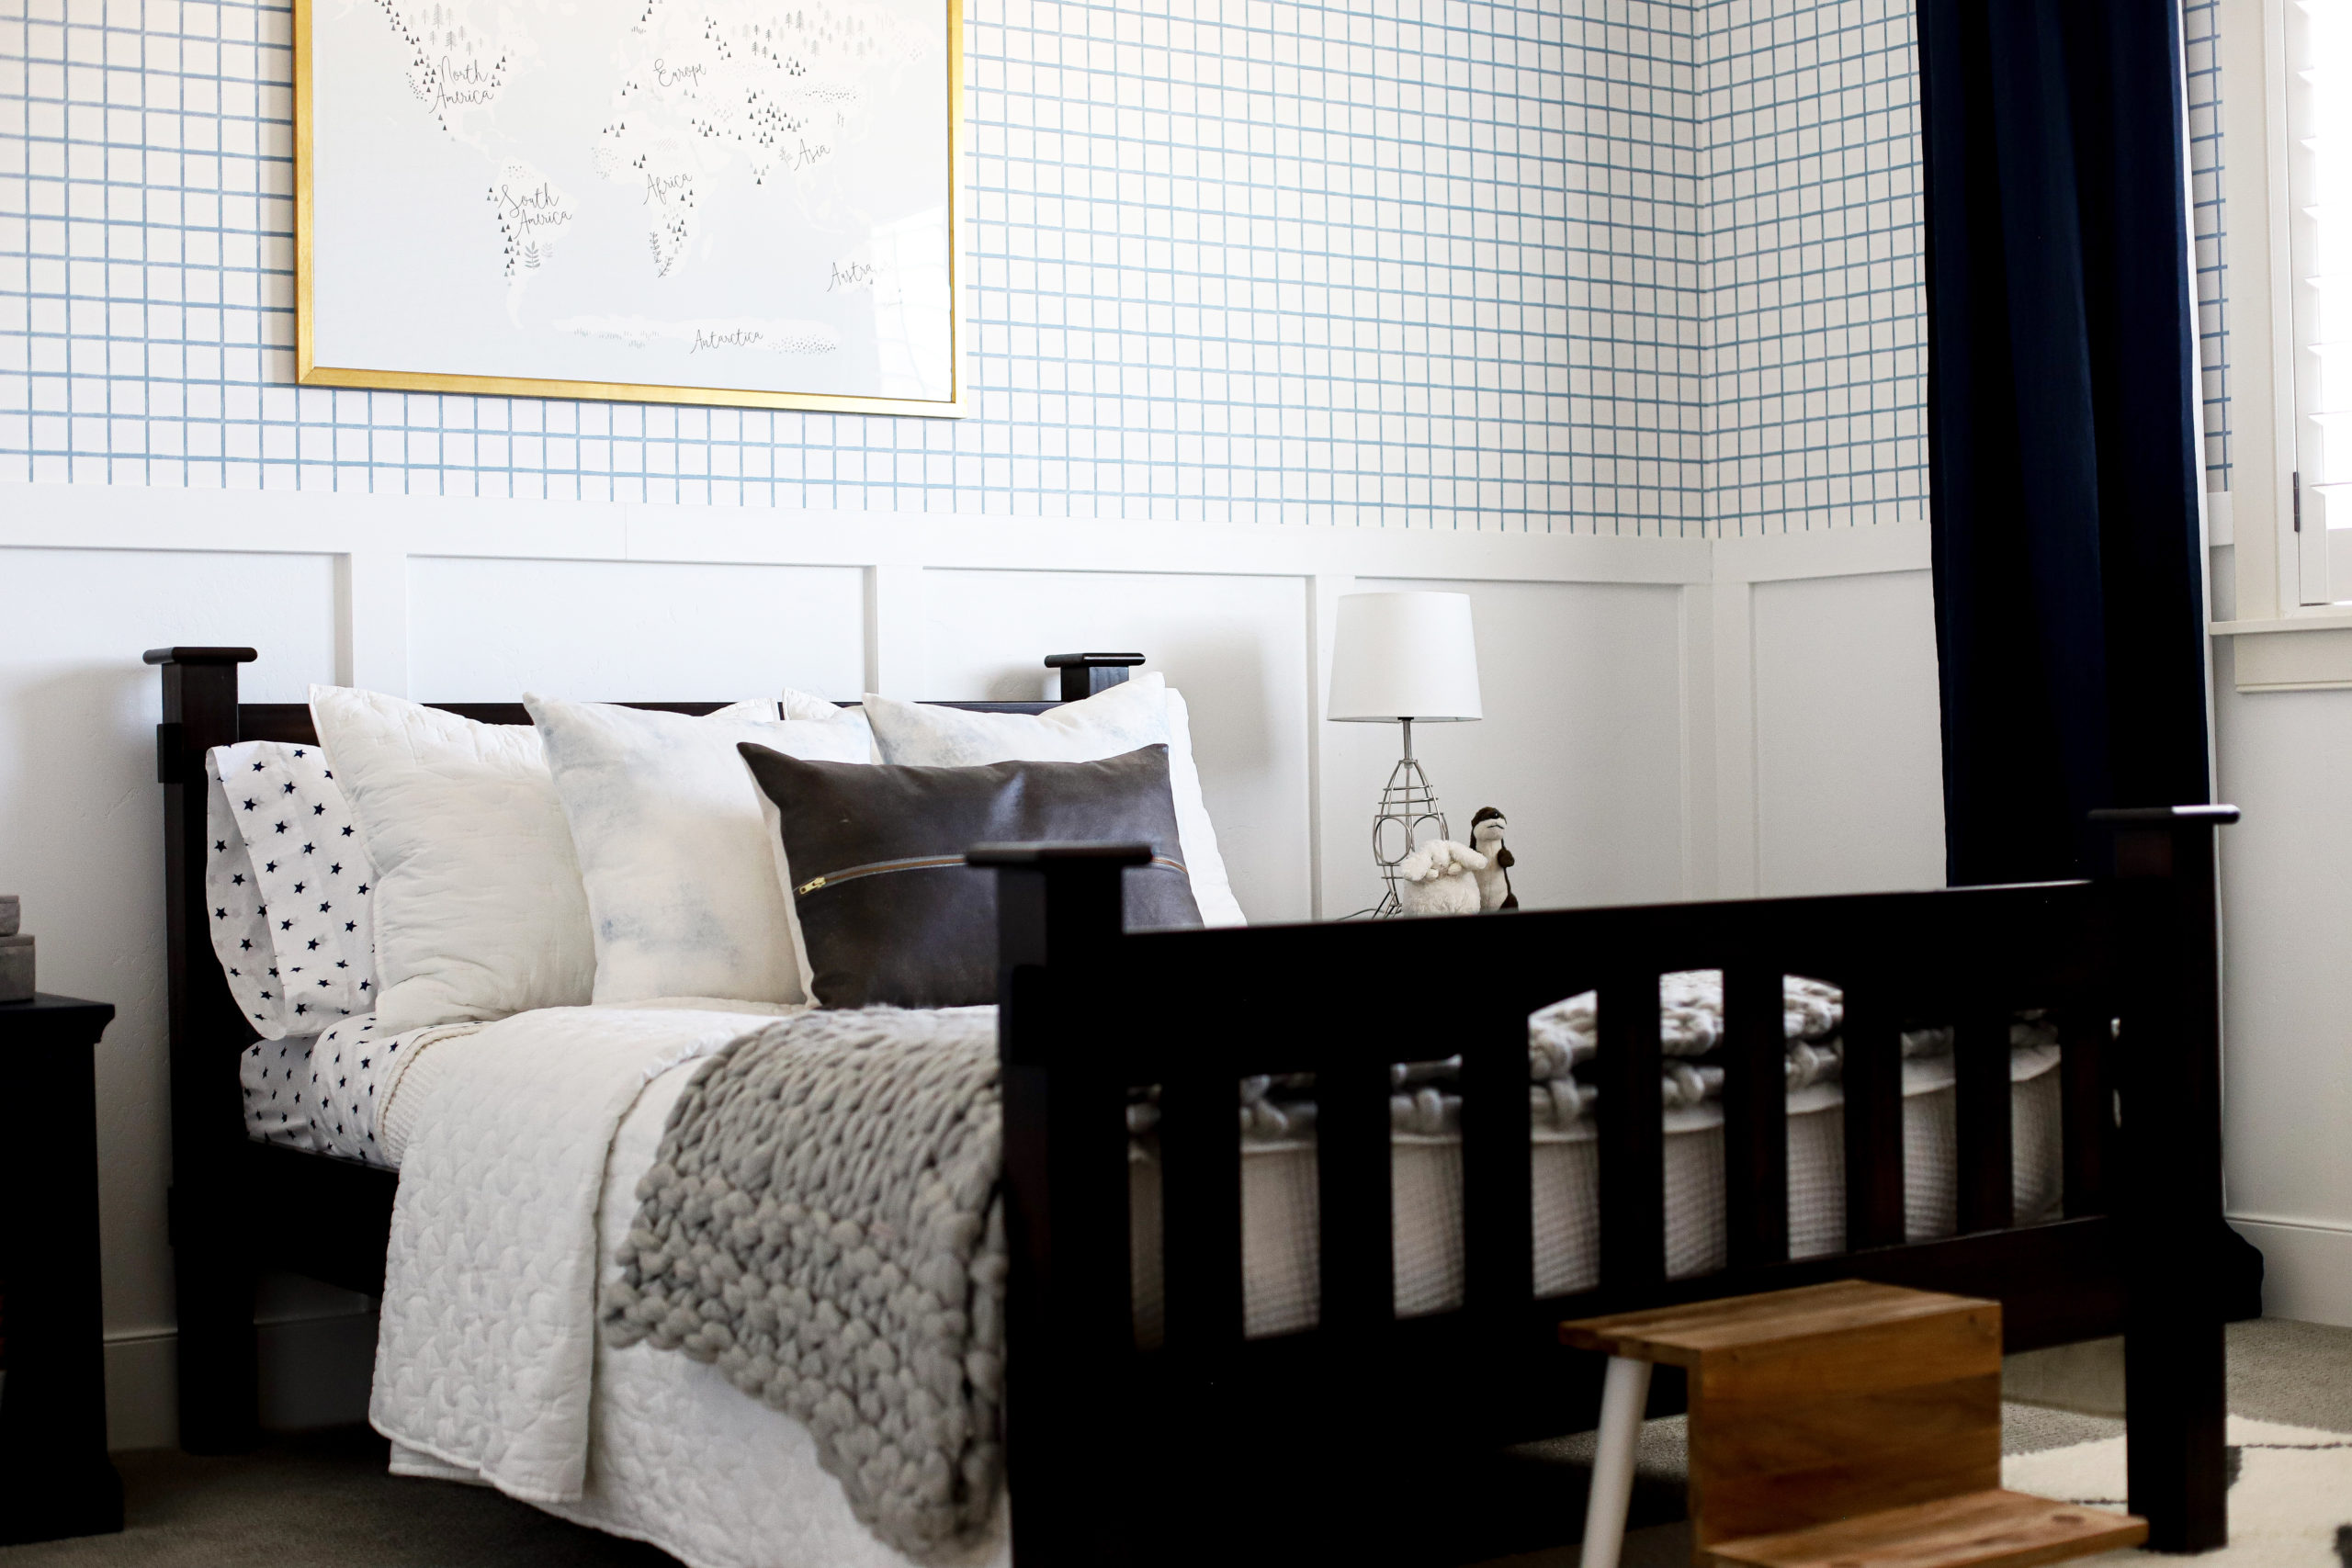
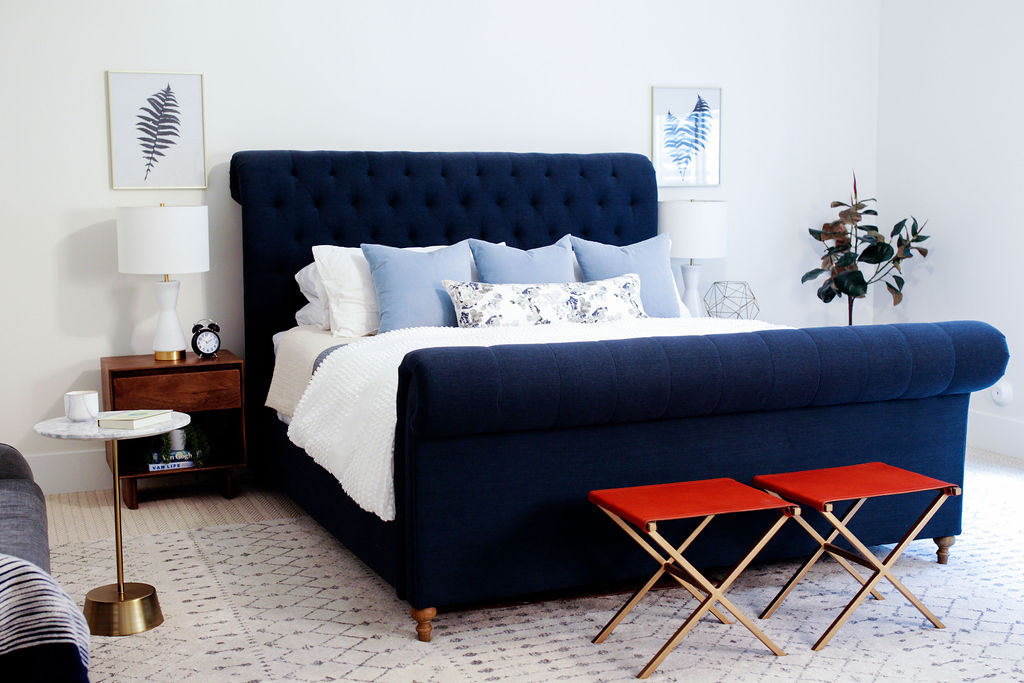
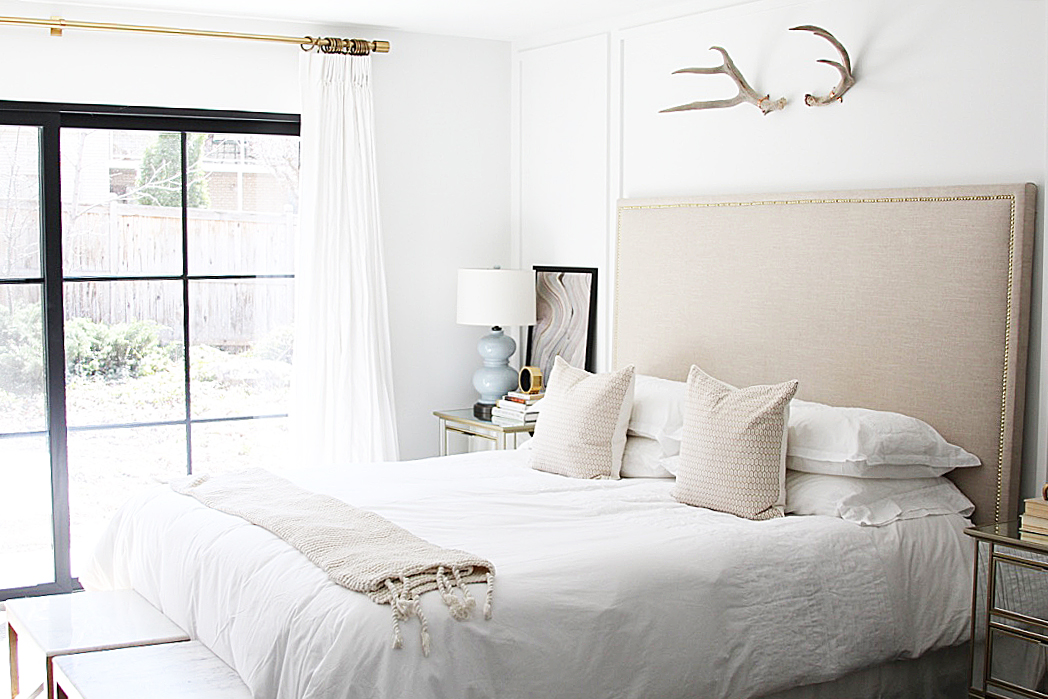
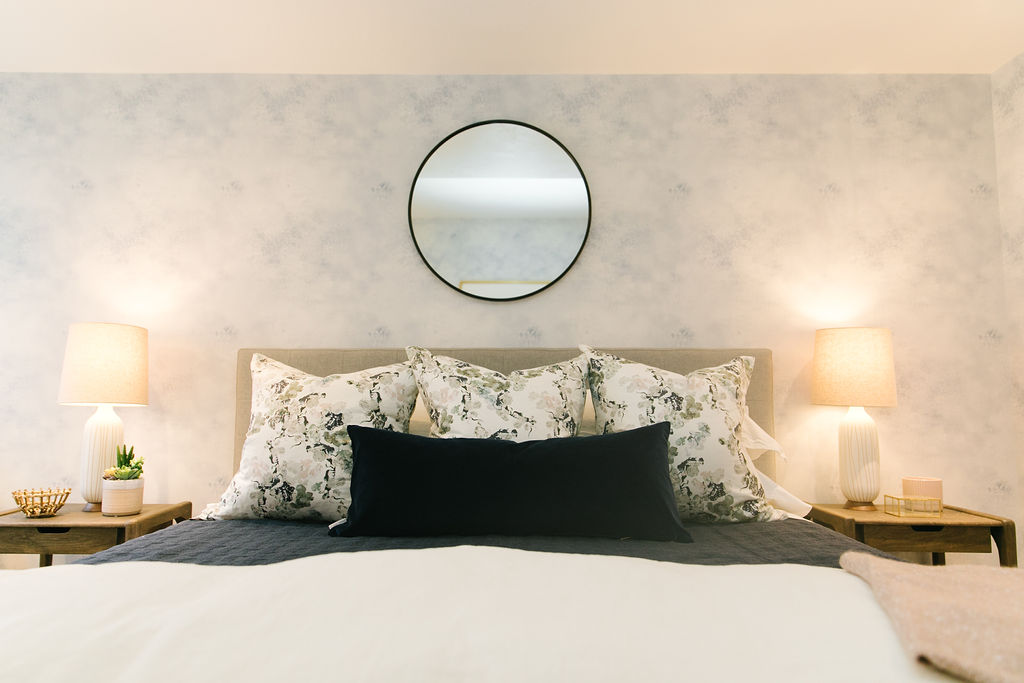
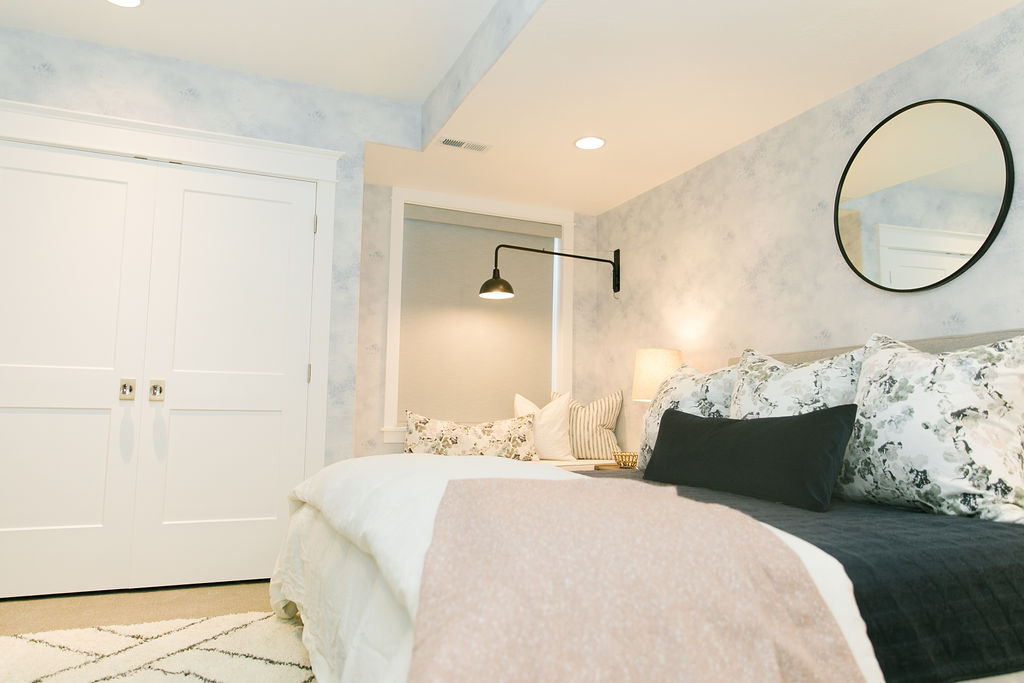
We have just wrapped up our master bedroom re-do and I’m so excited to start planning the next space. But before I do, I want to share all we did in our master bedroom. Today, I’m showing you how to create a custom-looking pelmet box and drapes, with ribbon trim and no sewing. I repeat, no sewing. And it was pretty easy.
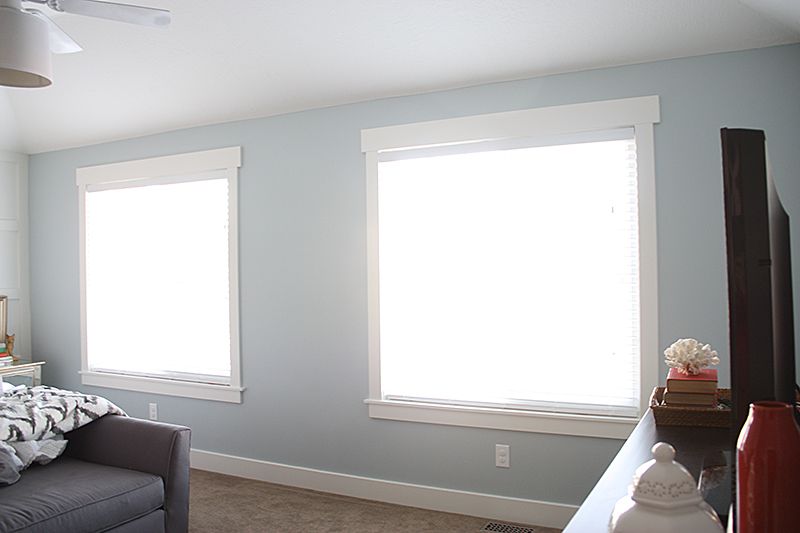
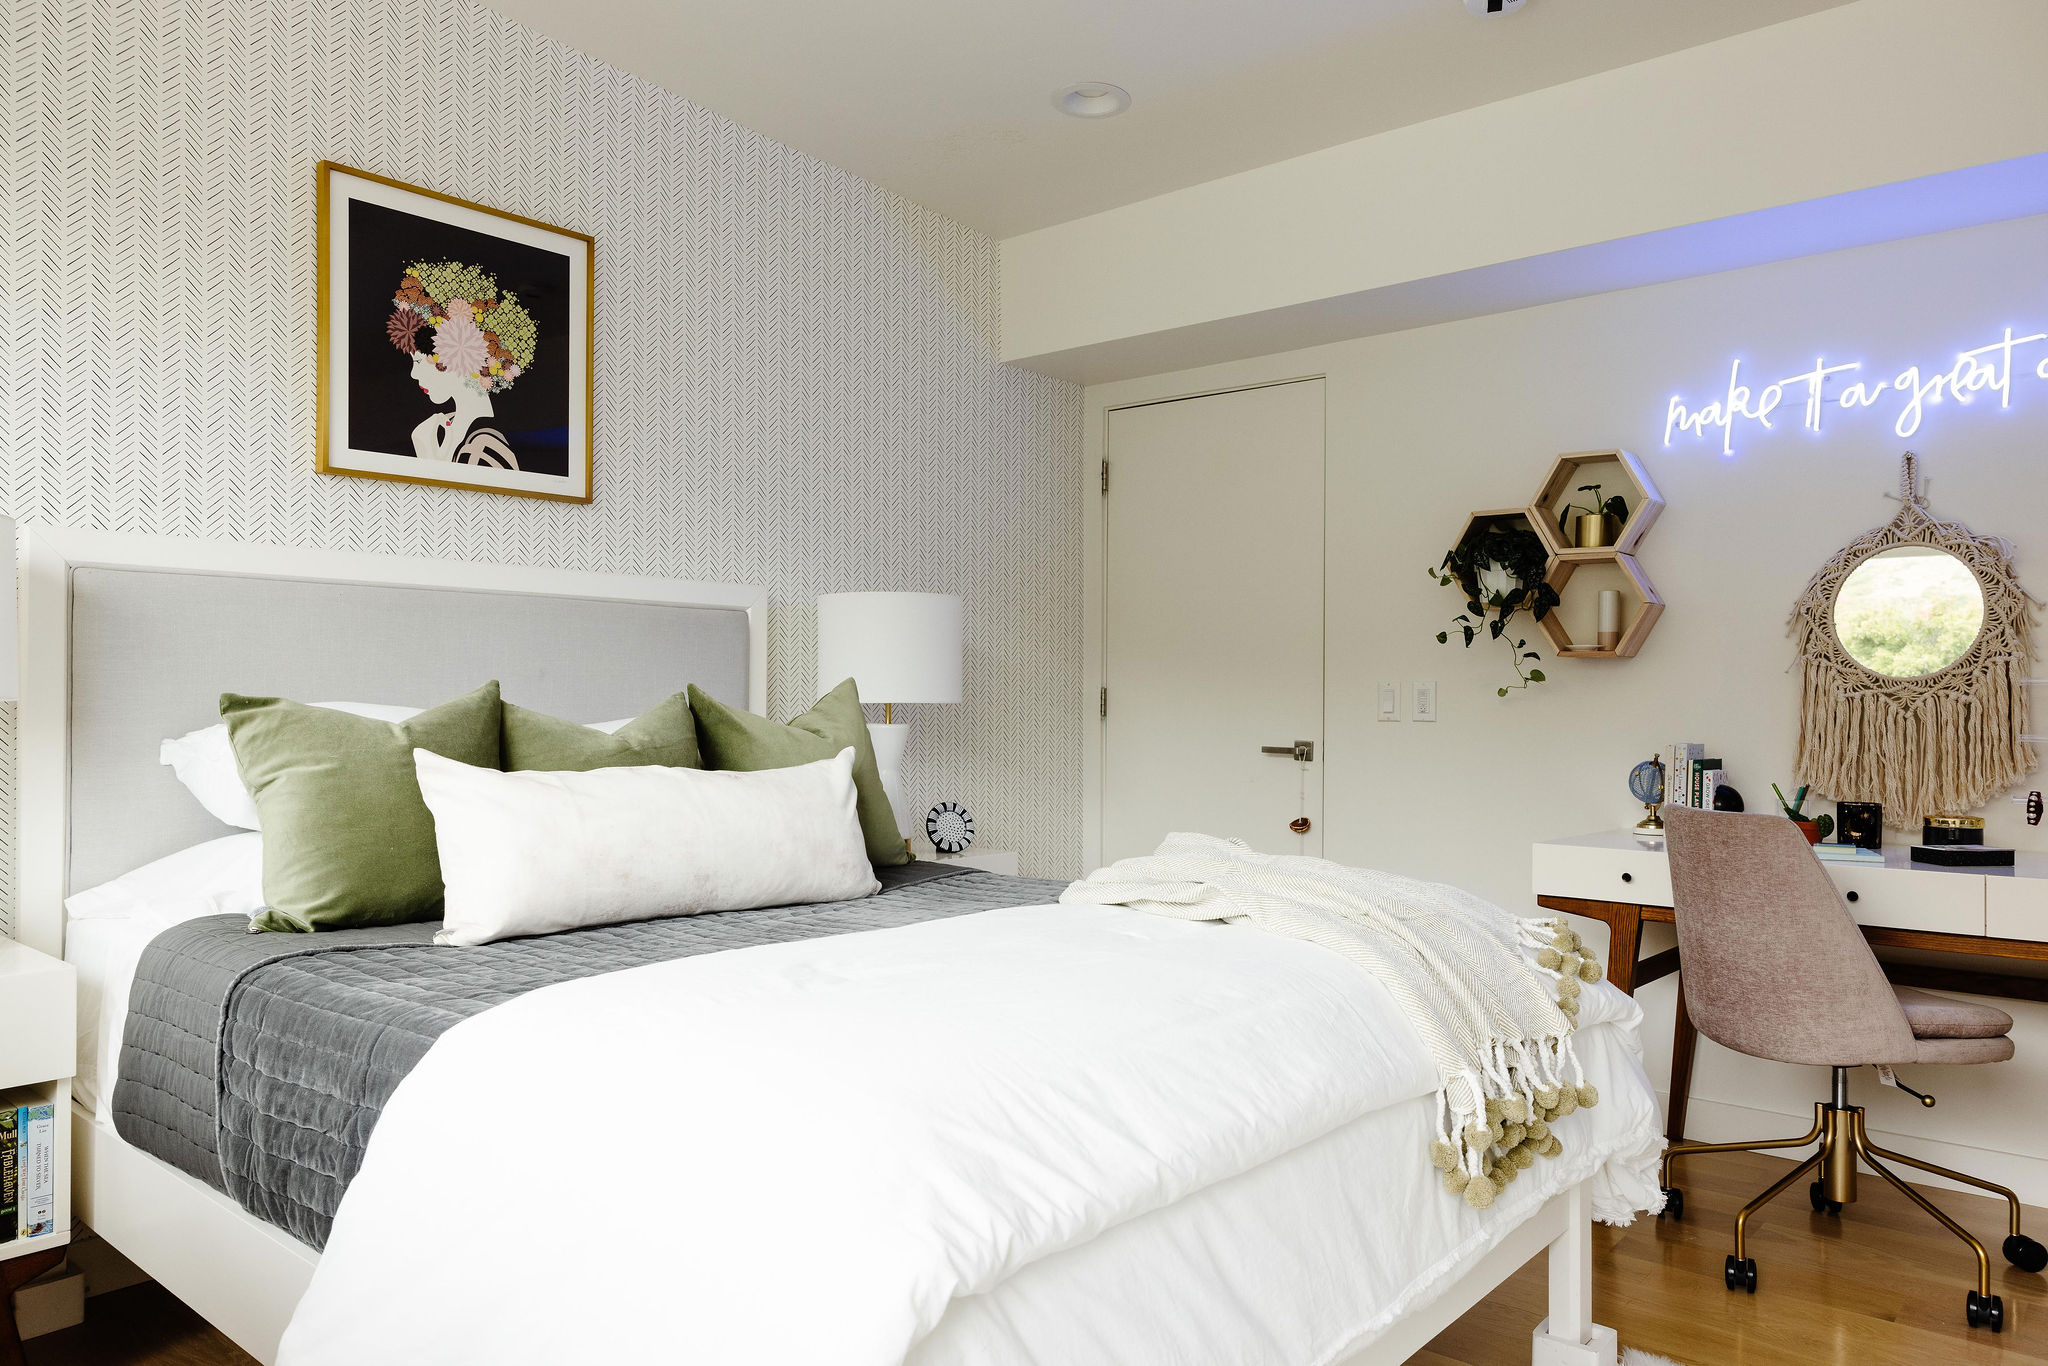
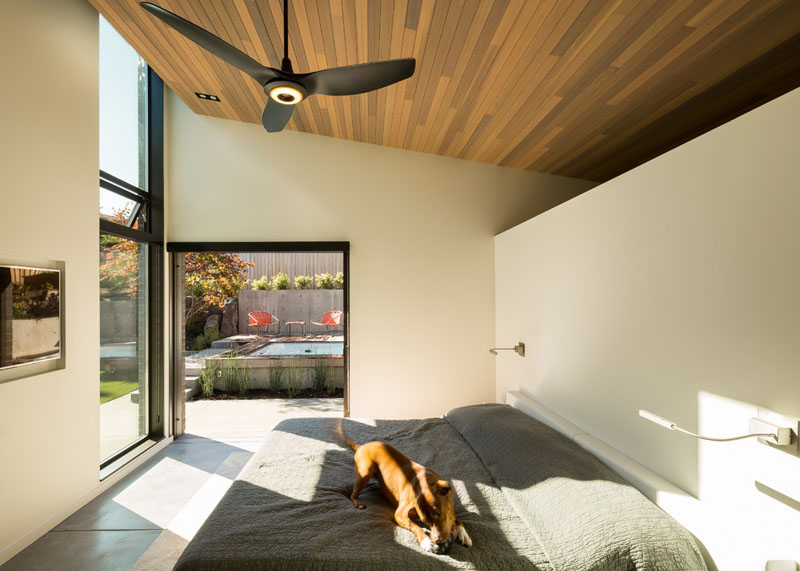
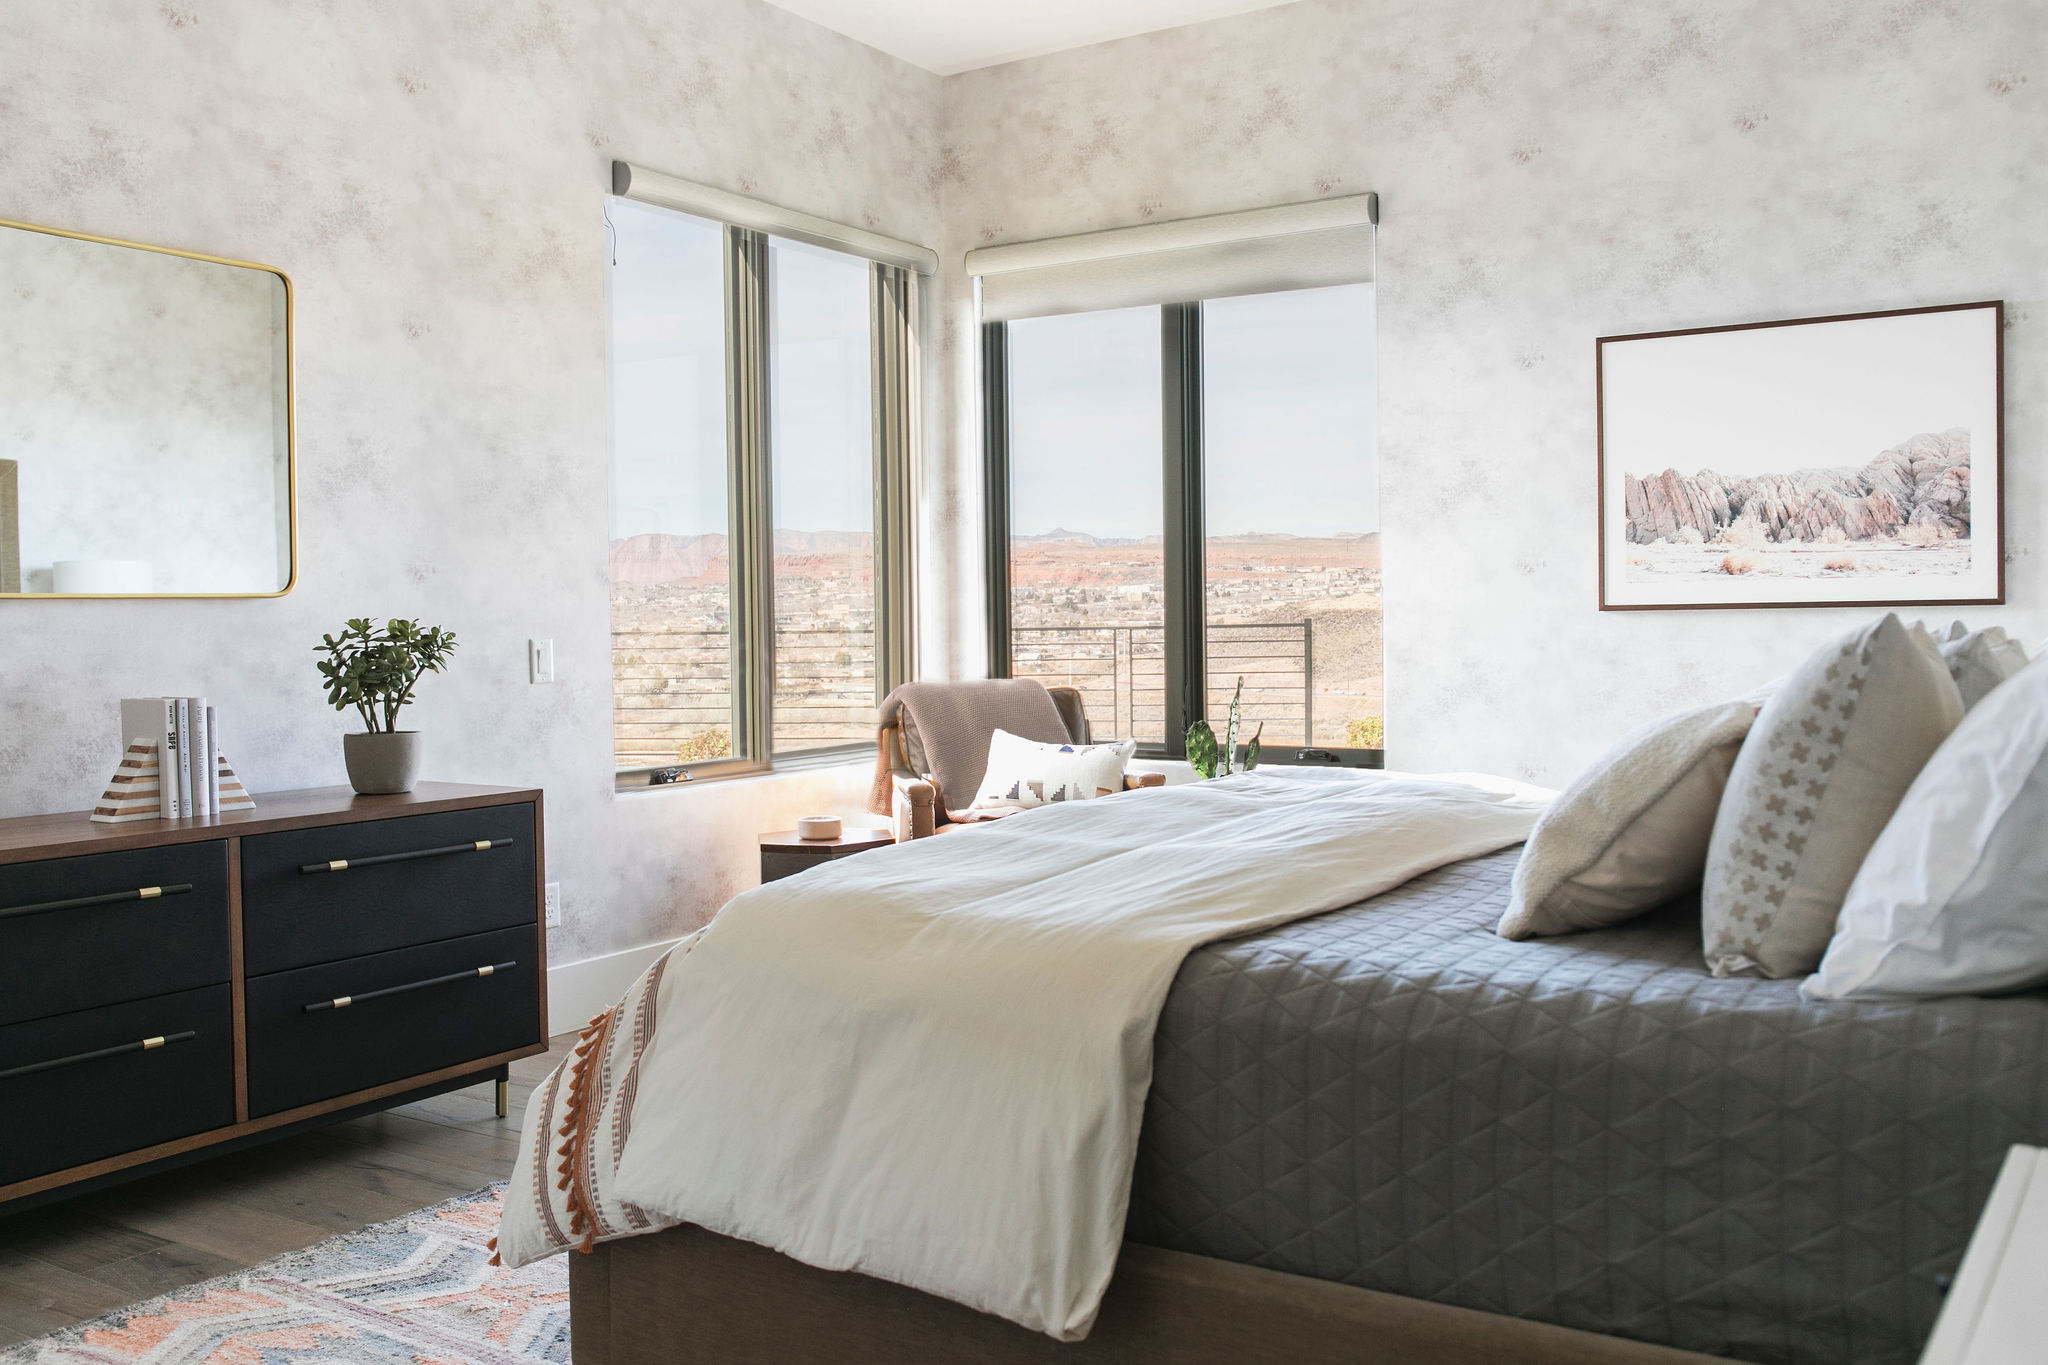
We have two large windows that take up the entire Northern wall of the room. It gets great natural light, so I didn’t want anything too heavy. I wanted something airy, clean, and crisp with some tailored touches. Enter the pelmet box.
Design Manifest

Unknown
I love pelmets. They add class and sophistication to any space. But having them custom made comes with a hefty price tag. I have seen some tutorials online for foam core versions, but I wanted it to look and feel custom, without the custom price tag. And I didn’t want to do any sewing. Sound impossible? I say not.
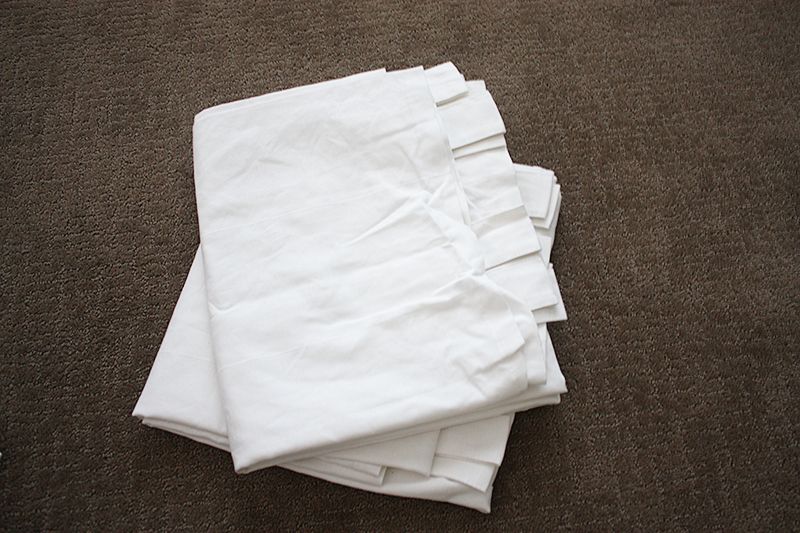
I knew fabric would be the budget buster. To buy enough for all four drapes and extra for the boxes was going to add up (and require sewing). I opted instead for the standard white drapes at IKEA. One set (two drapes) was $20. I bought three sets.
Also from IKEA, I bought the cheapest white curtain rods and rod attachments they had. I found some coral grosgrain ribbon at JoAnn’s, fabric glue, and a roll of standard batting. (FIY– JoAnn’s has a fabulous phone ap where you can pull up coupons right at the checkout. I used two 50% coupons and saved half on the batting and fabric glue. Score!)

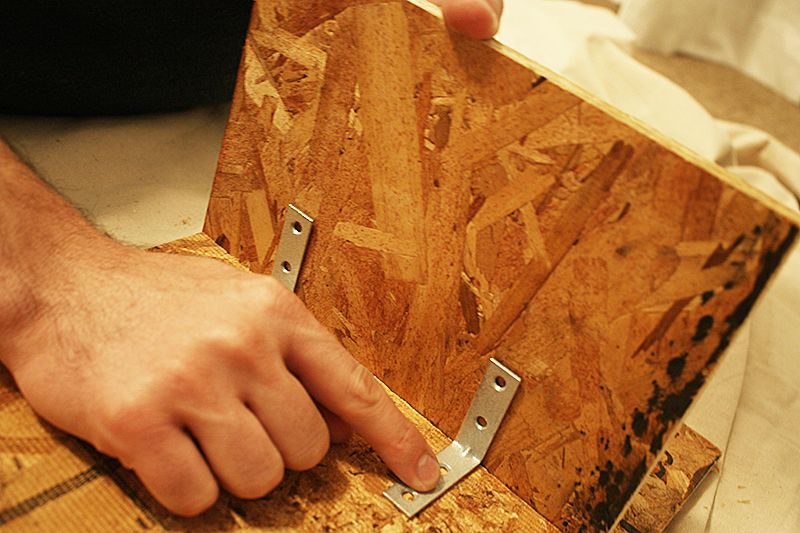
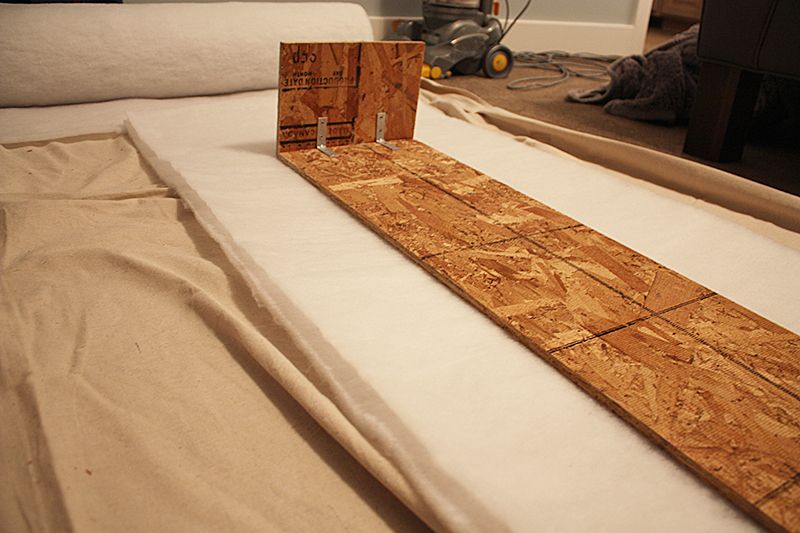
I headed to Home Depot and picked up a 4′ x 8′ sheet of particle board (OSB). It was around $10. If you know the sizes you want, they will cut it for you. I had them cut it ten inches tall, and the lengths of the windows, then four small pieces that were long enough to just come out past the curtain rod (mine were 7 1/2 inches). I also purchased some L brackets.
If you have someone who can help you assemble the boxes, grab ’em. It could be done as a one-person-job, but it makes it much easier to have some help. (Pardon the quality of the photos– our time to work in these was after we had put Rubes down for the night.)
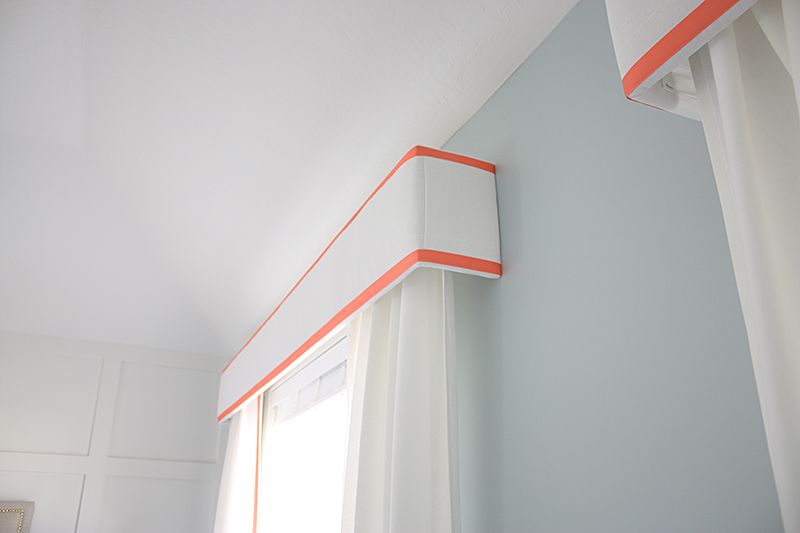
Jon and I started by assembling the box frame. We used L brackets to connect the wood, making a “U” shape. We attached two in each corner to make sure they were nice and sturdy.
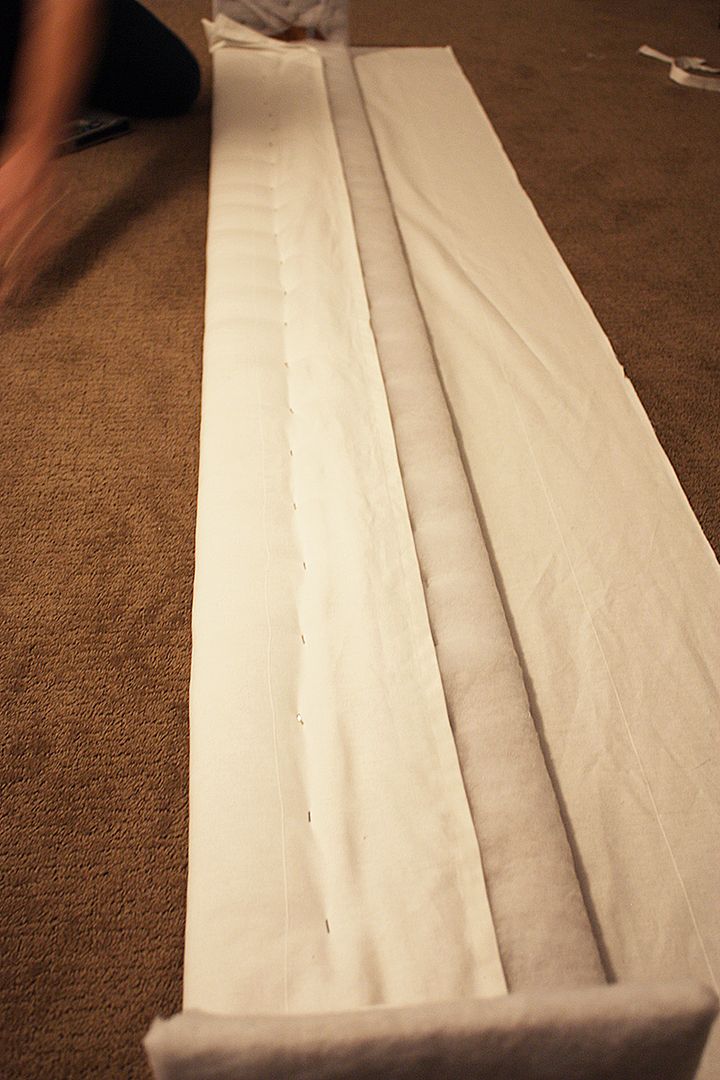
Once they were assembled, it was time to get wrapping. I rolled out a long strip of the batting, then cut it right down the center. Then I doubled up the strips and laid the frame flat side down on top.
We stapled both layers at the same time. We started in the center, started stapling them into place, and working our way out in both directions.
You want to make sure to pull the batting taut, but not so taut that it starts to pucker. It just takes a little practice. The corners are the trickiest part. We would pull, tack, snip away the extra batting, and repeat until it was all in place.
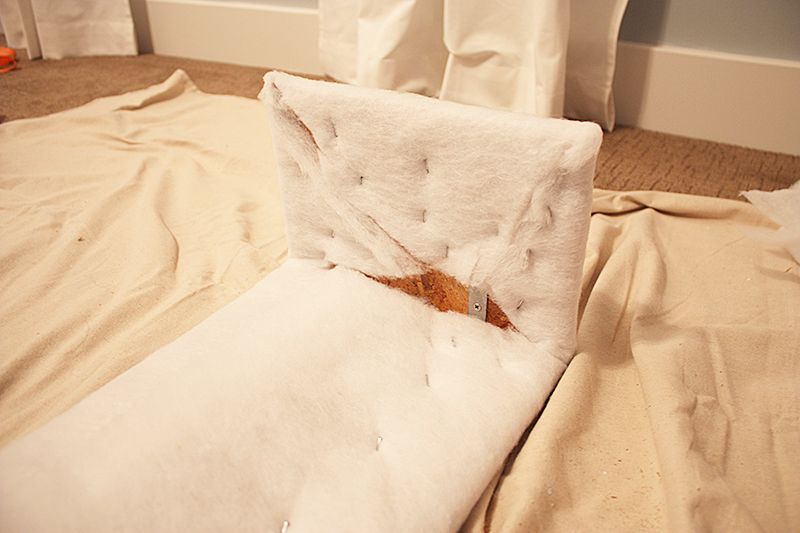
No one will see how ugly it looks on the backside– it’s the front that matters. Check to see if you batting or fabric is puckering from time to time.
Next it was time to staple on the fabric. I had purchased an extra set of drapes to use as covering for the pelmets. I cut them straight down the center. Half was plenty per box.
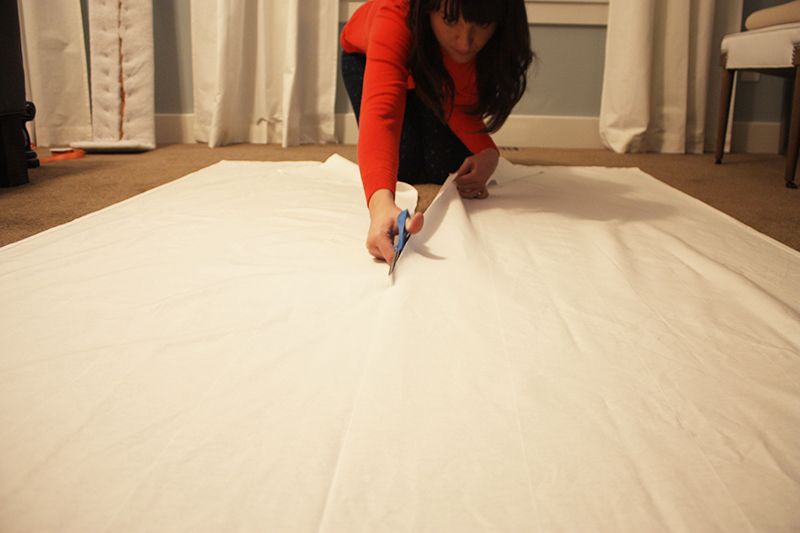
But there was one complication– they weren’t long enough for our boxes. My solution was to cover the front, and leave a rough unfinished end that came up just over each end (I chopped off the seams on either end so they were nice and smooth). I cut out an extra piece for each side, then folded it down and wrapped it around the end.
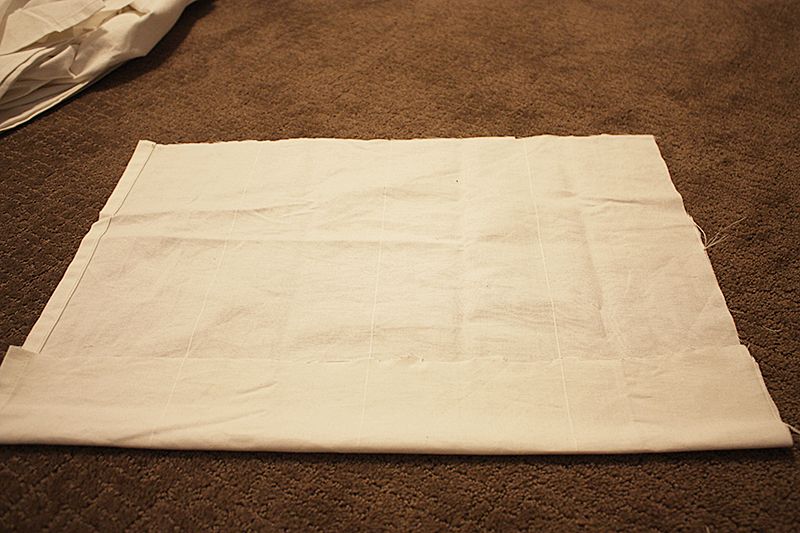
It created a pleat effect. Just make sure the fabric seams line up (these drapes have a thin pin stripe line in them).

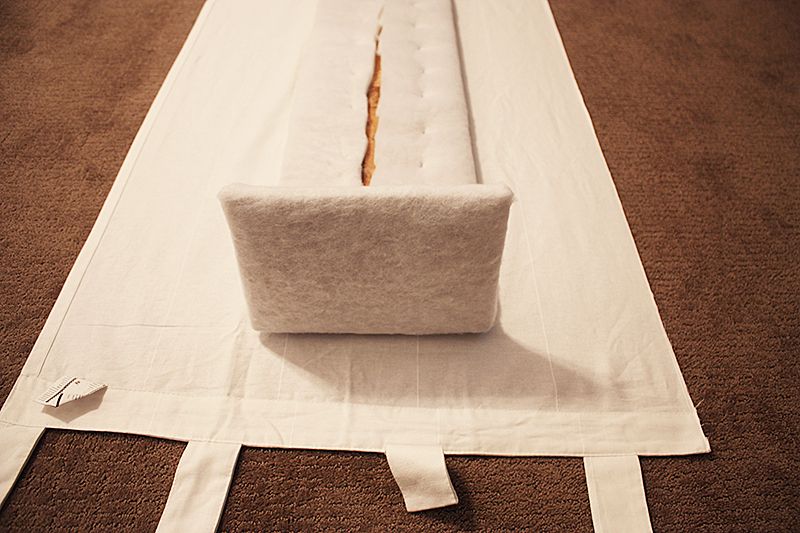
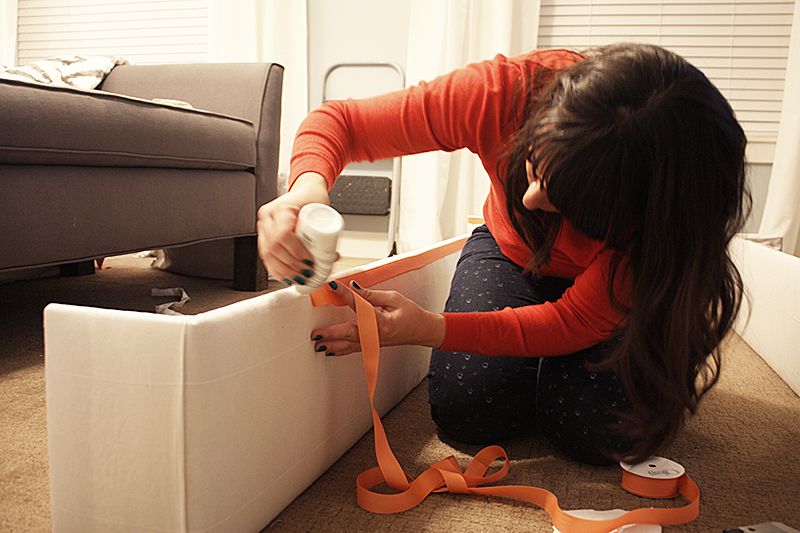
Once they were all wrapped up like pretty padded packages, it was time to hang the curtains and start gluing the trim. I thought it was easier to glue the trim once the curtains were already hung, but it did require a meticulous eye to make sure they were straight. I used a fabric glue that required an extra step by laying down a layer of glue, letting it dry, then laying down another layer and attaching the ribbon. My go to Fabritac was out of stock. If you can avoid this, do it. It was a pain in the arse. I used some clothes pins to hold the ribbon in place while it dried.
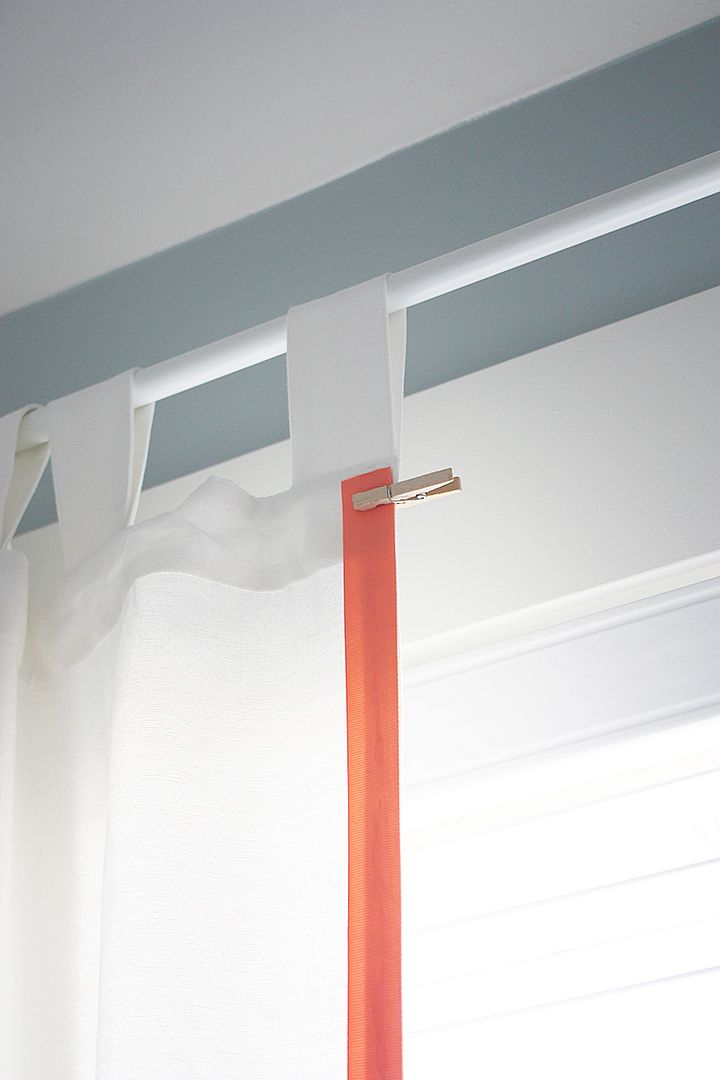
Laying the ribbon on the boxes was pretty simple. Again, just don’t rush it. You don’t want a jagged line.
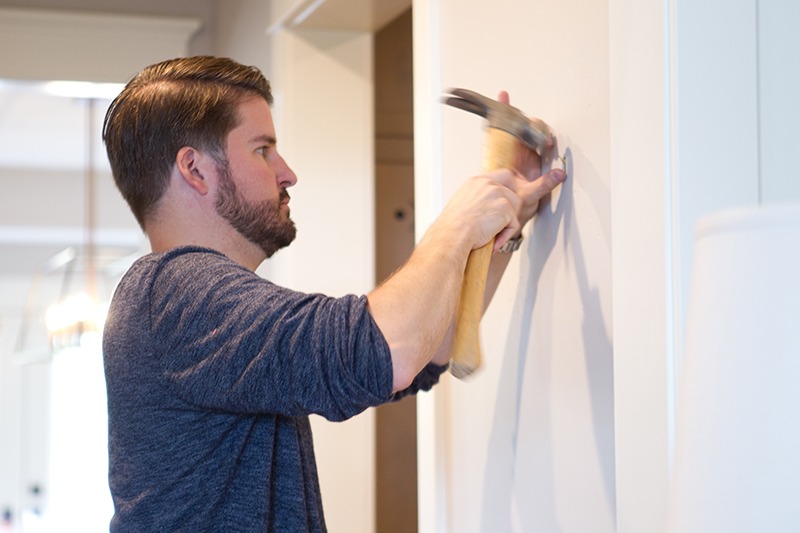
I let it all dry overnight, then hung them the next morning by attaching two more L brackets to the frame (drill right through the upholstery), and the drilled them into the wall. The transformation was immediate.
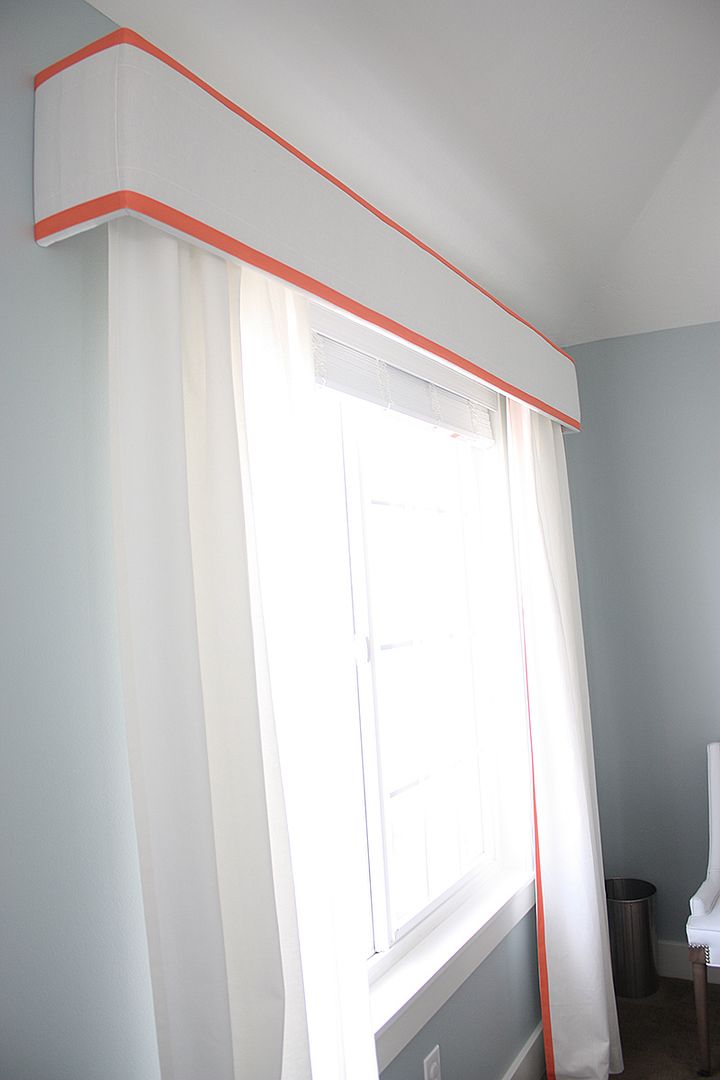
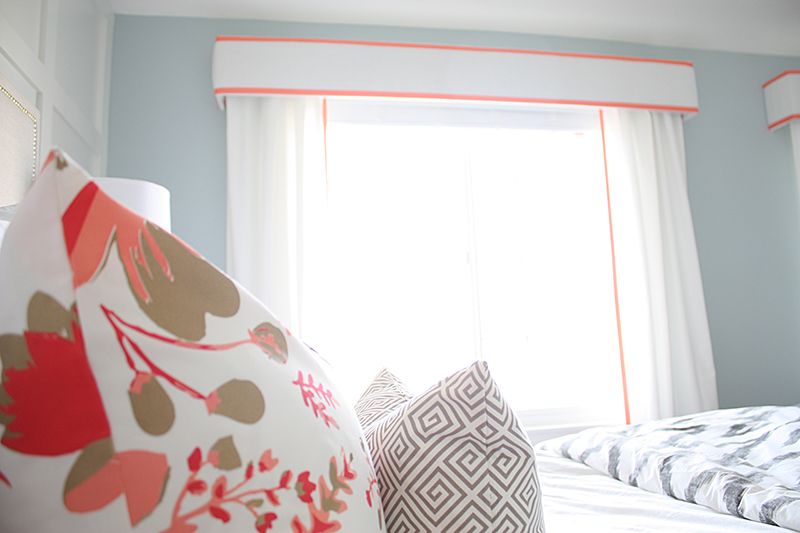
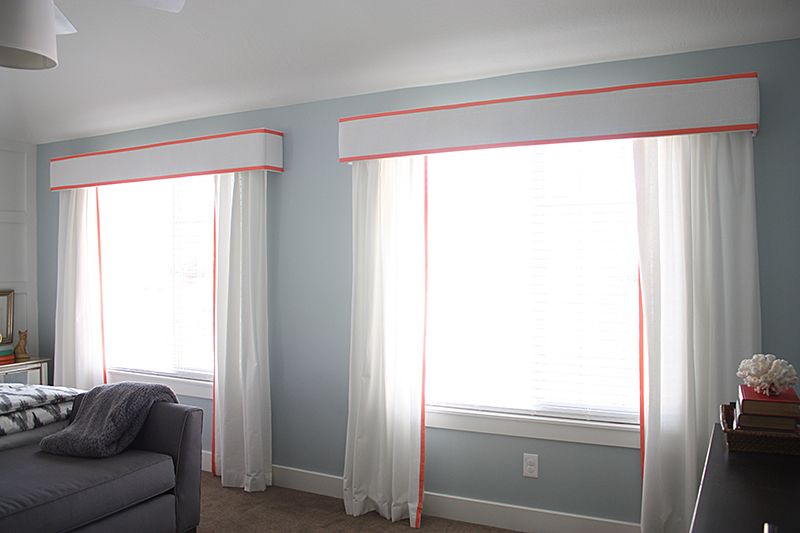
They add exactly what I wanted– a bright, airy, cheerful window treatment with a tailored feel. Not bad for a night’s work. And Ruby has a new place to hide (she is obsessed), so she’s happy!
No sewing machine (or skill)– no problem.
Happy Tuesday,

Leave a Reply


back to top
@jenniferstagg
shop

We're a full-service design firm and home furnishings shop built around the philosophy that a well-designed home should be beautiful, personal, cohesive, and complete. We think home is the most important place on the planet and when you live in a home that is perfectly you, it changes your life. Don't believe us? Stick around. We're confident we'll change your mind.
hello there!
Follow Along
@jenniferstagg
Hey, let's be friends
Exclusive projects, discounts, and extra goodies all in your inbox. And don’t worry- your email is for our eyes only.

looks very very pretty 🙂
I wish I had more space my rooms are just crammed and practical but not really pretty 🙁
Beautiful! Such a wonderful idea. May I ask how you hung the top pieces? Thanks so much 🙂
I just added that in! We attached them using L brackets, two on each side, then drilled them into the wall. It was simple. The hardest part was holding them up there! Good luck and thank you for reading:)
This is fabulous!!! Pinned and I will be doing this in the near future. I hope mine looks as good as yours!!
Tracy
http:\\itsmostlyaboutfashion.blogspot.com
Fabulous! Can I ask what paint color you used in your room. It is the perfect blue
Hi Lynette! Thank you so much! I honestly can’t remember the name of it, but I’m going to be posting a complete breakdown of the room next week and I’ll list it then. Thanks for reading!
[…] Large windows are wonderful to decorate but can sometimes be challenging. Or maybe you are just bored with the usual configuration of drapes or shades and blinds. If you want a new look that you can create on your own without any sewing, try these amazing no-sew drapes and pelmet box project. […]
These are fabulous ! Thanks for the easy to follow guide,… I’m about to attempt my own , if they turn out even half as good as these I’ll be happy x
Thank you! Glad you found some inspiration!
so very lovely !!! Good job, glad i found your post!
Thank you!